


We’ve all been there, it’s 4 pm on a Wednesday afternoon(subtle plug) you’ve just deployed a major release to production, and your alerts channel on slack is blowing up, there are some non-critical but important workflows that don’t work as intended. You did everything right, you had tests, you had a robust pipeline, and everything was manually QA-ed too. How did this happen?
Well, that's the truth of it, you’ve built a product that caters to a thousand different flows and a hundred thousand different users. The impact of not handling a single edge case could be catastrophic. Notice the use of “could be” rather than “is”, it obviously means I’ve got an ace up my sleeve. Don’t worry, I’m not here to gloat, I’m here to share!
I understand that deploying a new release is always scary and daunting, and that’s where canary deployments help. In this deployment strategy, the new version of the software is rolled out in phases. You could start as low as 1% and have slow increments based on metrics, or you could manually choose to increase the percentage rollout. This allows you to control the potential blast radius of bugs, or issues that are seen only in production.
Let’s take a simple example. You’ve got v1 rolled out and being used. It’s a stable build but doesn’t have that new swanky feature the team spent the last 2 weeks building (Bi-weekly releases for the win).
Here’s what happens next. You release v2 at a 1% rollout. This means for every 100 requests that come in 1 request is served by v2, and the remaining 99 are served by v1.
💡 Hah! thought you’d be able to bypass backward compatibility, is it? Backward compatibility, & a rollback strategy are not luxuries, they come under essentials. No matter what happens, the customer experience should never suffer. This will ensure it.
The impacts of breakages, unintended latencies, and other side effects that come with a new release are now limited to a percentage of your users rather than the entire user group. This is a step ahead of observability and proactive response to errors, which is crucial for this approach to work btw. Canary deployments are useless if you don’t have the ability to monitor the state of your application or the health of your system. If you haven’t already read our in-depth article to set up Signoz for application performance monitoring I would highly recommend that you do it here. Or if you’d like to avoid that simply set up cloudwatch logs, metrics, and Xray. But make sure you have an insight into the performance, behavior, and health of your system!
Alright, enough talking about the magic of canary deployments, let’s get practical. Through this article, I intend to lay down a 10-step process that will allow you to enable canary deployments for ECS workloads. I’ve even included the link to a GitHub repository where I’ve open-sourced the entire setup. Even better I’ve added a CD pipeline and a configuration that gives you full control of traffic switching, and annotating stable builds!
Follow along and I hope to provide more value than you originally anticipated. And by following the steps outlined in this article will result in the implementation of the following architecture.

Pre-cursor
In order to ease the process we’ve created some scripts for you. Run the following command:
In case you decide to go cowboy and mix things up, please make sure you rename it throughout the repo. The scripts in this repo assume the following values
AWS
Account ID
<AWS_ACCOUNT_ID> → change this to your Account ID
AWS Region
ap-south-1
App Mesh
AppMesh Name
the-wednesday-super-app
Virtual Node
the-wednesday-super-app-virtual-node-1
the-wednesday-super-app-virtual-node-2
Virtual Router
the-wednesday-super-app-virtual-router
Route
the-wednesday-super-app-route
Virtual Gateway
the-wednesday-super-app-virtual-gateway
Virtual Gateway Route
the-wednesday-super-app-gateway-route
ECS
Service1 v1
the-wednesday-super-app-svc1-v1 (task-definition family is the same)
Service1 v2
the-wednesday-super-app-svc1-v2 (task-definition family is the same)
Gateway Service
the-wednesday-super-app-gateway-service (task-definition family is the same)
ECR
Service1v1 repository name
the-wednesday-super-app-svc1-v1
Service1v2 repository name
the-wednesday-super-app-svc1-v2
💡 Hey there! Just a heads up before you get started, if you want to personalize your app's properties, just make sure that you have replaced the-wednesday-super-app with your-app-name in the assets folder in the repository. Please be consistent with the names throughout the tutorial to avoid issues.
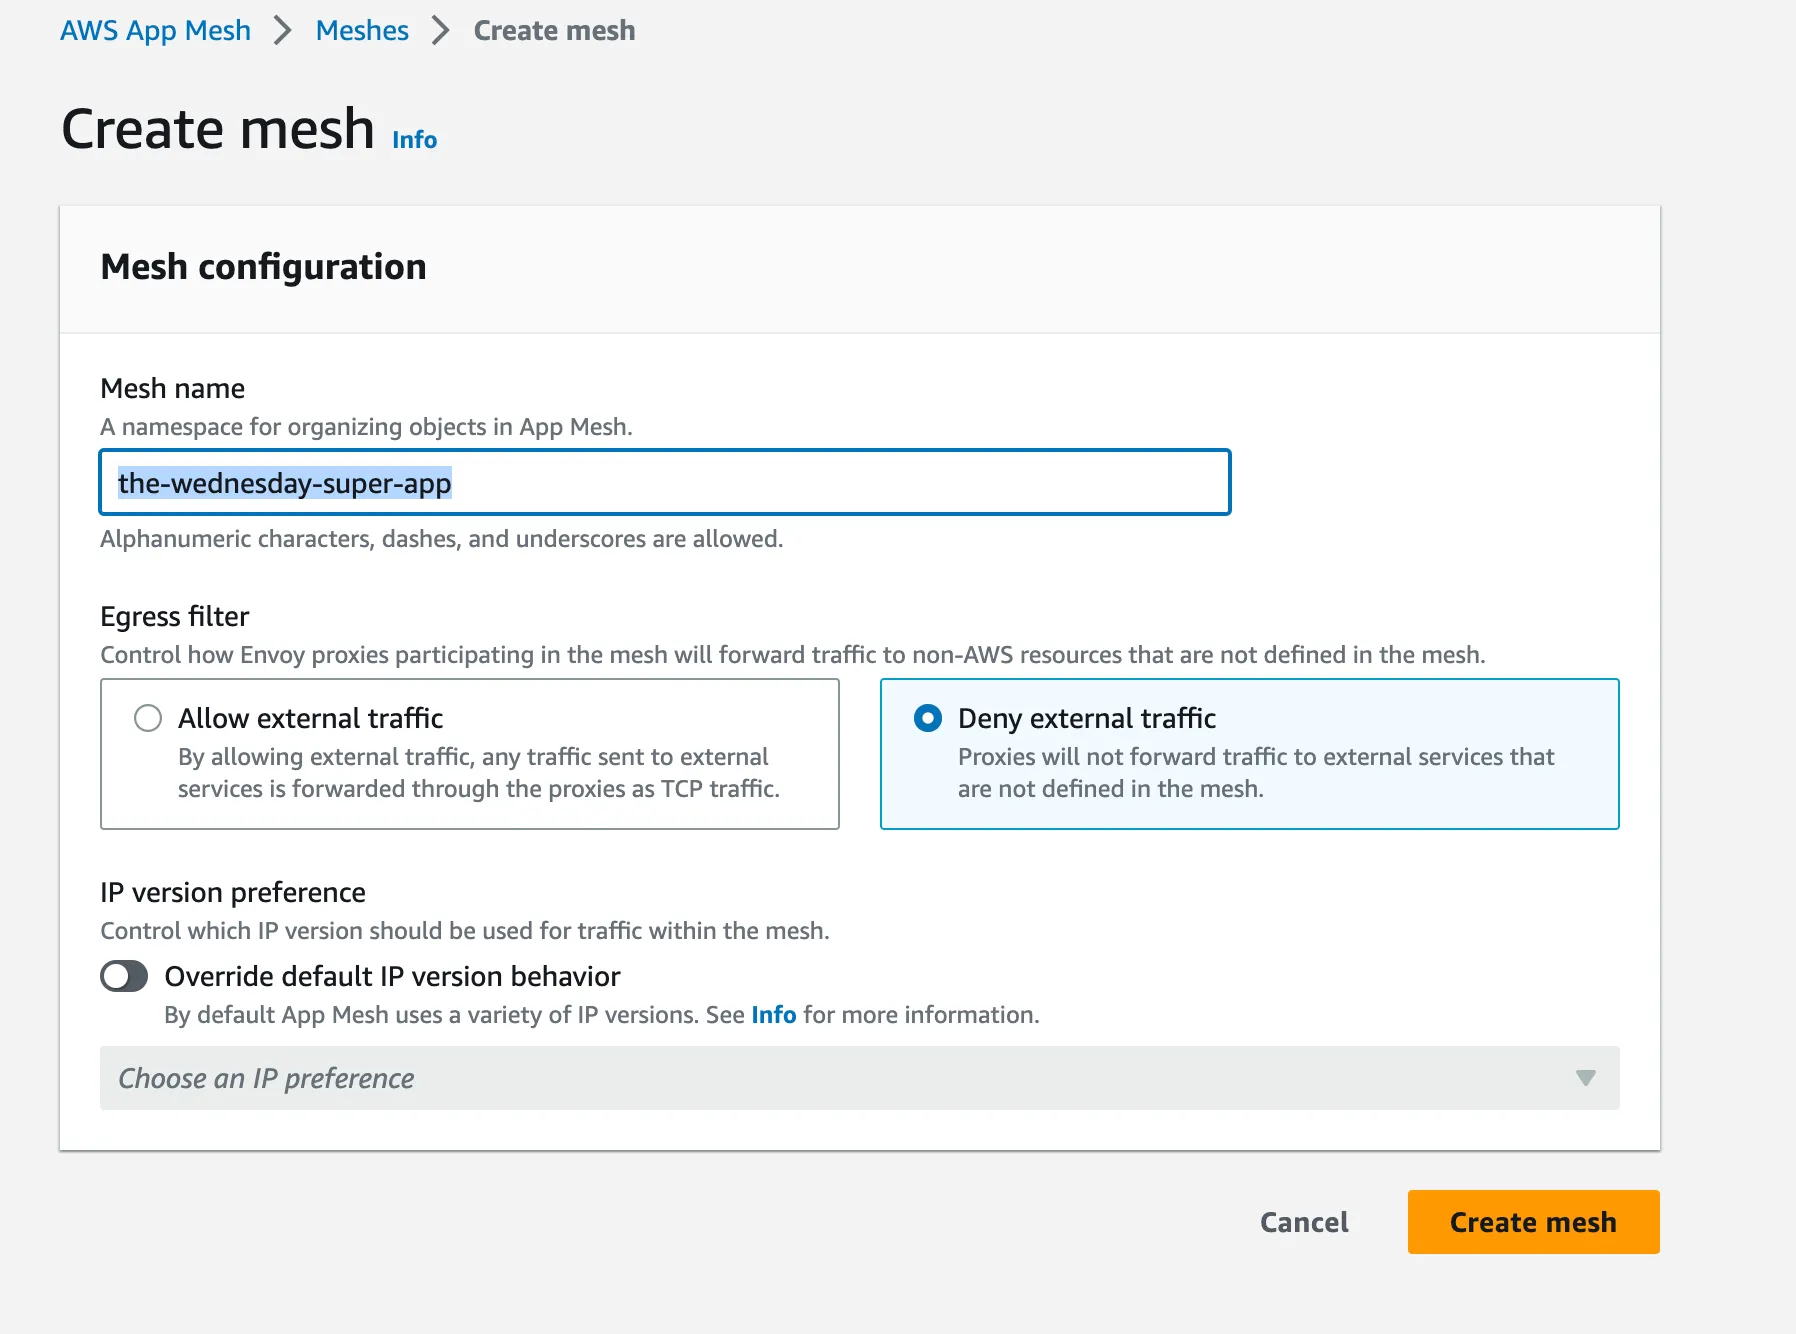
Step 1: Create an App Mesh
Create an AppMesh. Just search AppMesh on the AWS Console and create one. Give it a meaningful name. ExampleAppMesh is acceptable but frowned upon 😖
Step 2: Create Virtual Nodes
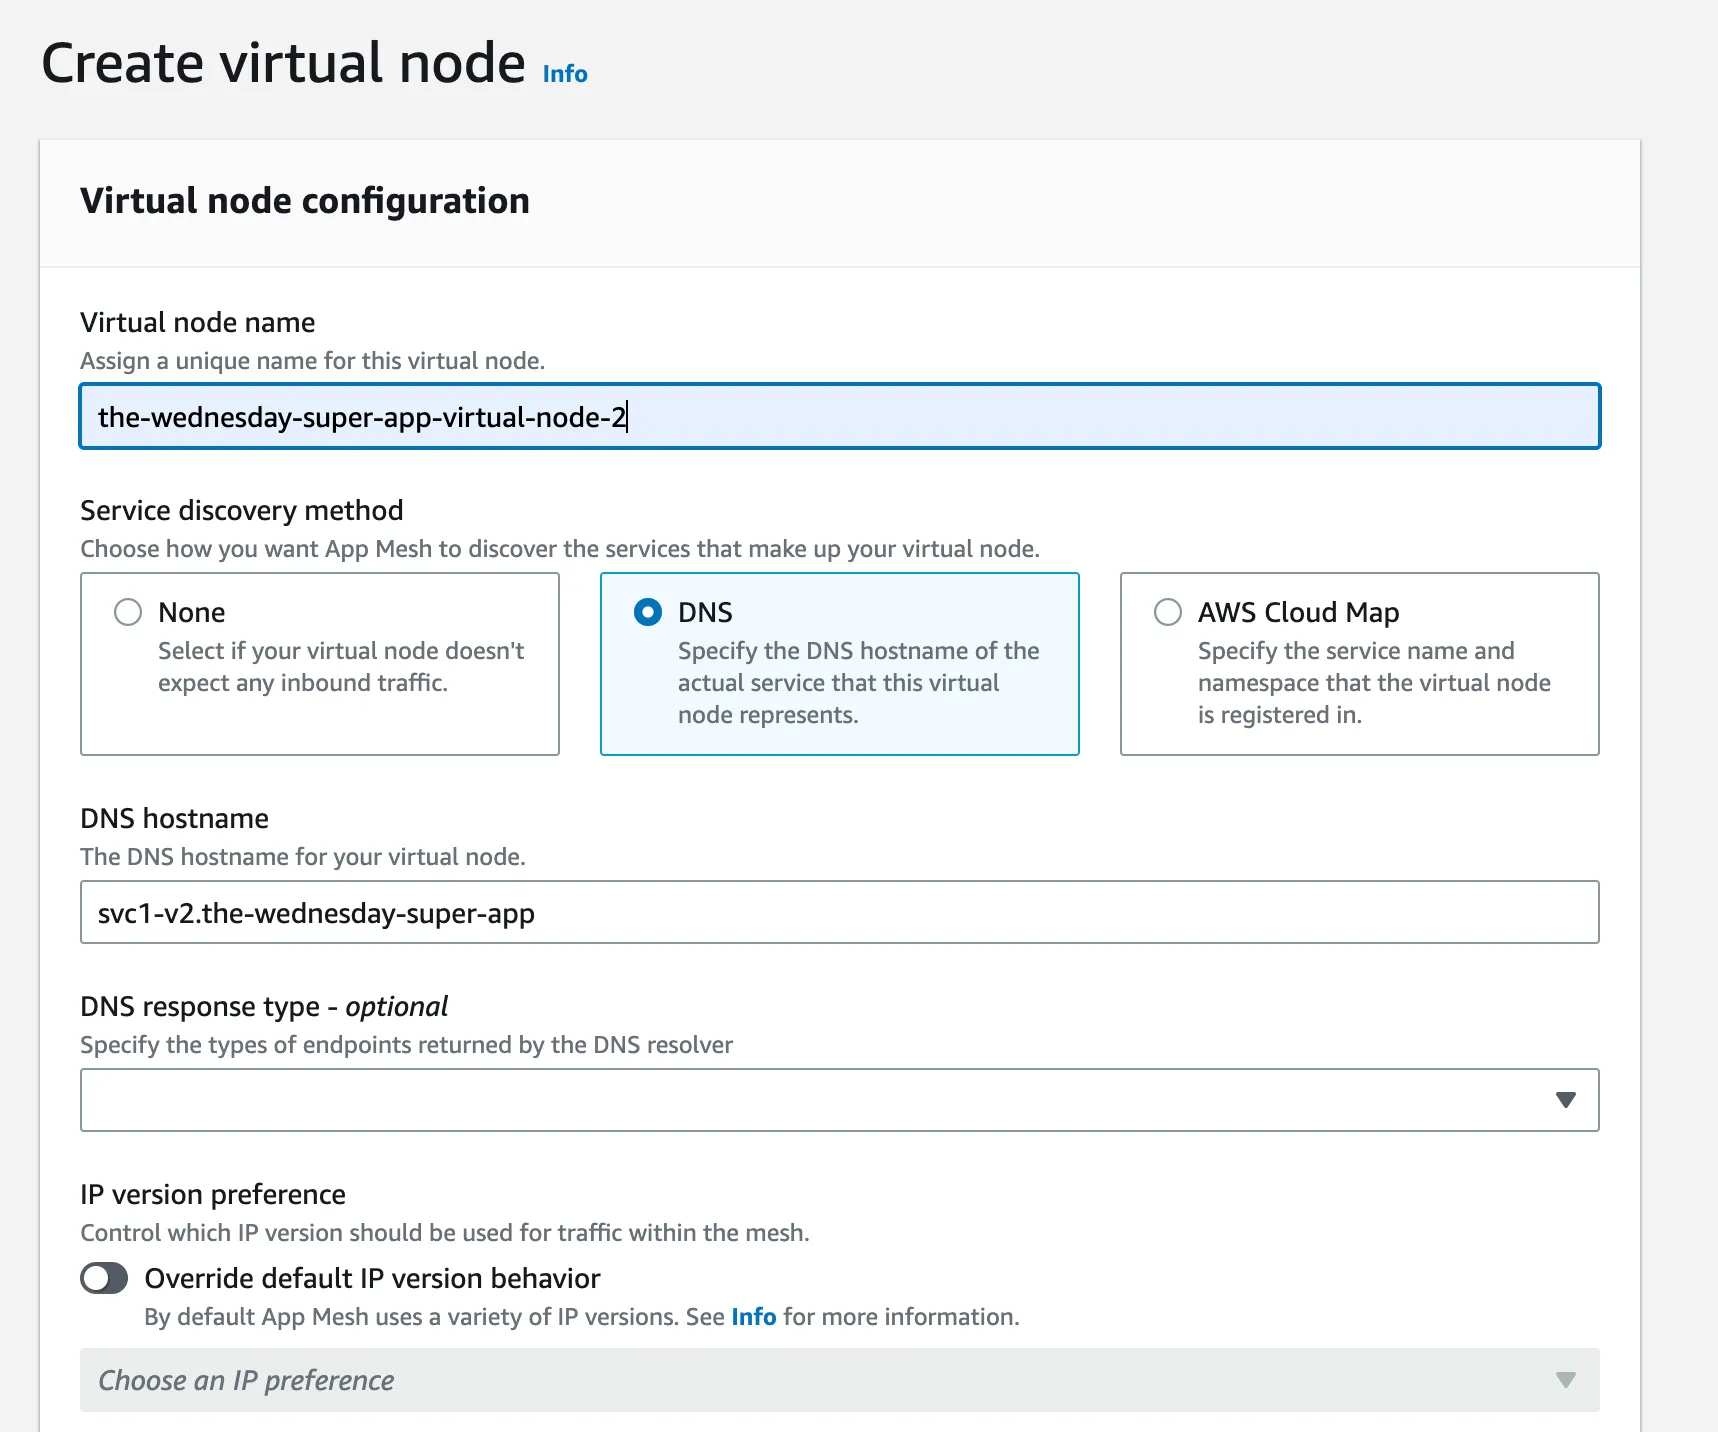
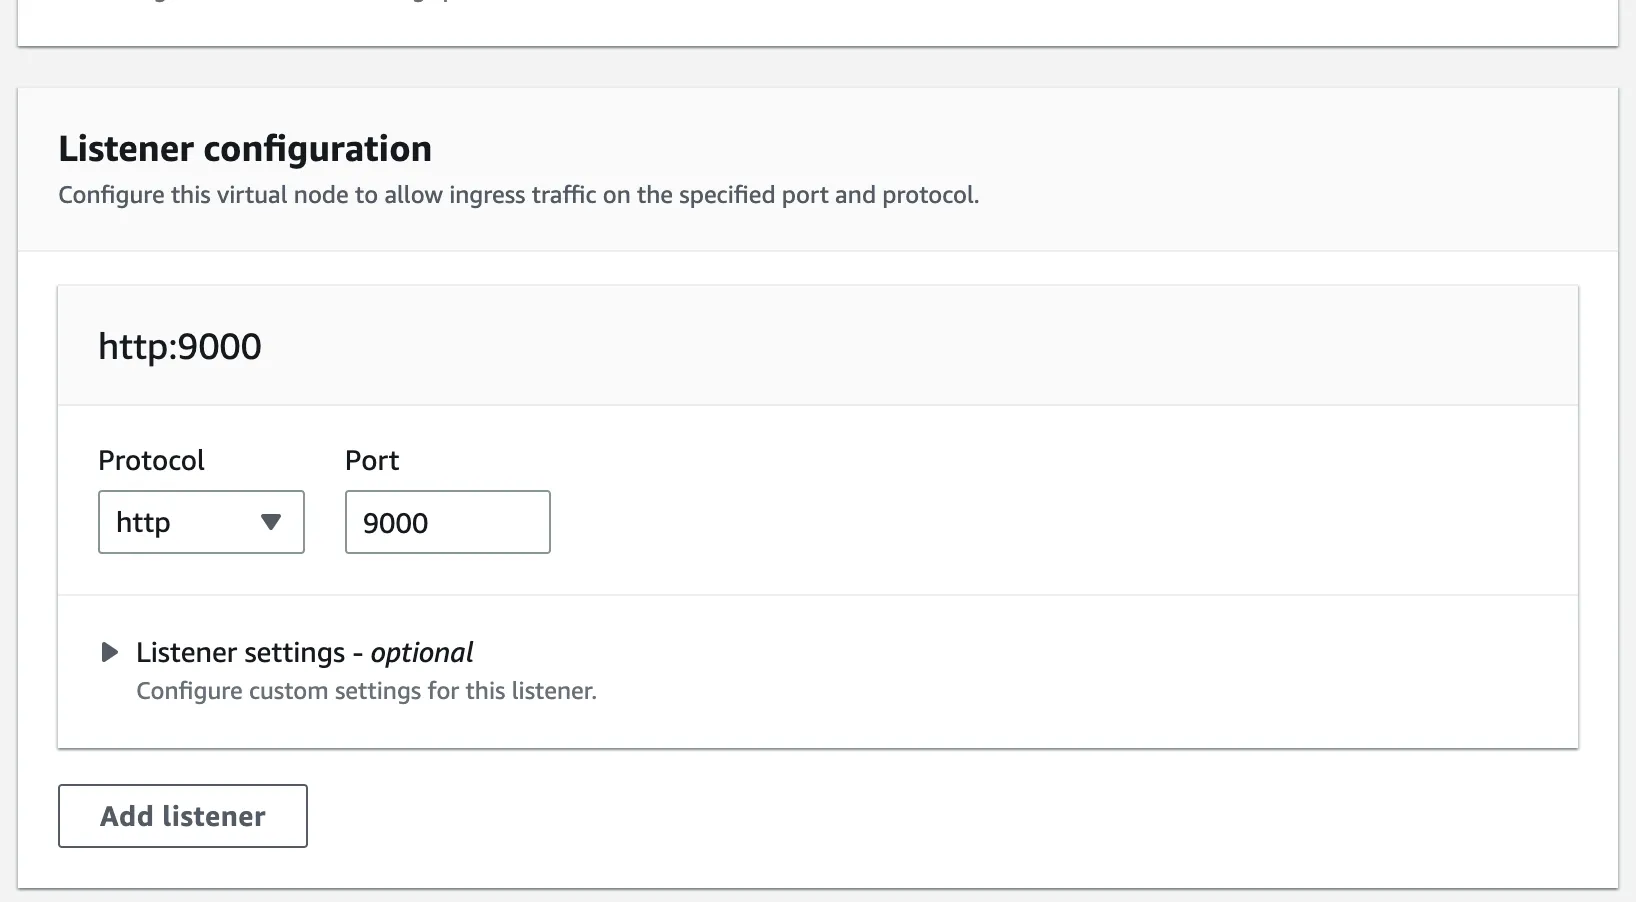
Stay with me on this, now is where it gets exciting and interesting. Create 2 Virtual Nodes. 2 since at any point we’d like a maximum of 2 versions running in our canary deployment. Assuming you’ve got a single service, you’re going to want to be able to route traffic between these 2 variants.
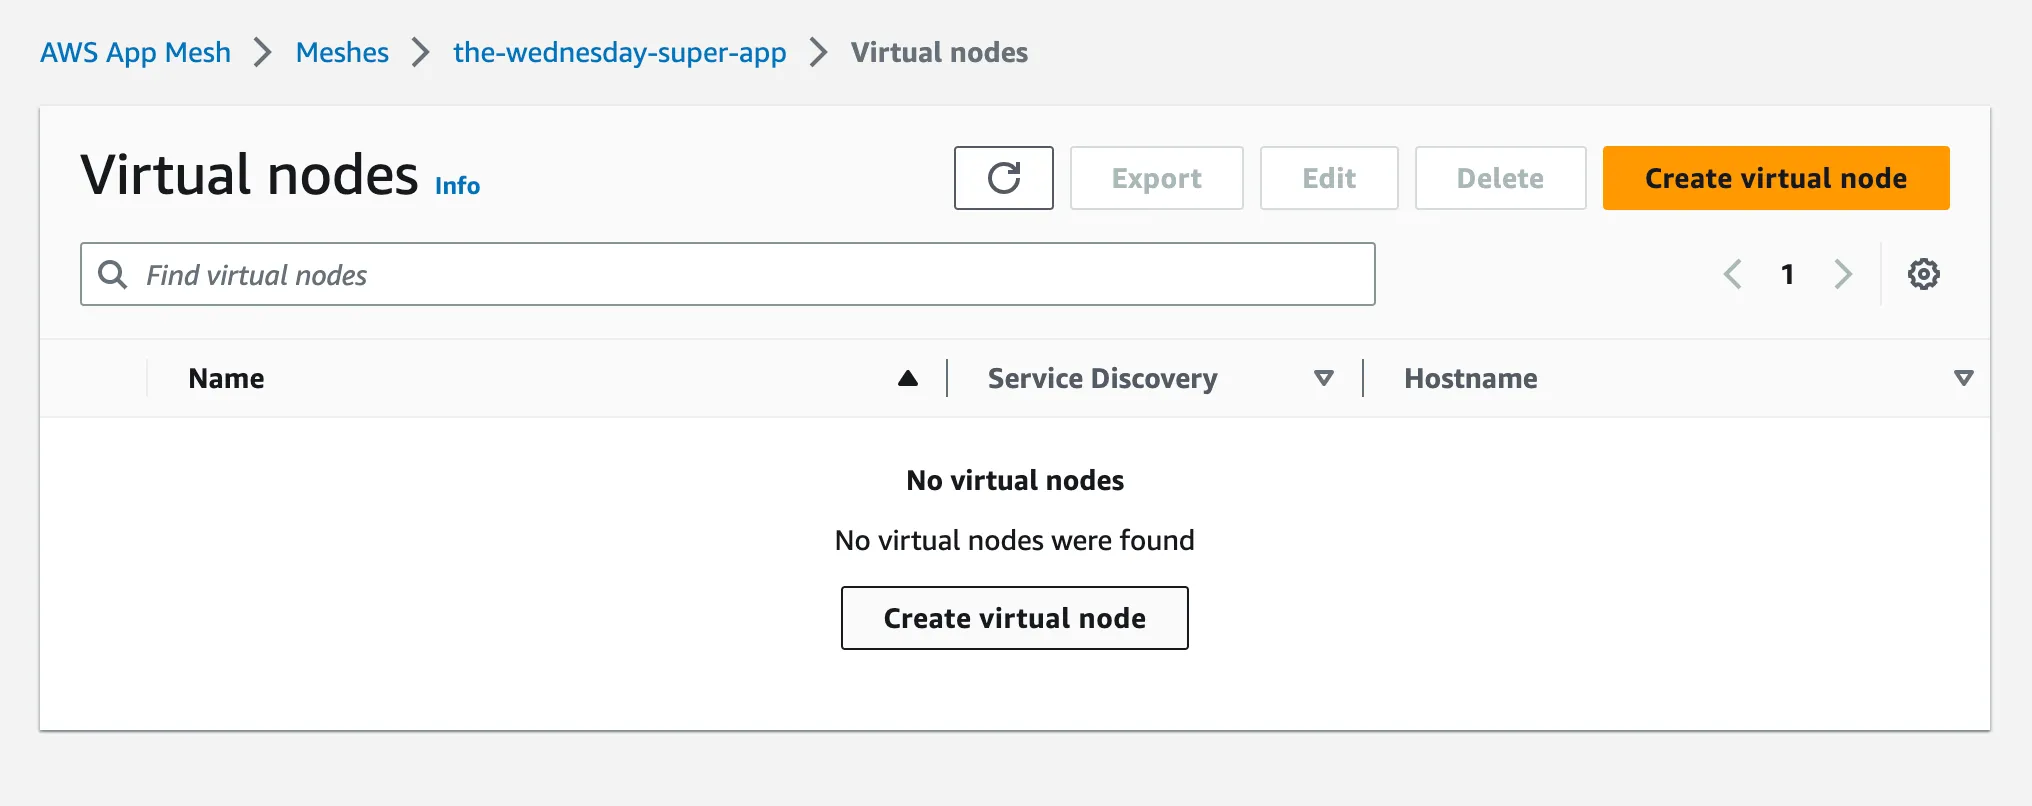
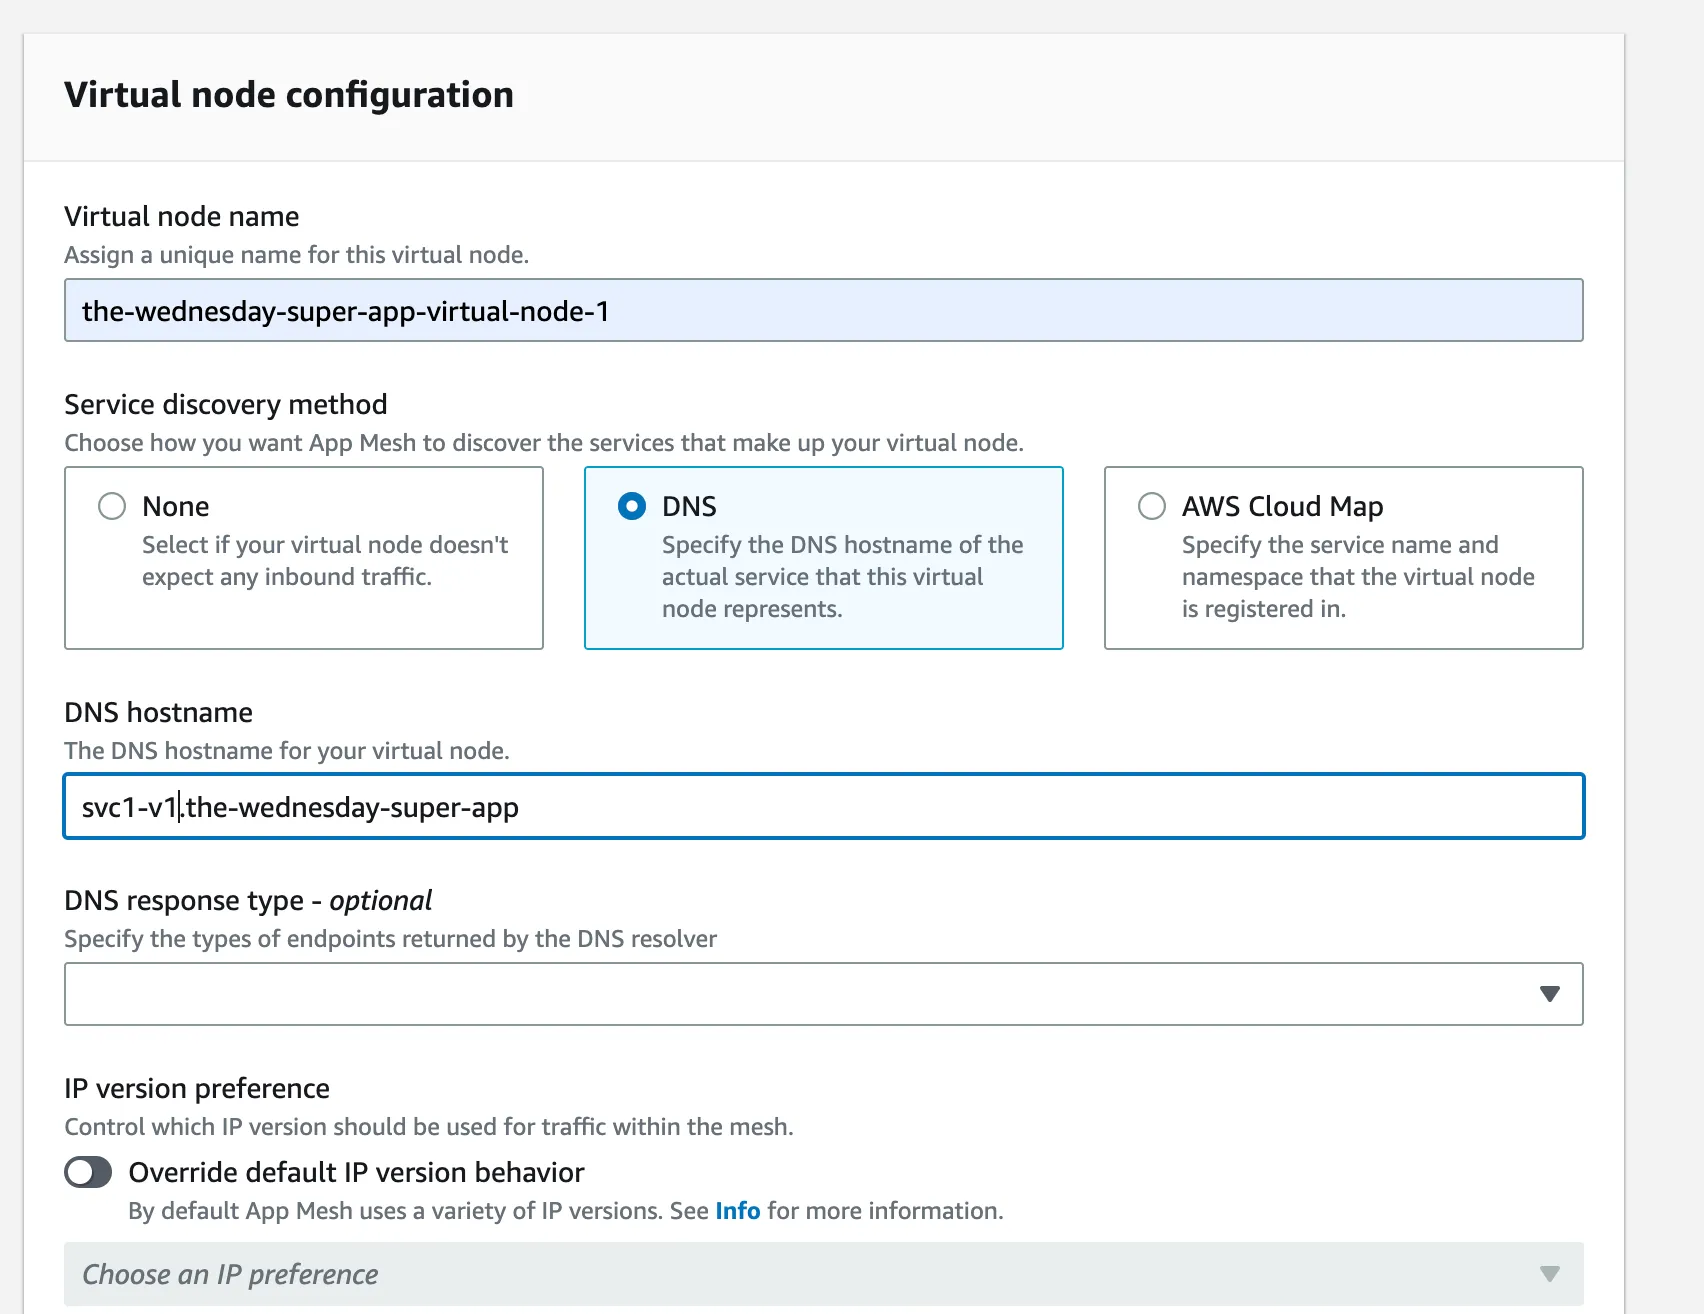
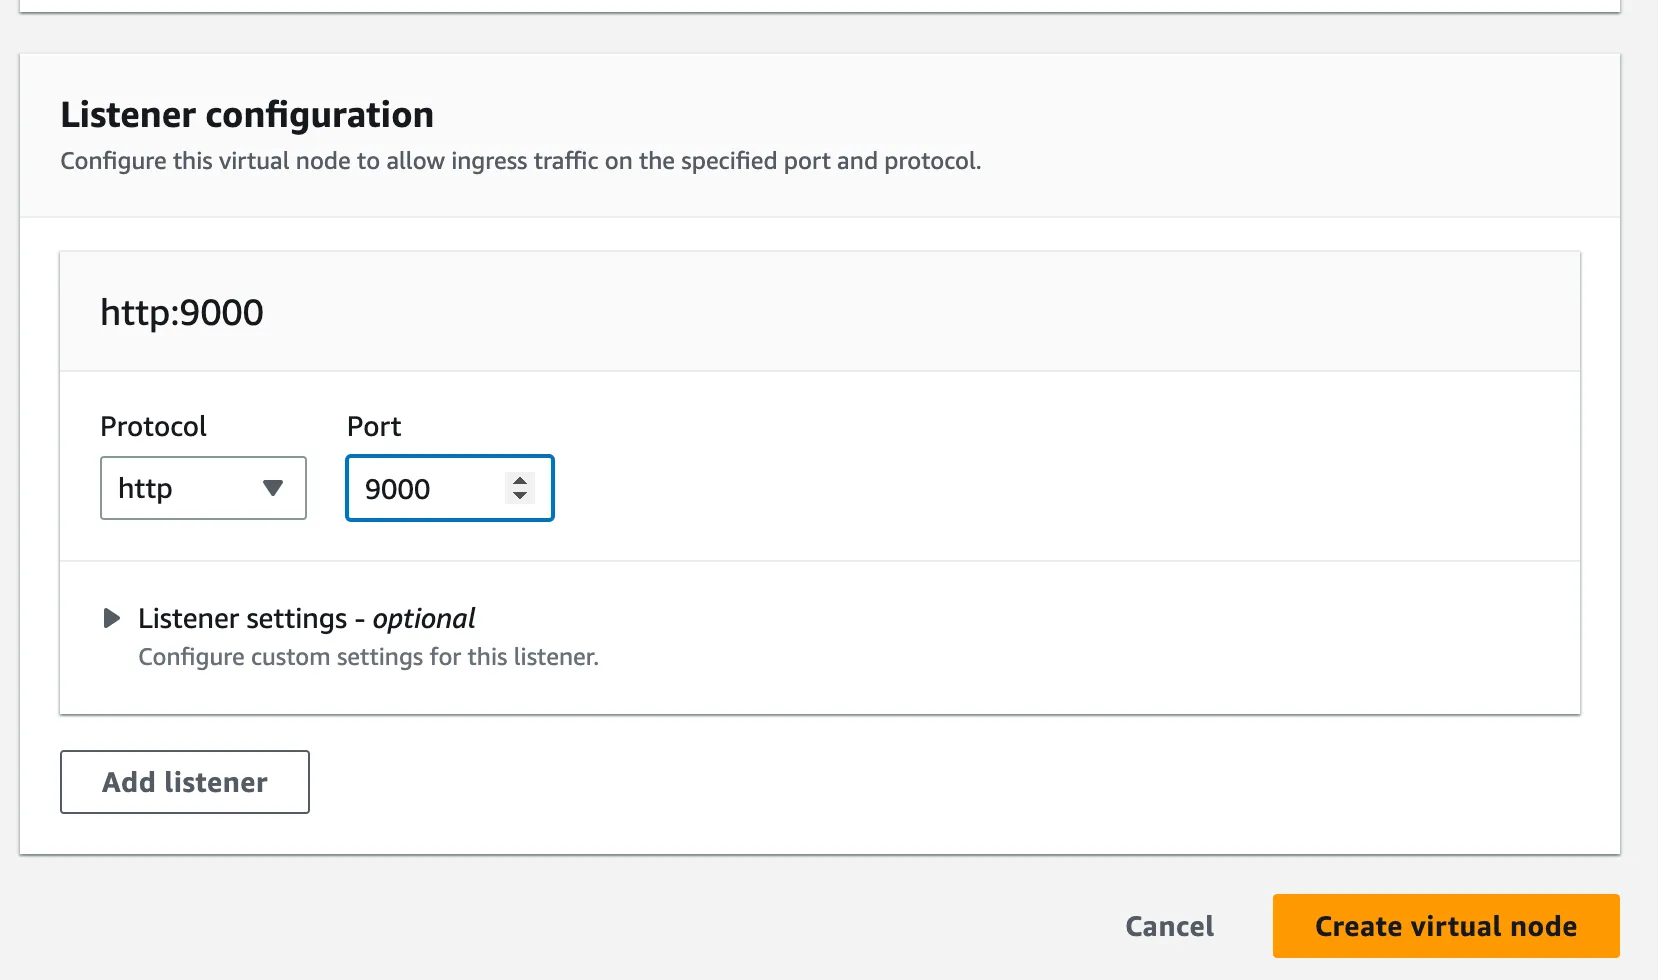
💡 Be careful while setting the hostname. It should reflect the CloudMap namespace and the service. Else your gateway won’t be able to route traffic to your nodes properly

Create your second virtual node now
Step 3: Create a Virtual Router
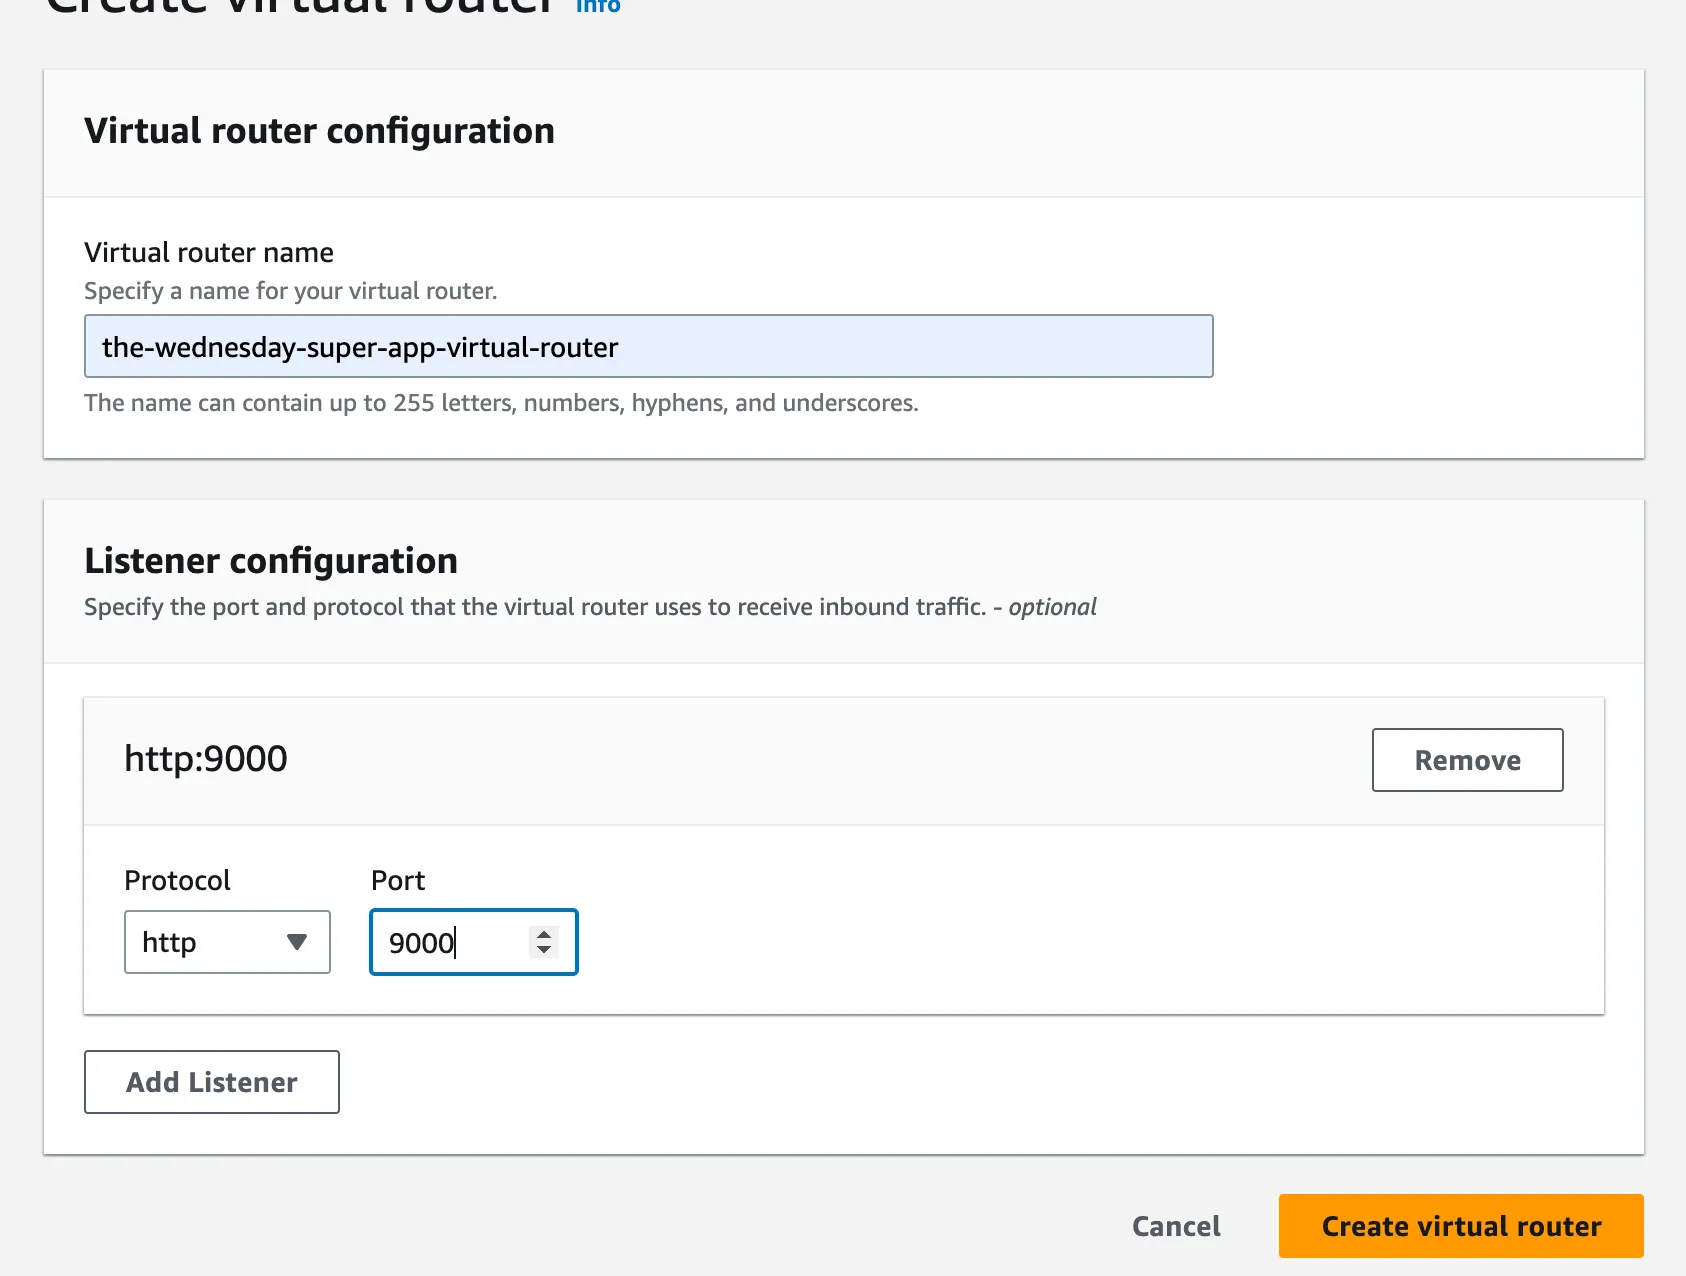
From the same console, create a virtual router on the port that your container expects traffic on
Step 4: Create and configure a Virtual Service
Create a Virtual Service now, and add the VirtualRouter created above as the provider.
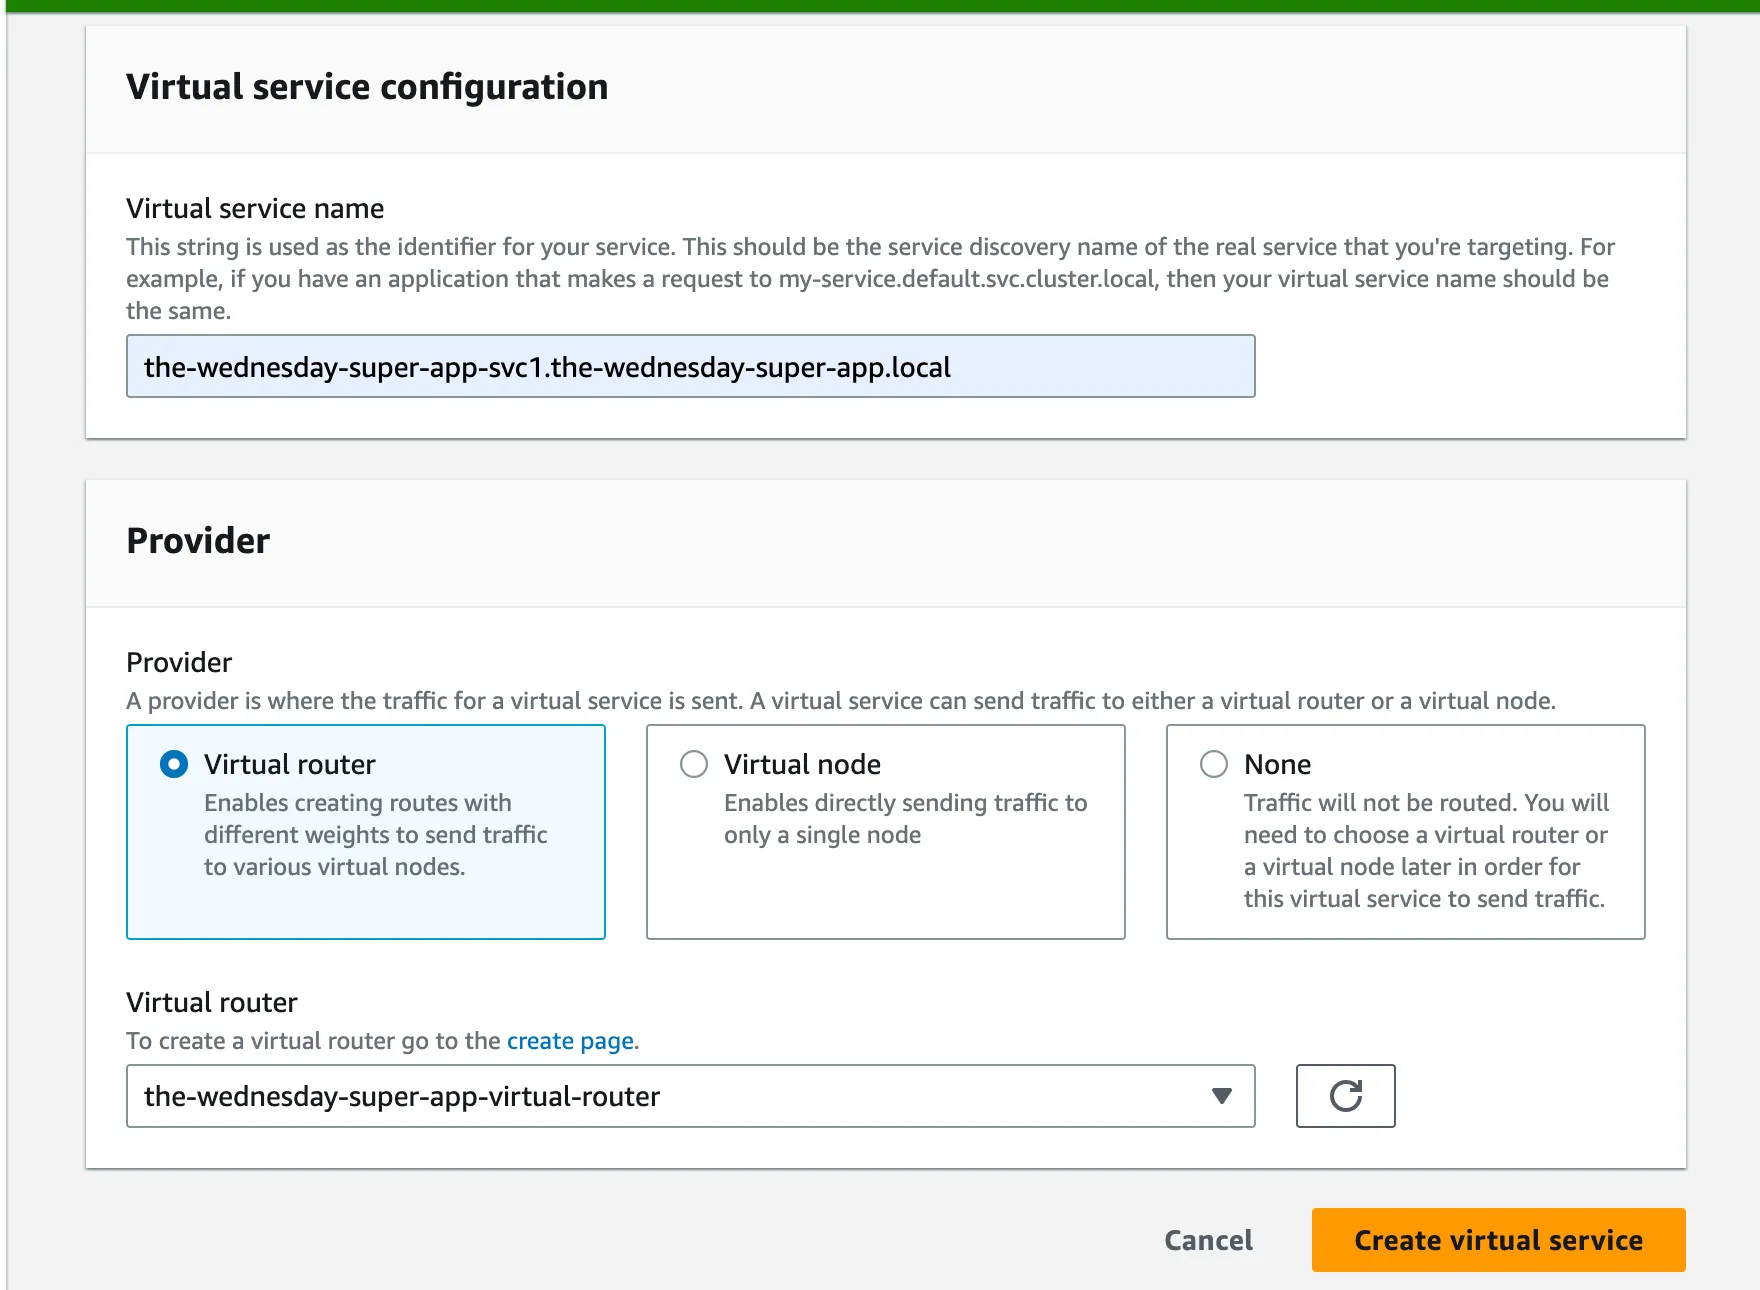
💡 Be careful while naming the service. It should be the service discovery name of the real service that you’re targeting.
Step 5: Create an AppMesh Route
Finally, create an AppMesh Route. This will have “WeightedTargets” that will allow you to accomplish the goal of phased releases/canary deployments. This is where you specify the weight or percentage of traffic that you wish a certain version will handle.
Step 6: Create a Virtual Gateway
Phew, captain! You’ve come a long way, just a few more yards, don’t you give up on me now. It’s darkest before dawn and all that.
Create a VirtualGateway, ensure that the Port that you’re using is 9080, the protocol is http
Step 7: Create a Virtual Gateway
It’s the last leg now for Part 1, create a GatewayRoute. Ensure that the target is the VirtualService that we created previously!
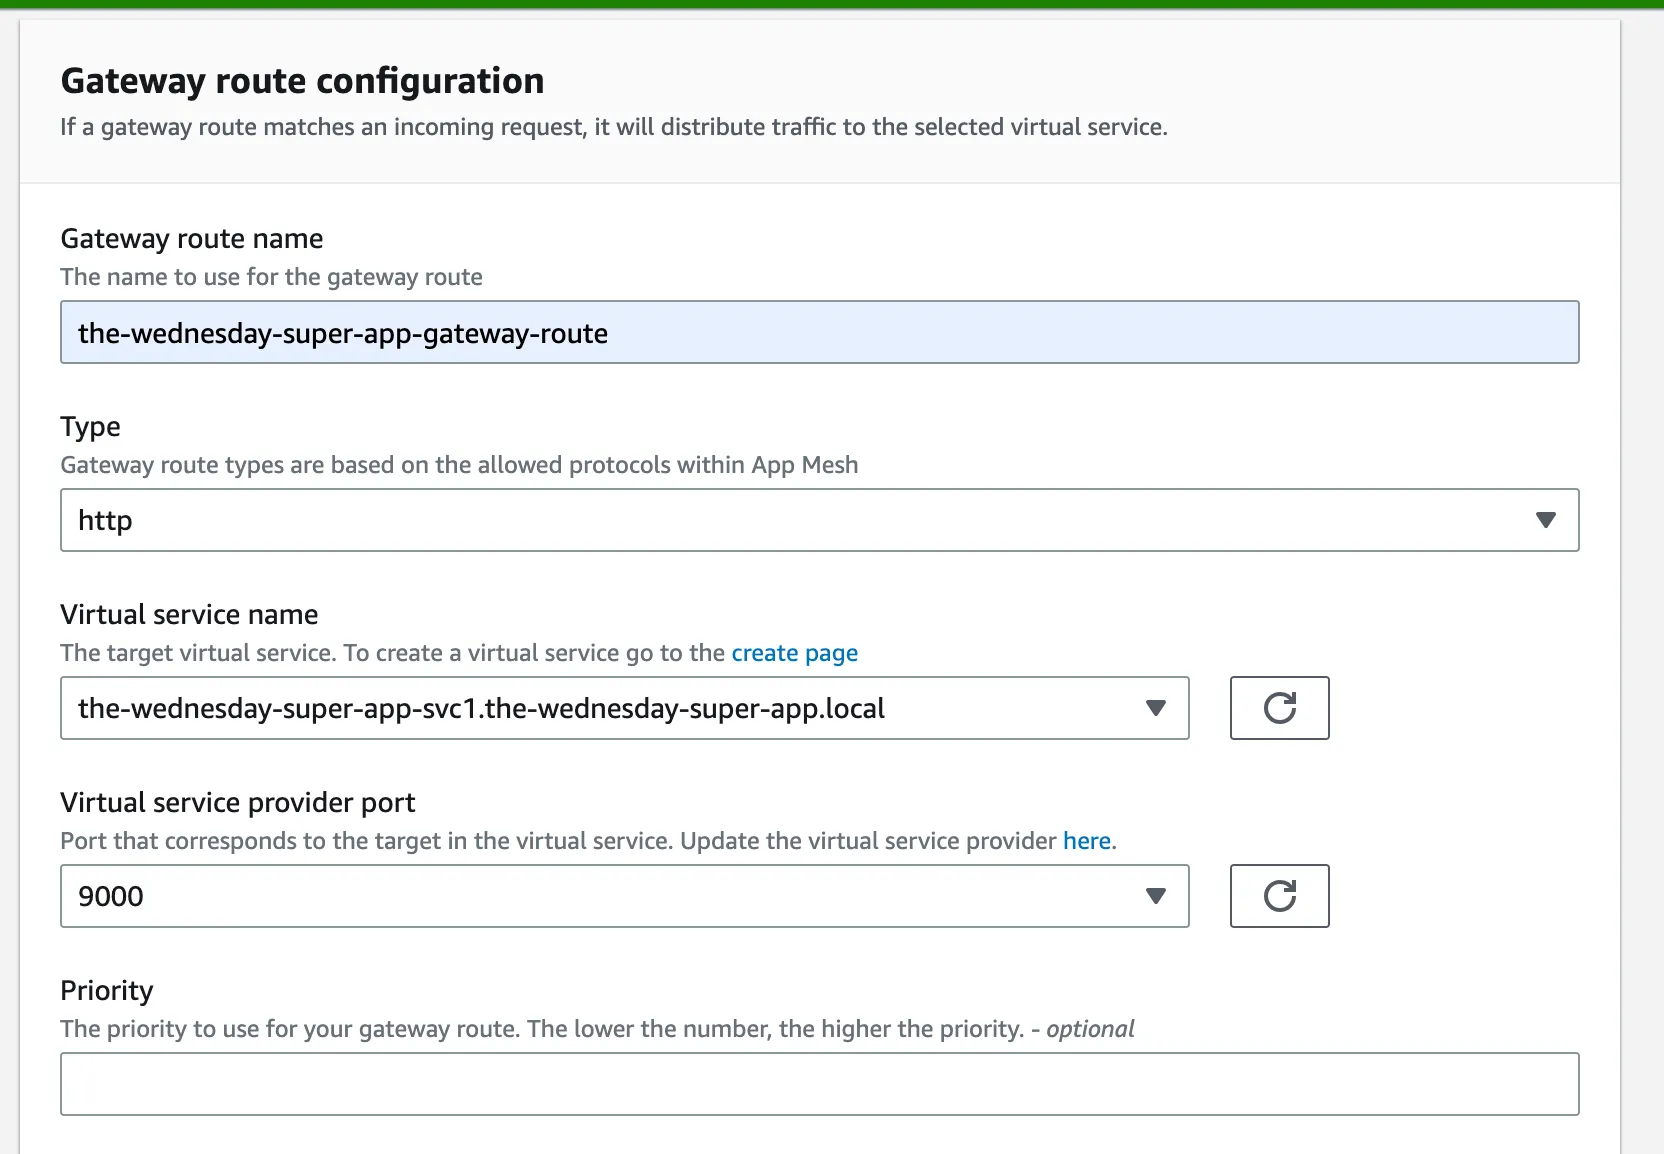
Step 8: Create an ECS Cluster and the Service for Version 1

Great job! You’ve created and configured your AppMesh. You’re ready to take on the world, err, I think I forgot something. Ah the ECS! Go on now, create your cluster. (If you already have a cluster, that's great. Move on to creating services)
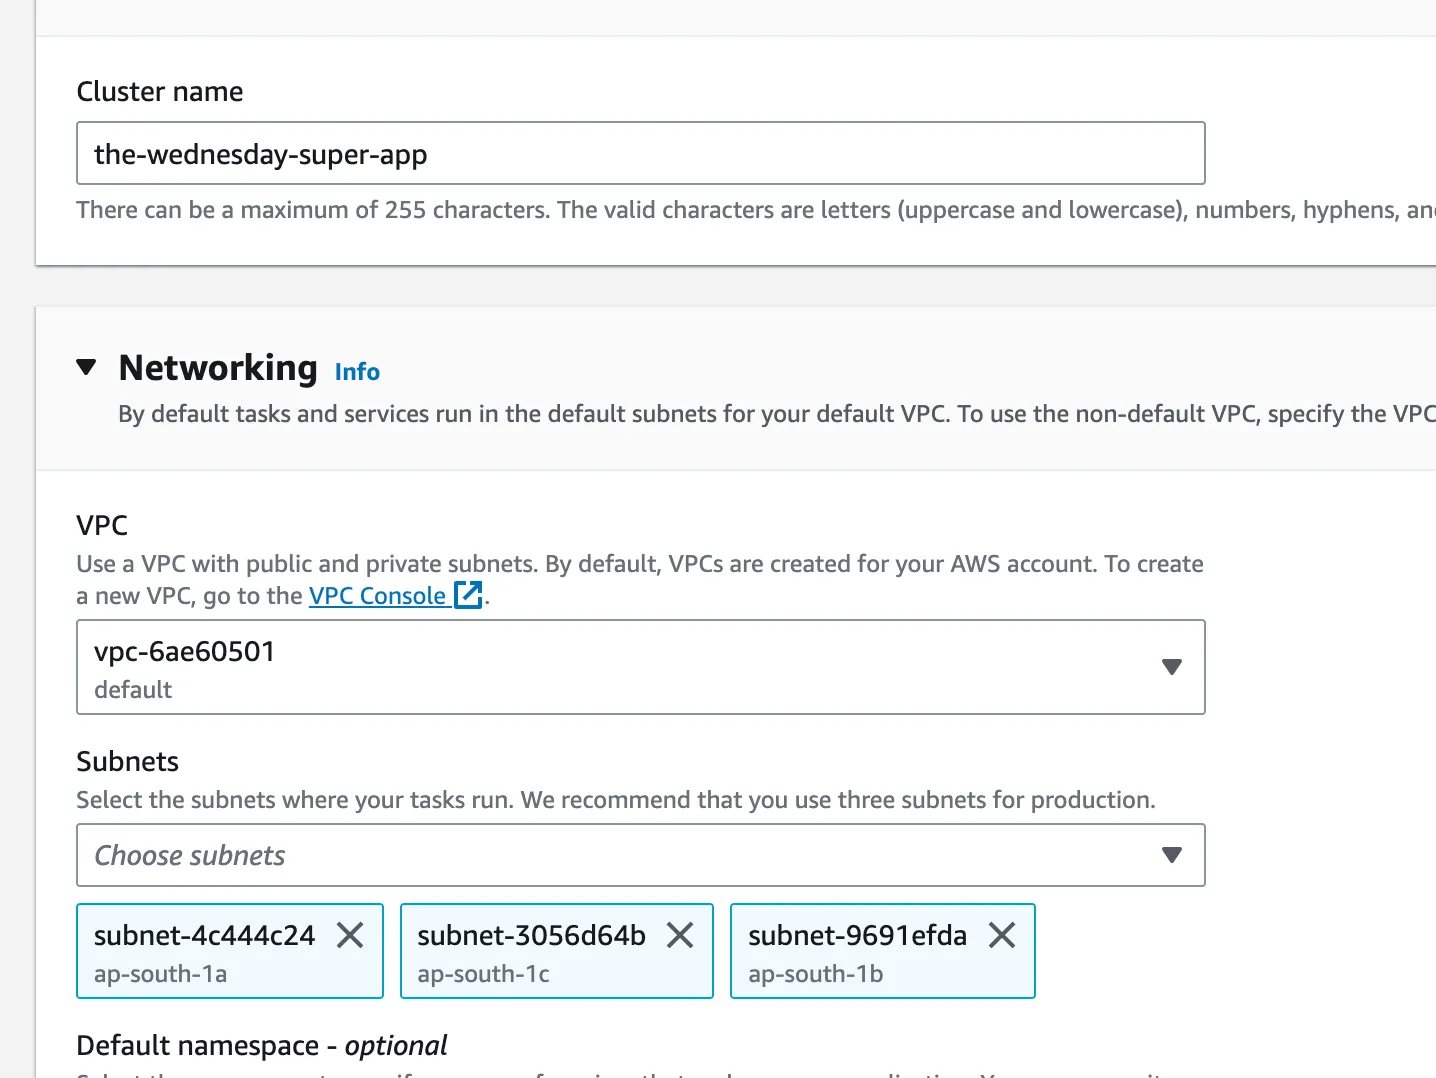
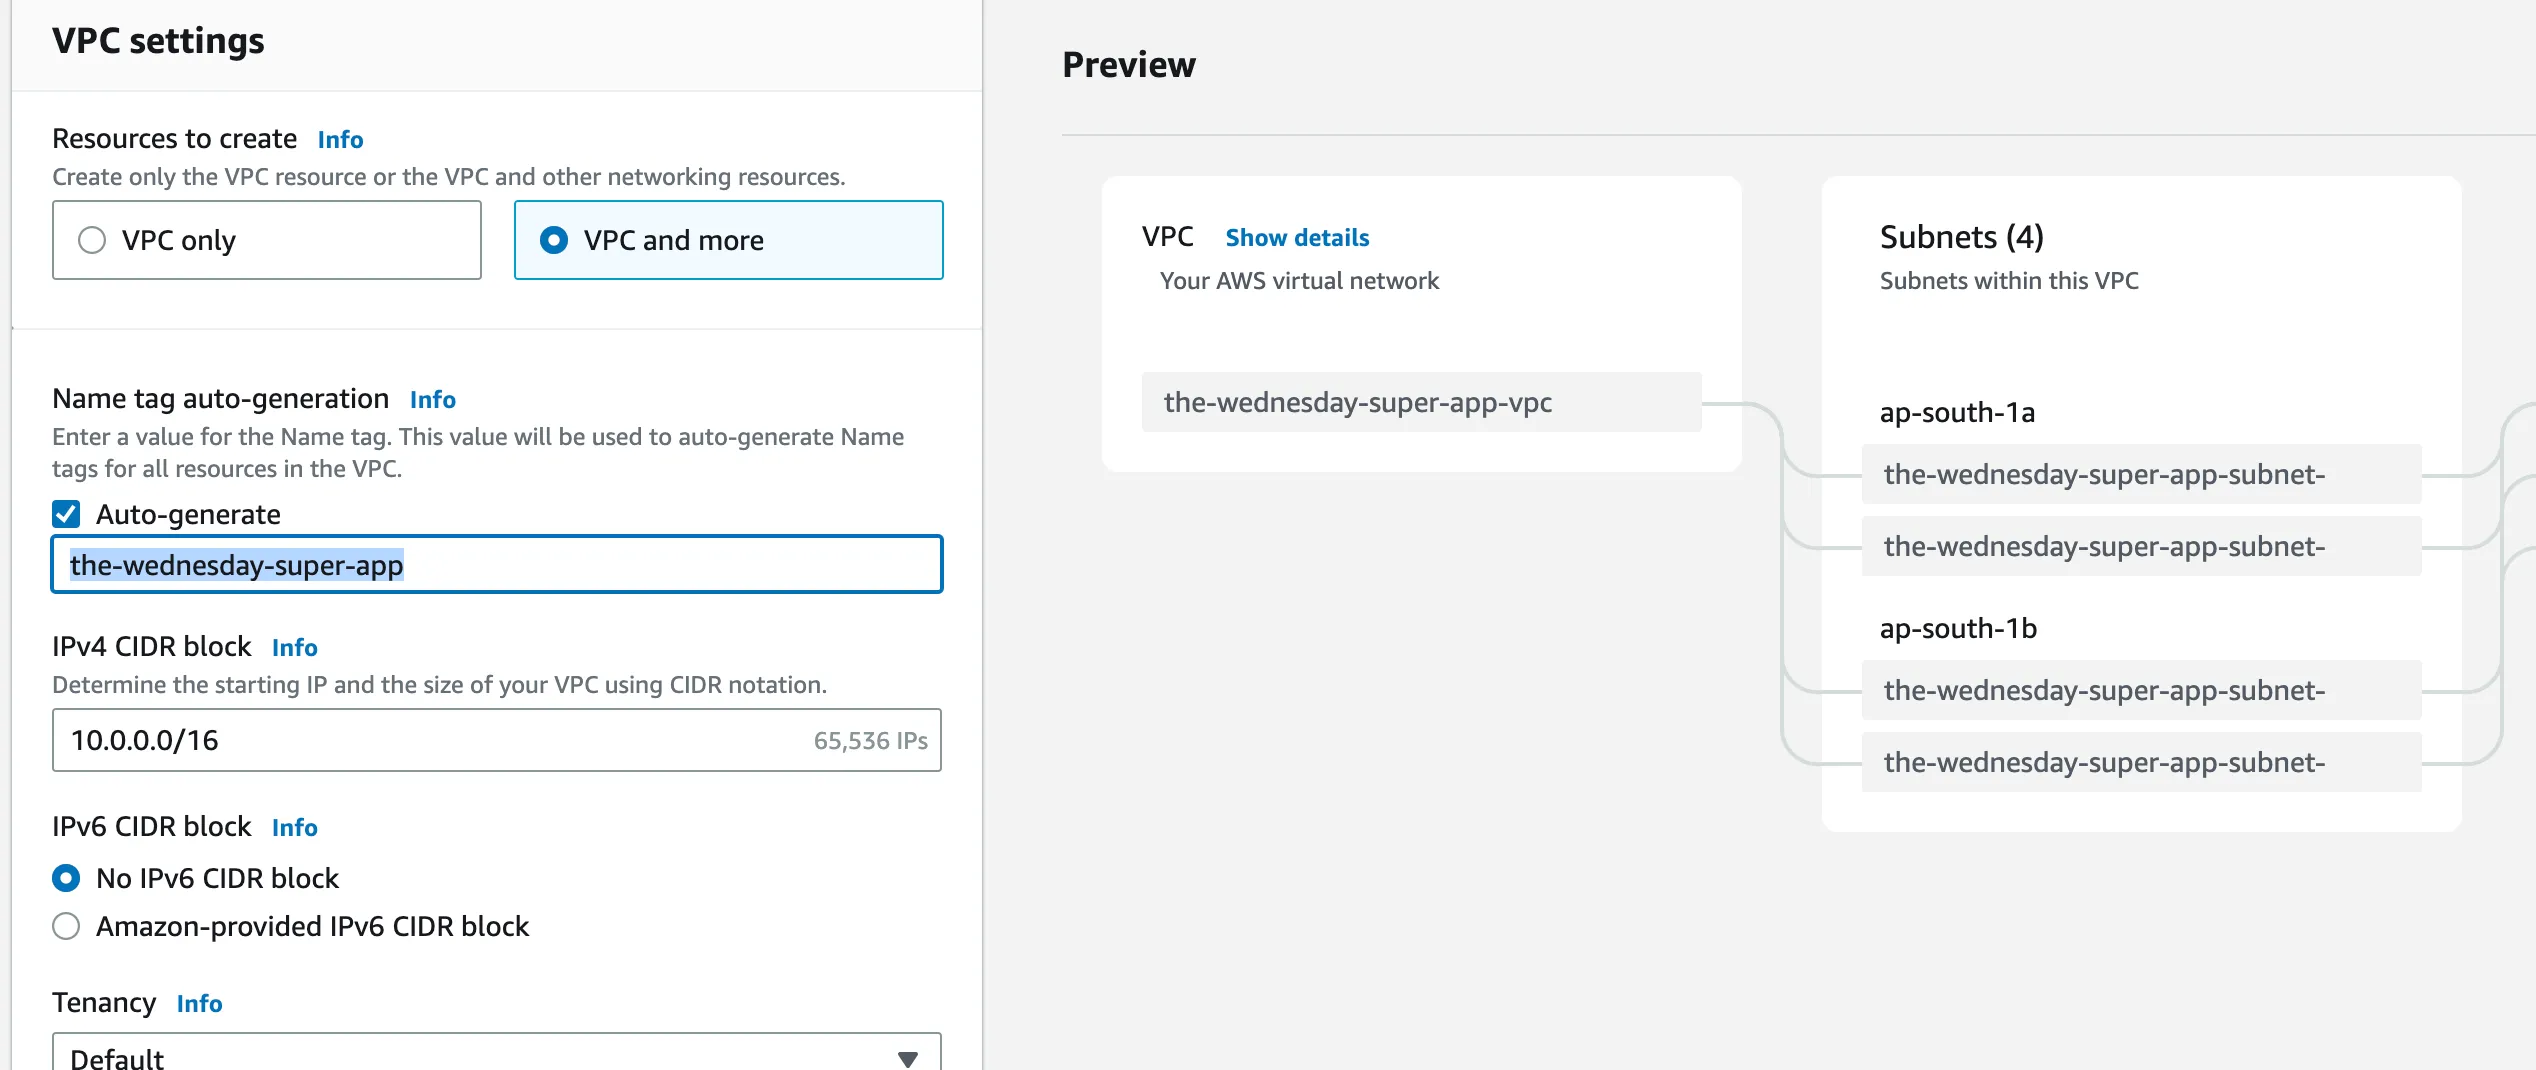
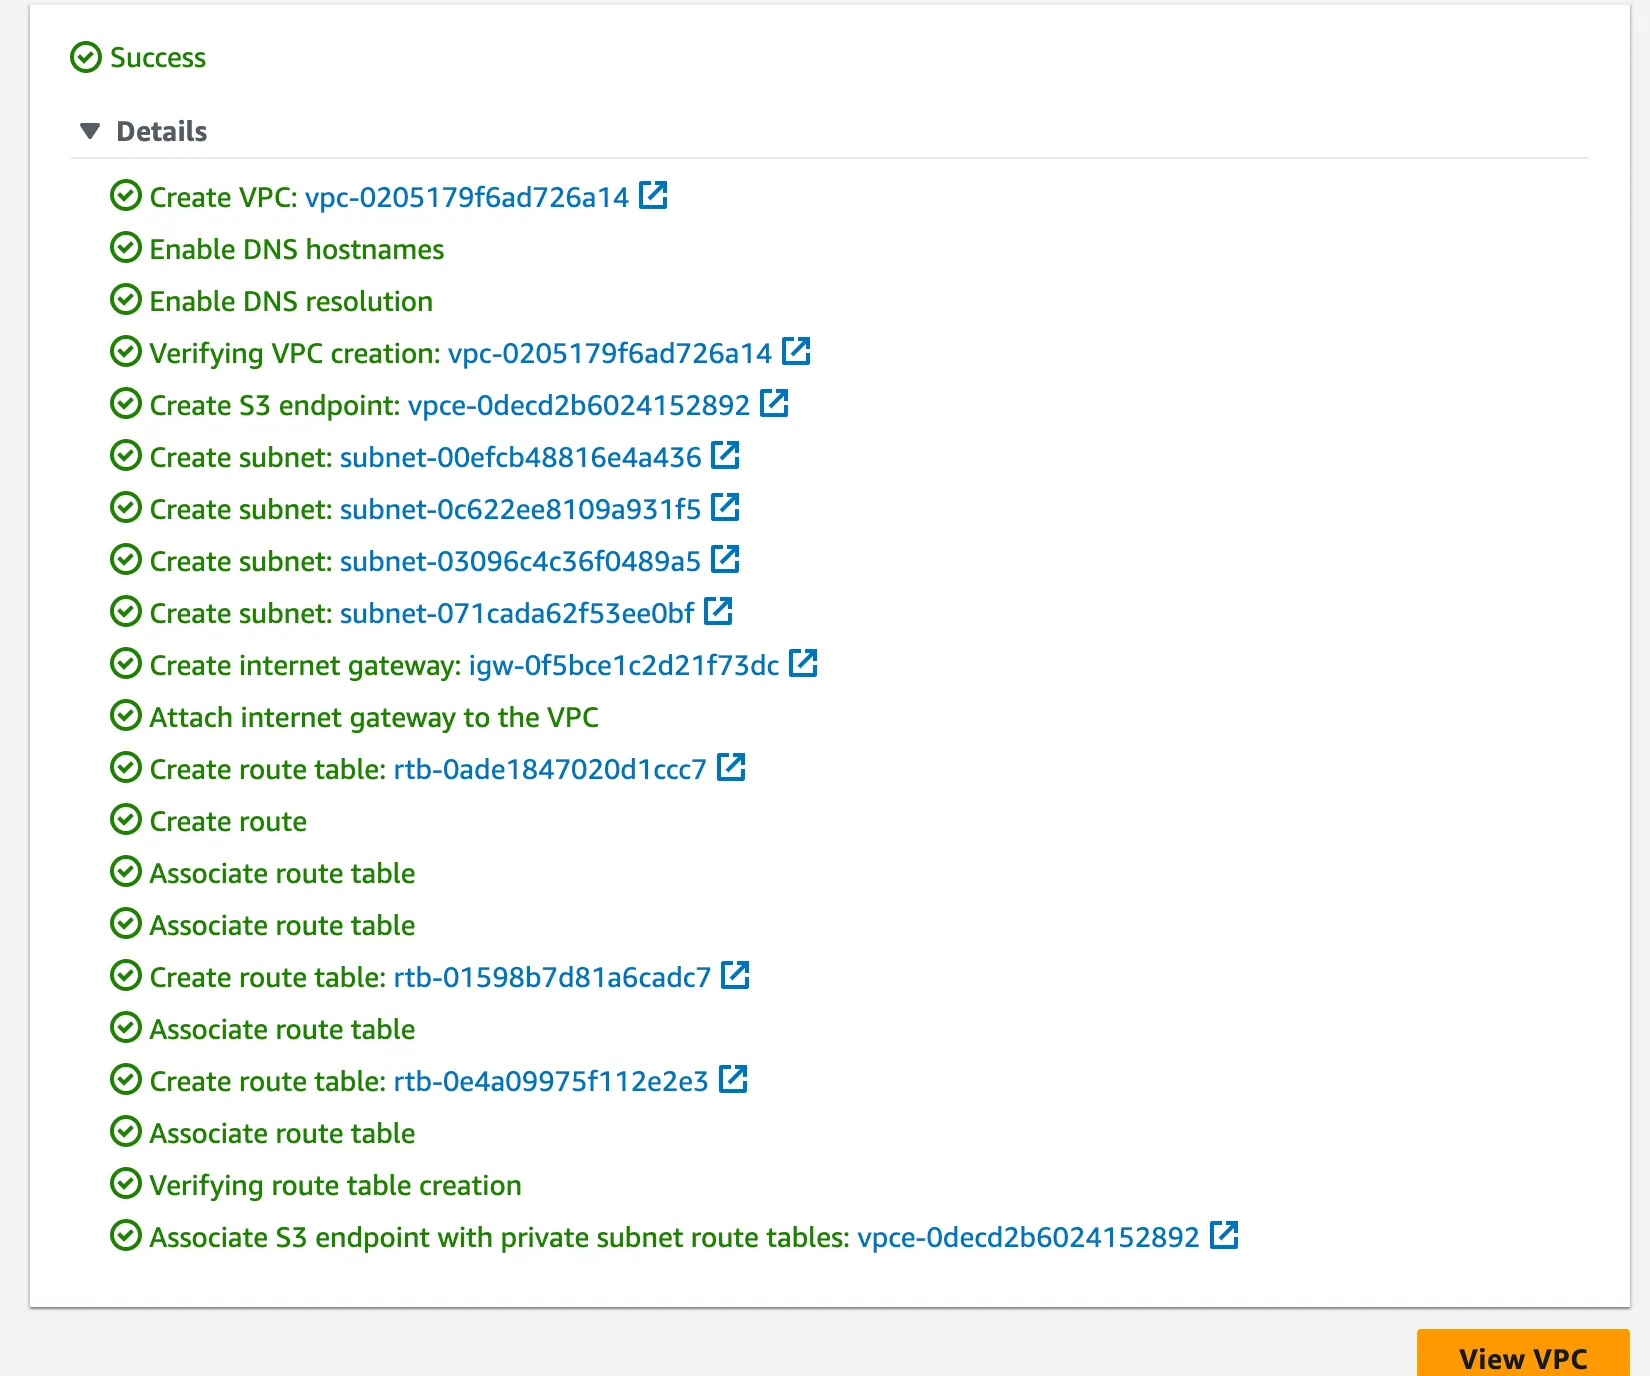
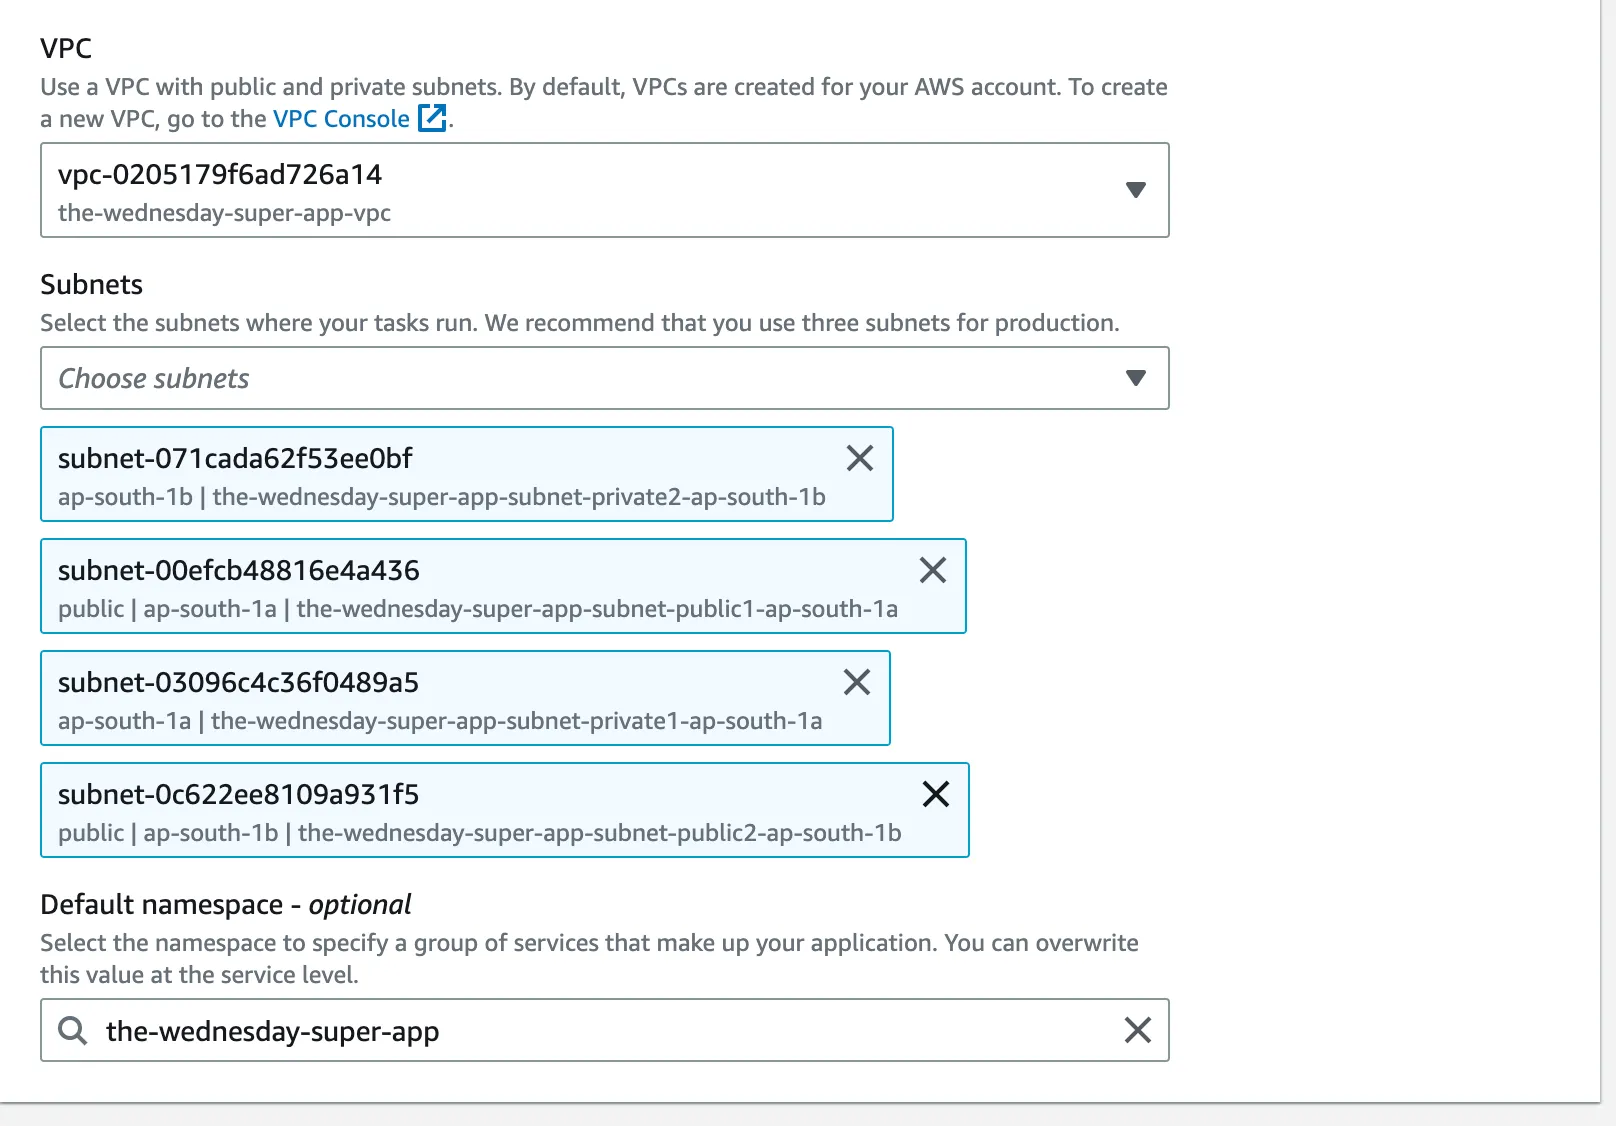
💡 Pro tip: If you’re not already using it please consider using AWS Copilot for everything ECS. It’s a gift you didn’t know you needed. Short story - that’s how I can create 3 clusters (dev, QA, prod) with multiple services, databases, cache clusters, and an MSK in under an hour. Take a look at this article and get your first copilot-powered ECS cluster up and running!
We’ll be creating 2 services that will be used to deploy multiple versions of the same application at the same time, and hence achieve the goal of canary deployments.

Make sure your AWS profile is configured and run the following command

PS: You can skip the below section if you’ve already got an ECR repo ready. Be sure to change the image location in the task definition below!
Creating an ECR repository
Authenticate with ECR
For v1
Create the repository
Build your application image
Push to the repository
For v2
Change line 5 in index.js as follows
Create the repository
Build your application image
Push to the repository
Before you start with your first service you’re going to need a task definition for it, this is where the magic is
Copy the contents from assets/task-definitions/svc1-v1.json and create a new task definition with it
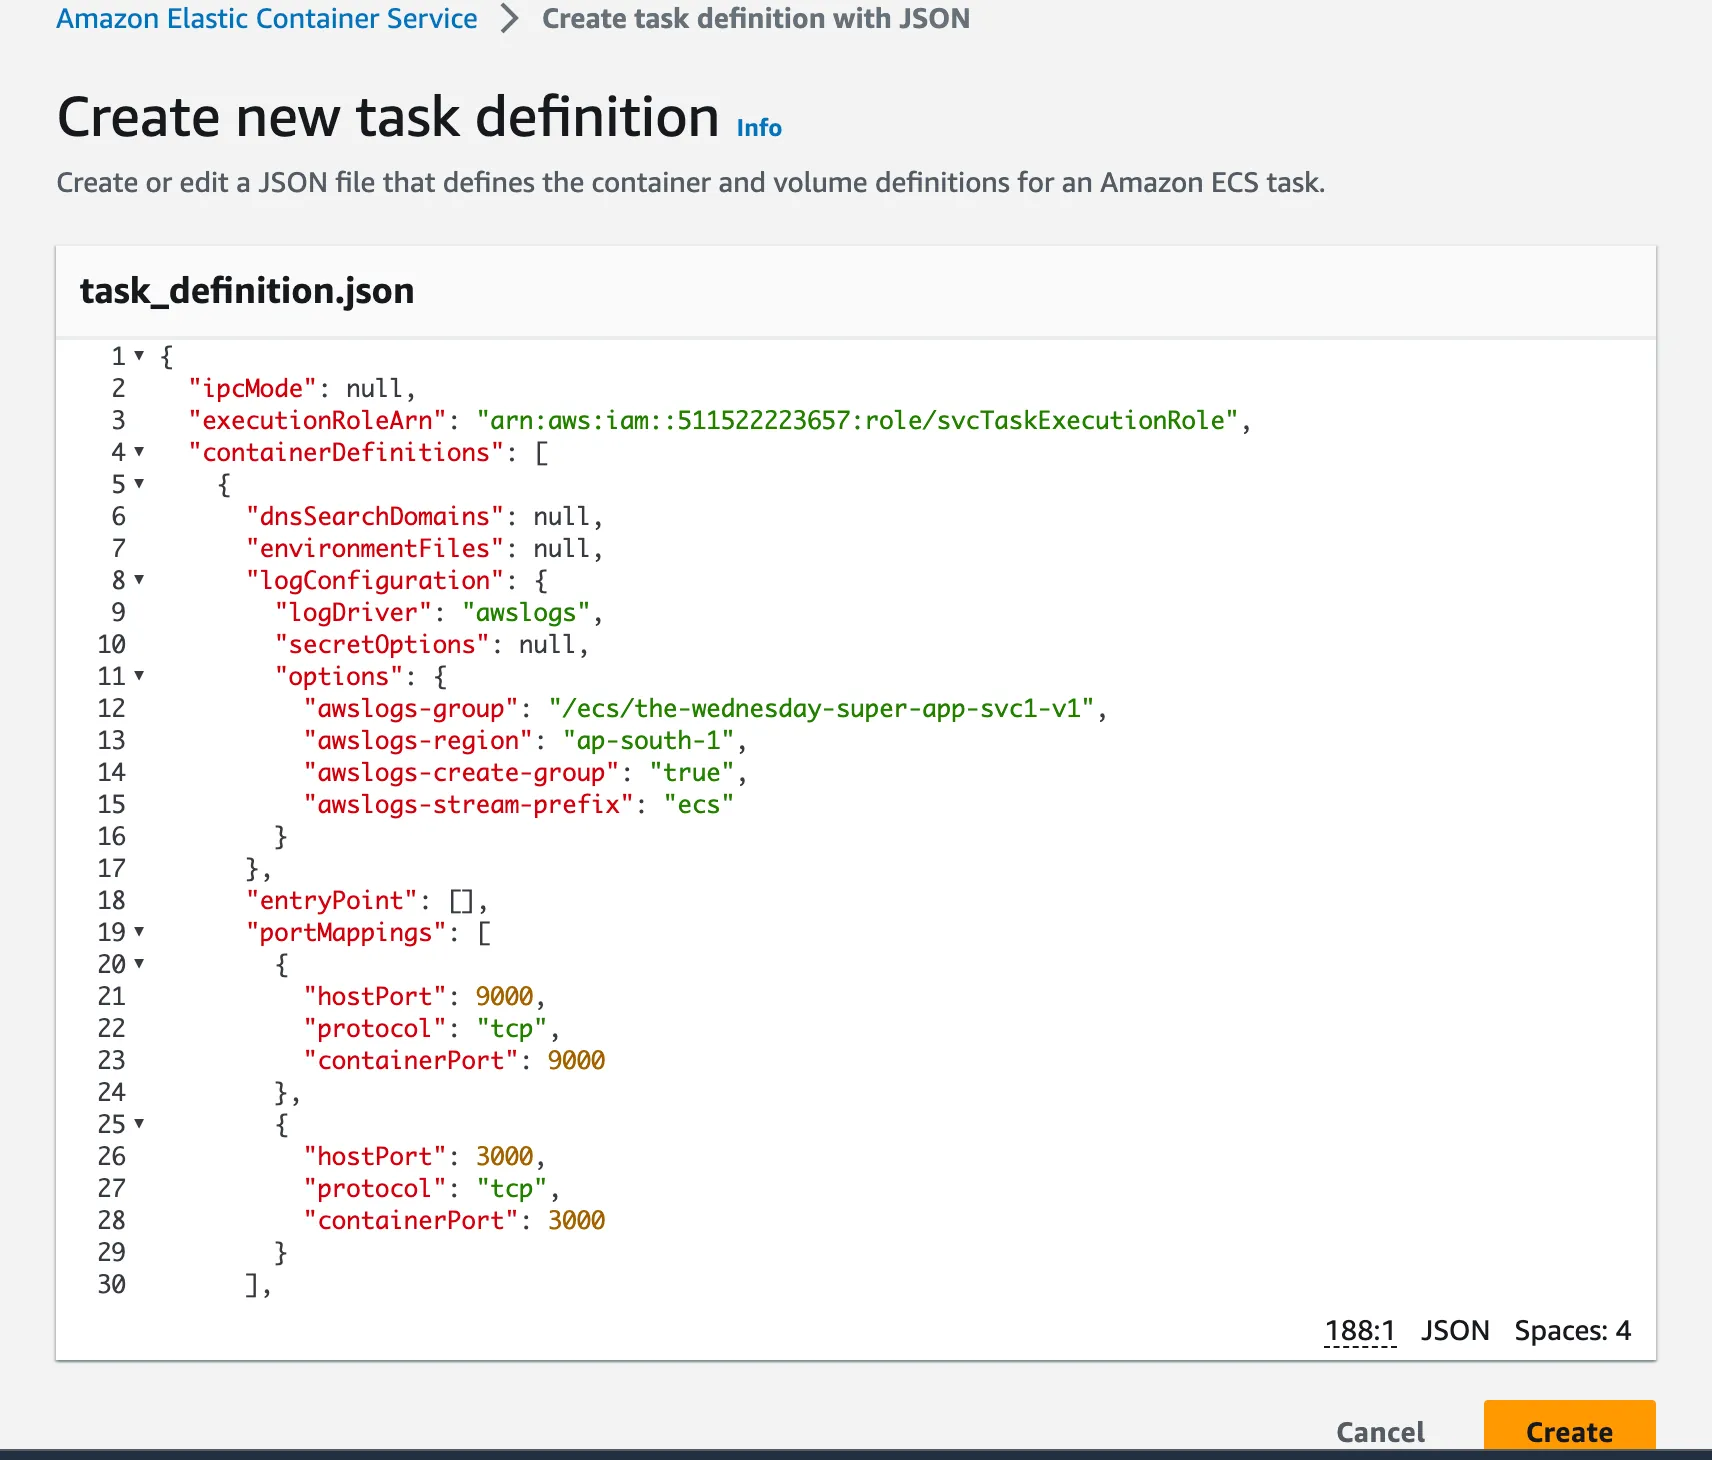
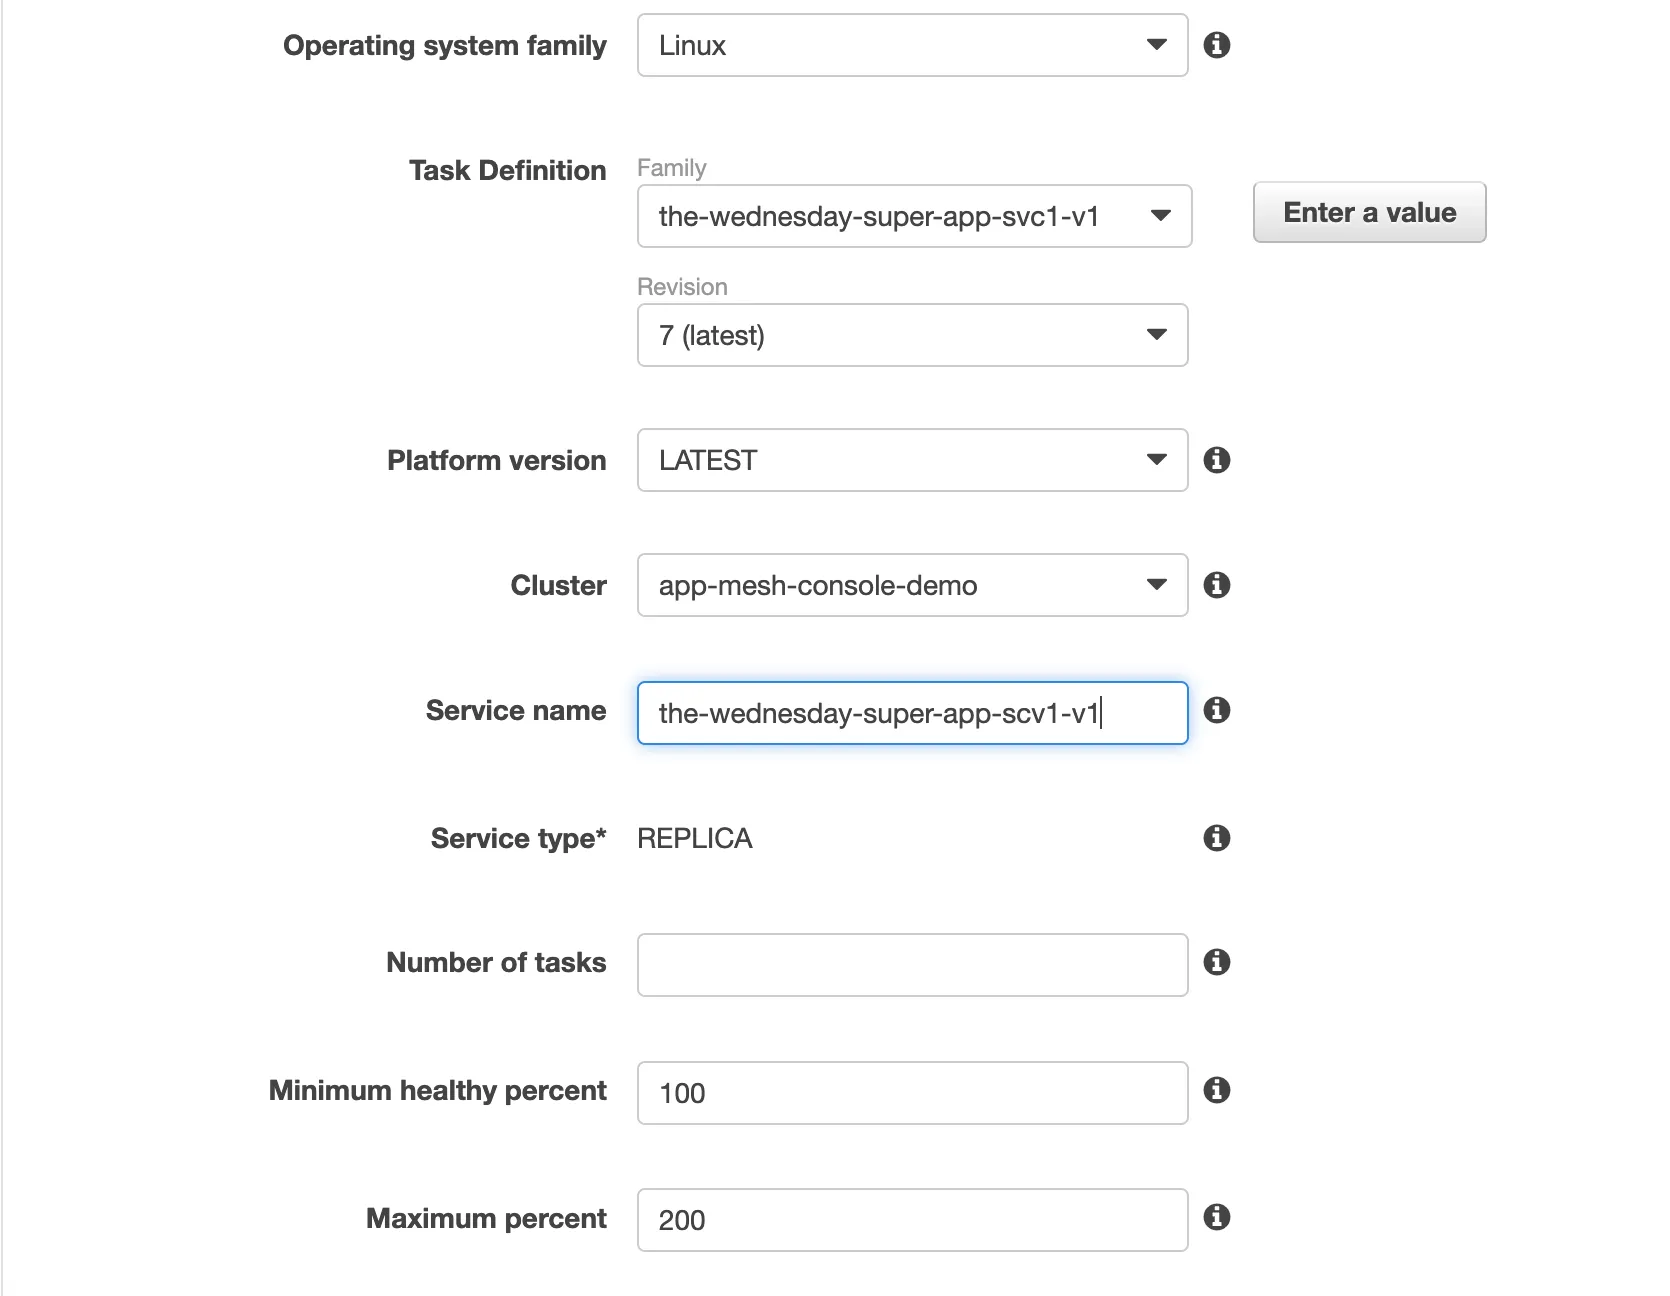
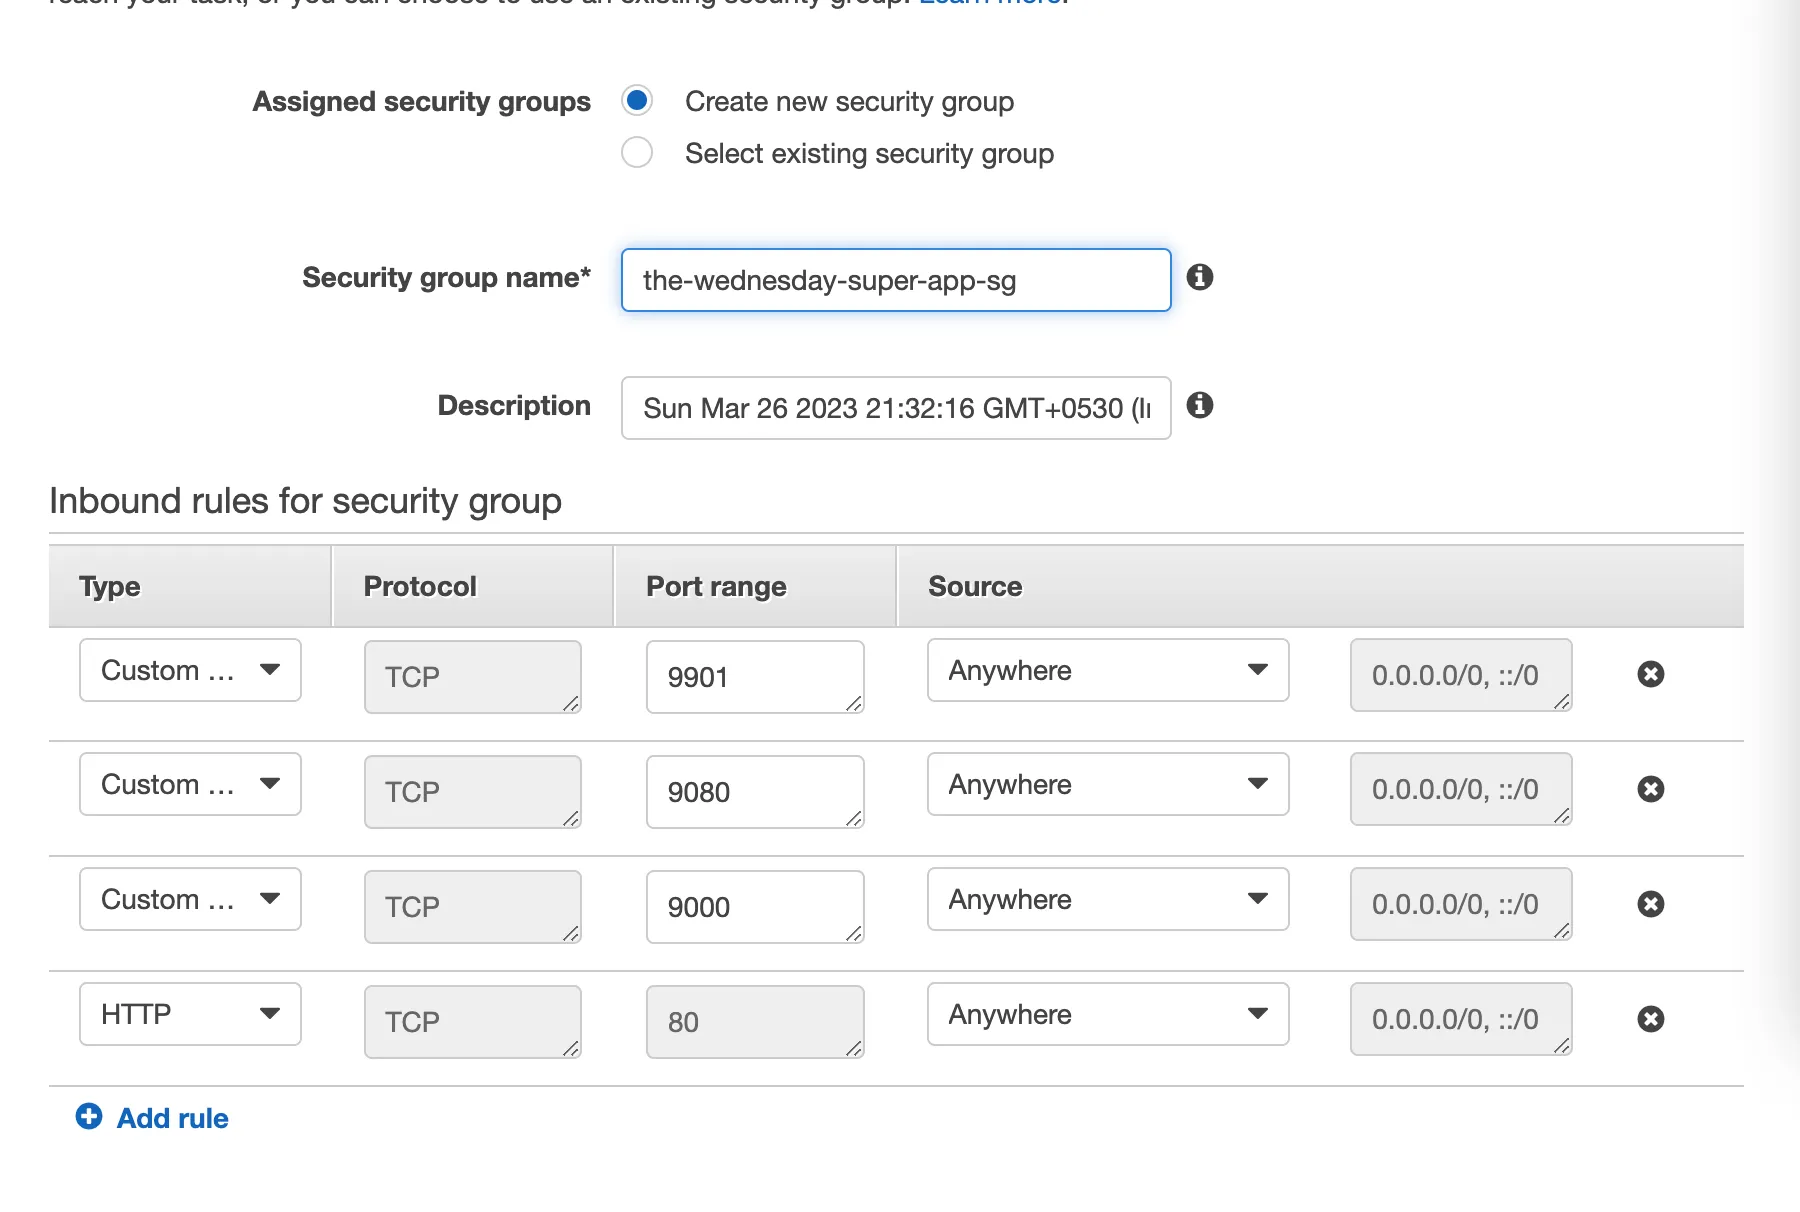
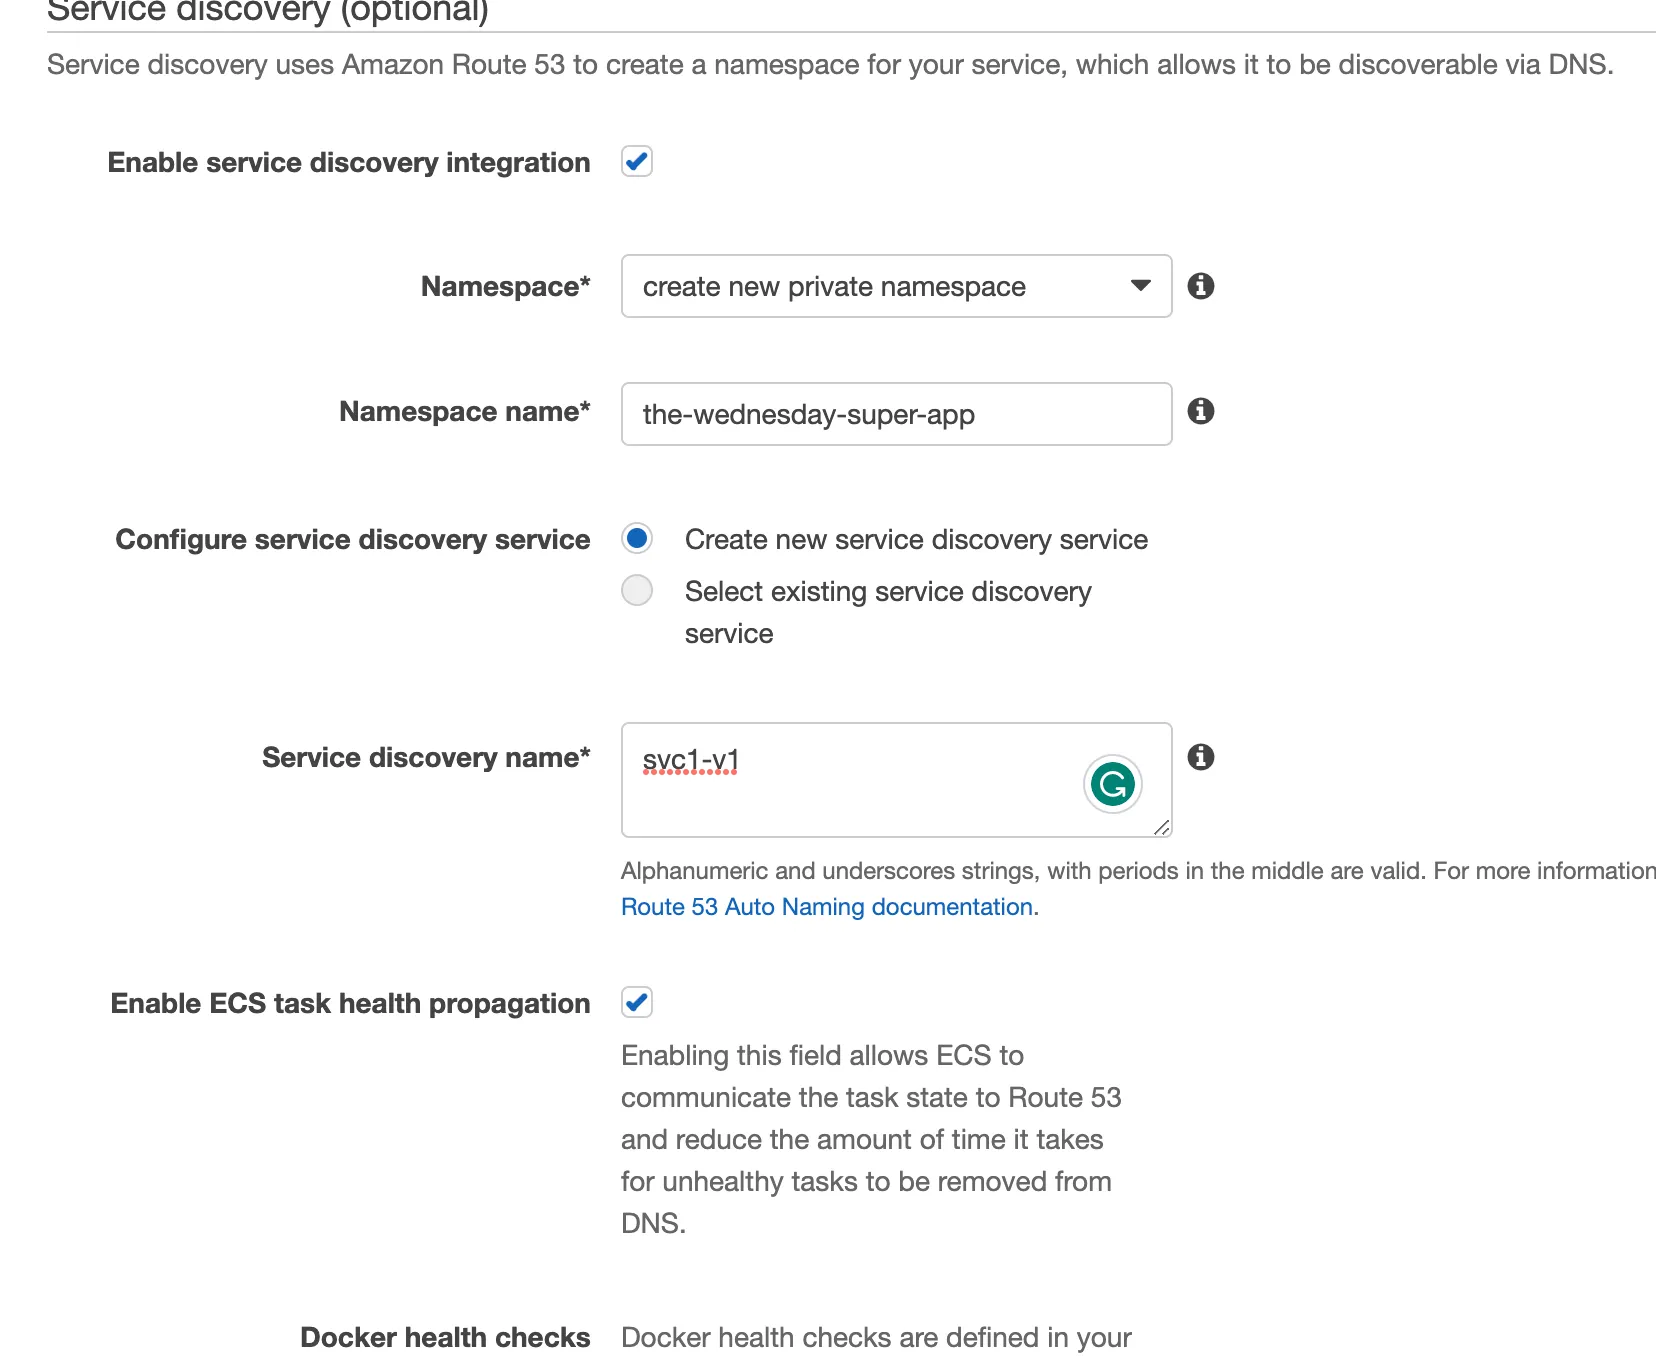


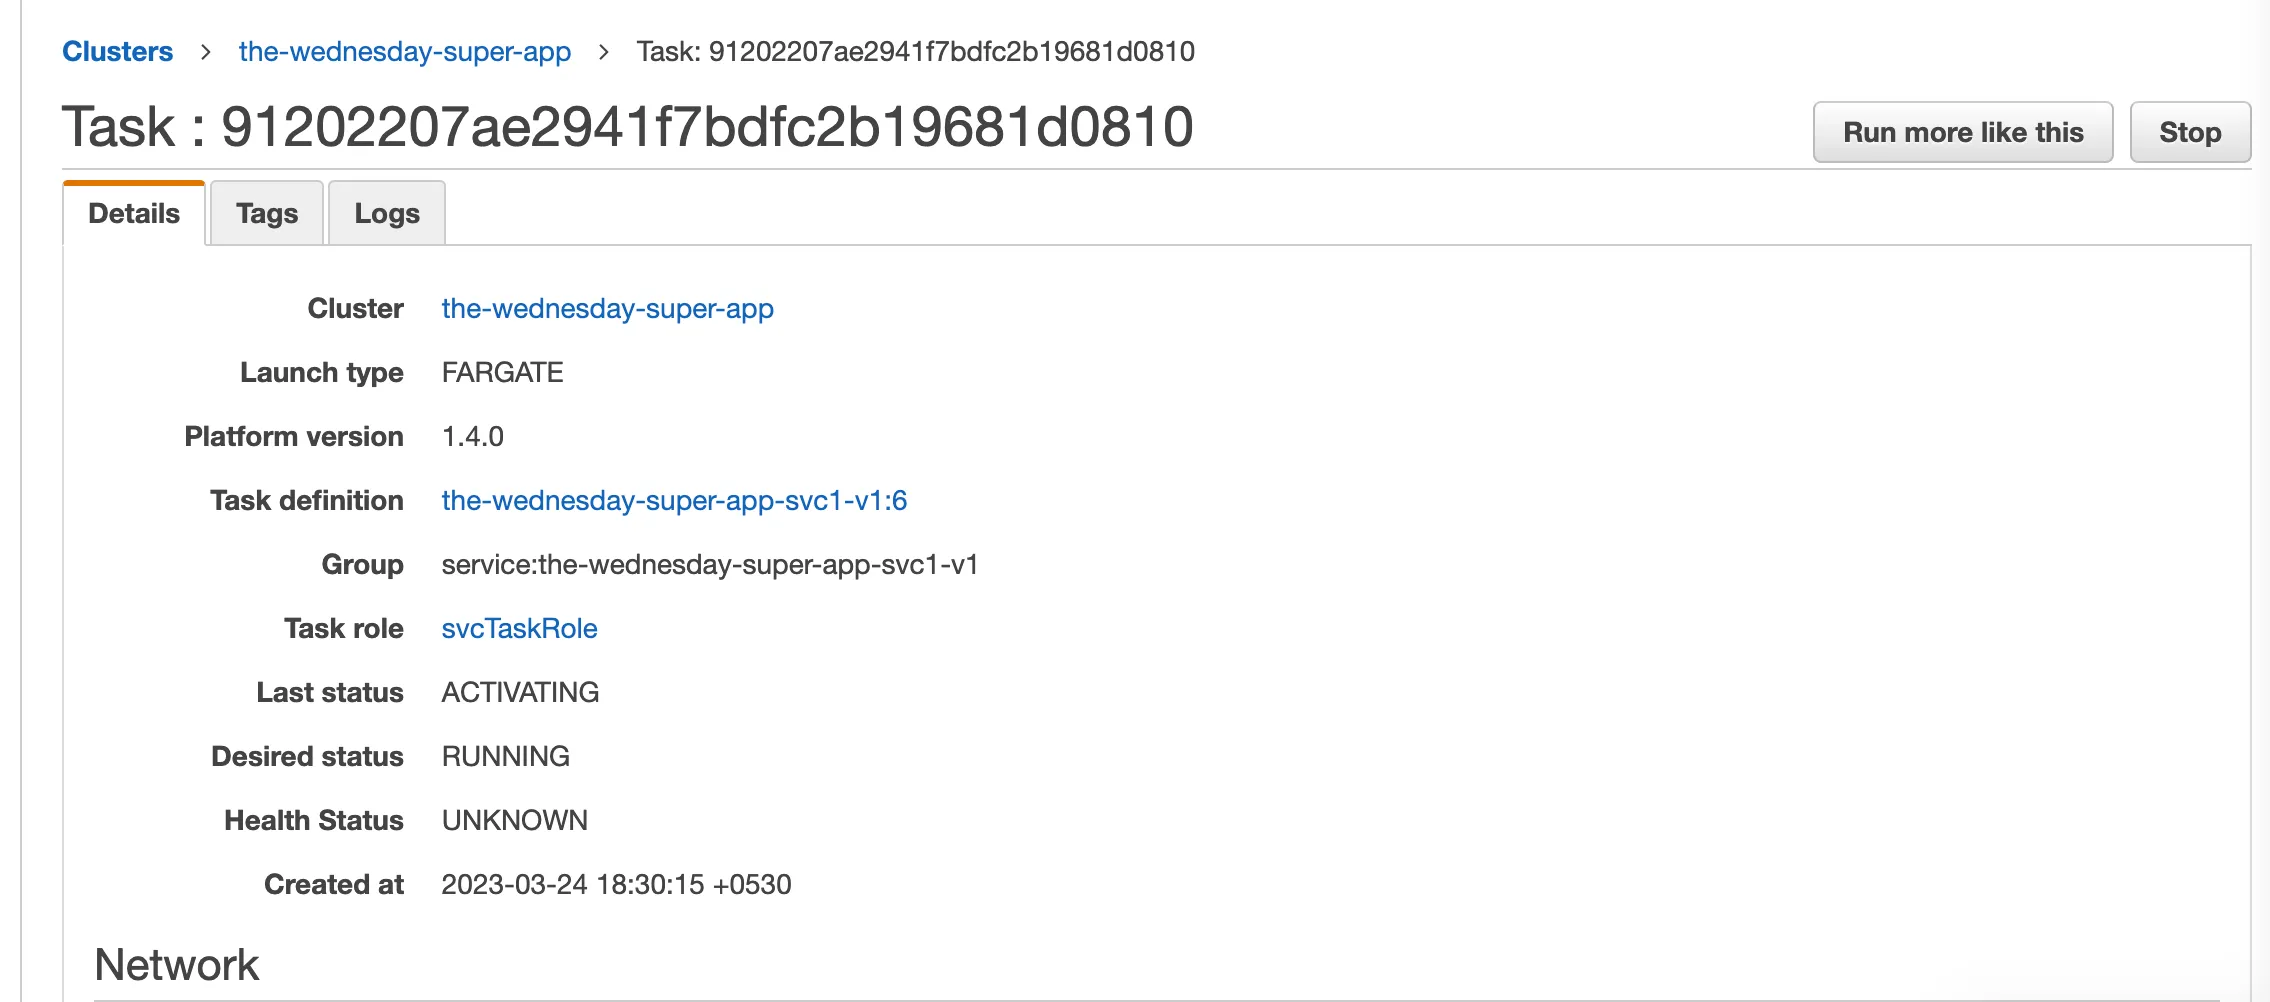
💡 Make sure you’re using the old UI. As of writing this article, the new console UI has some glitches
Step 9: Create ECS Service for Version 2
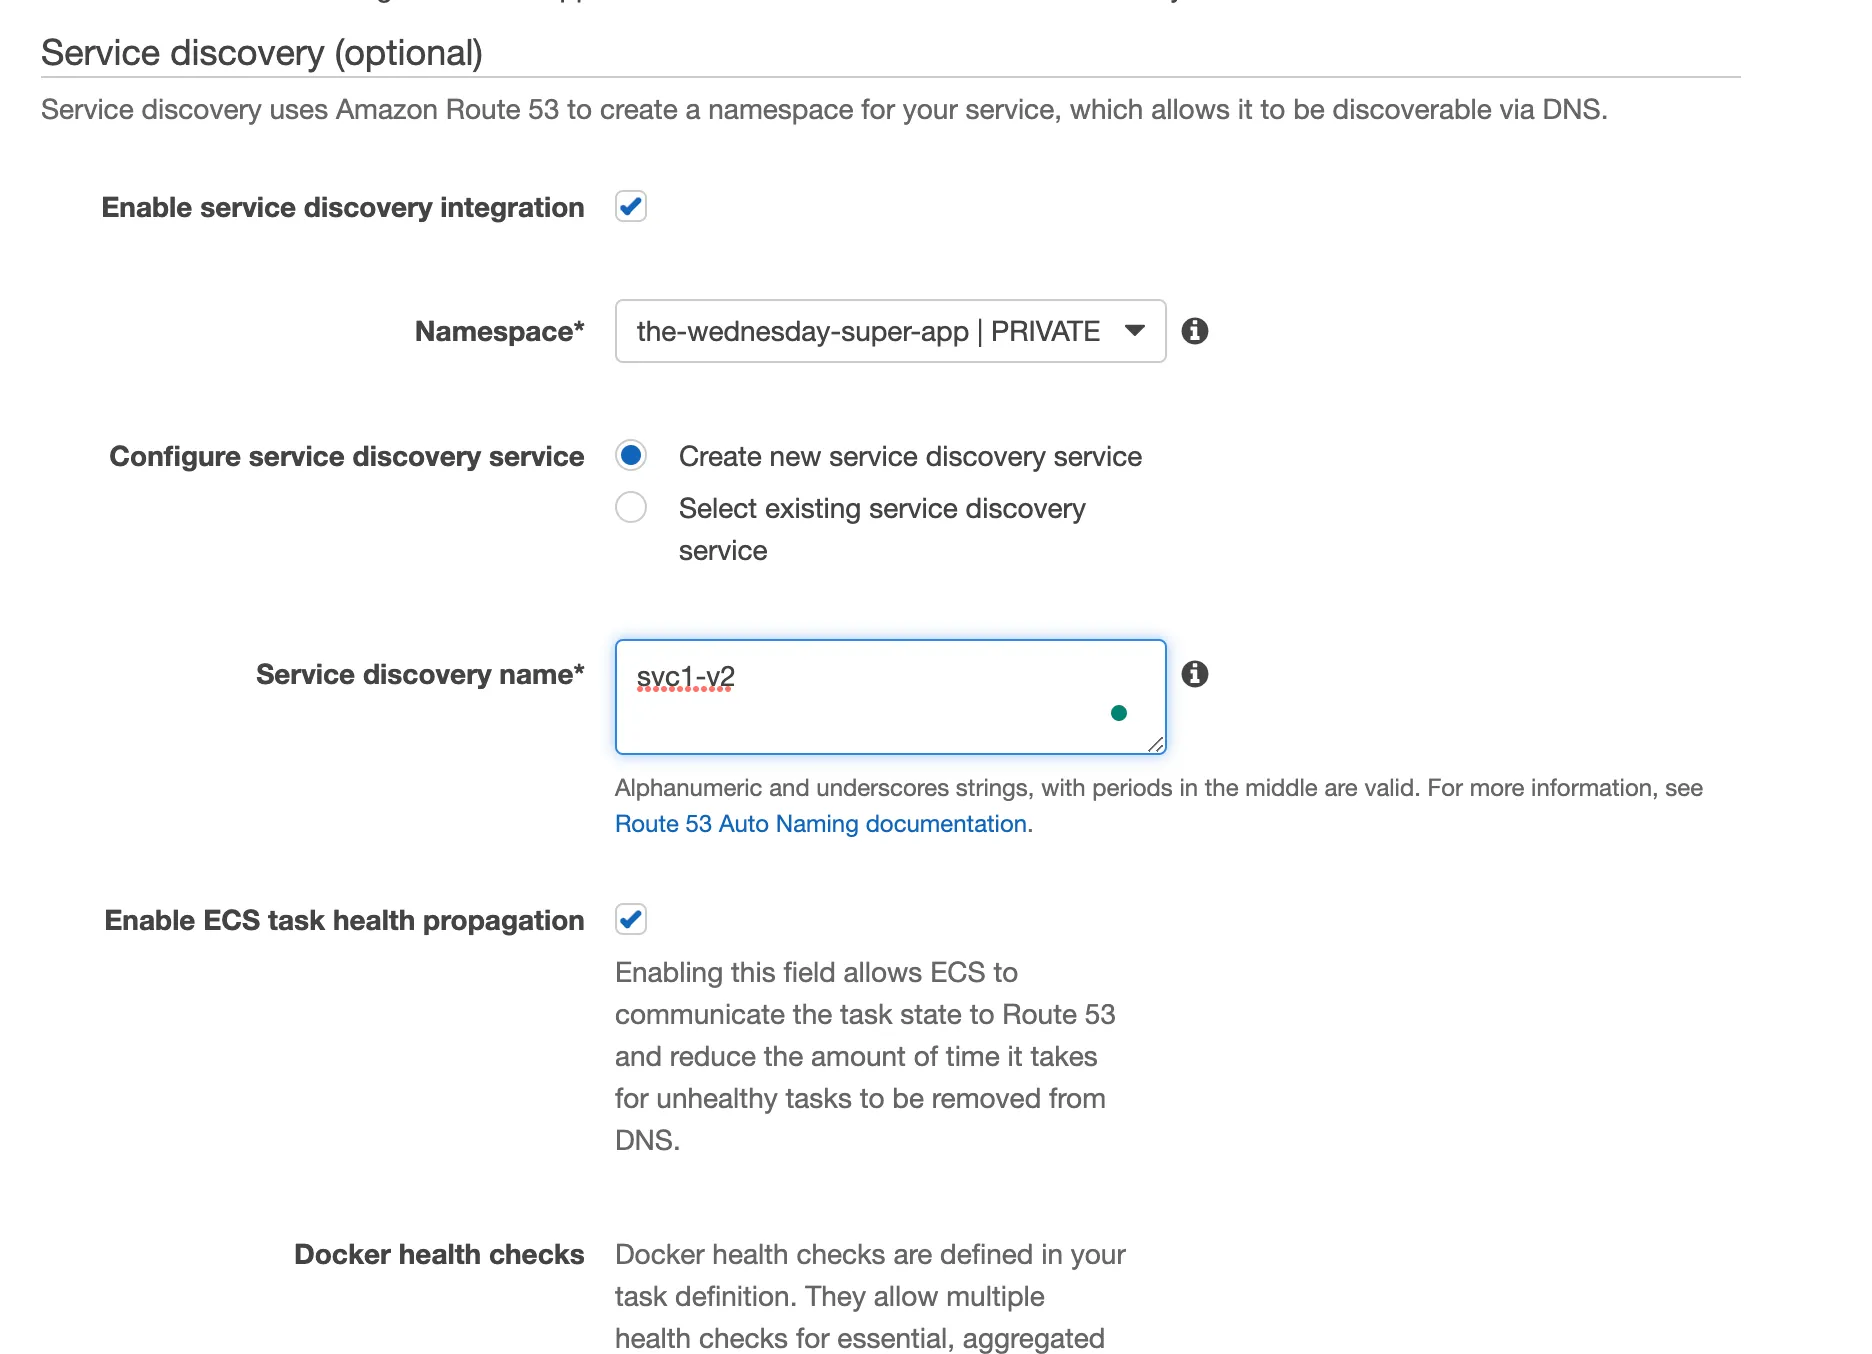
Now let’s configure the second service. It’s the same process again. Easy right?

Copy the contents from assets/task-definitions/svc1-v2.json and create a new task definition with it
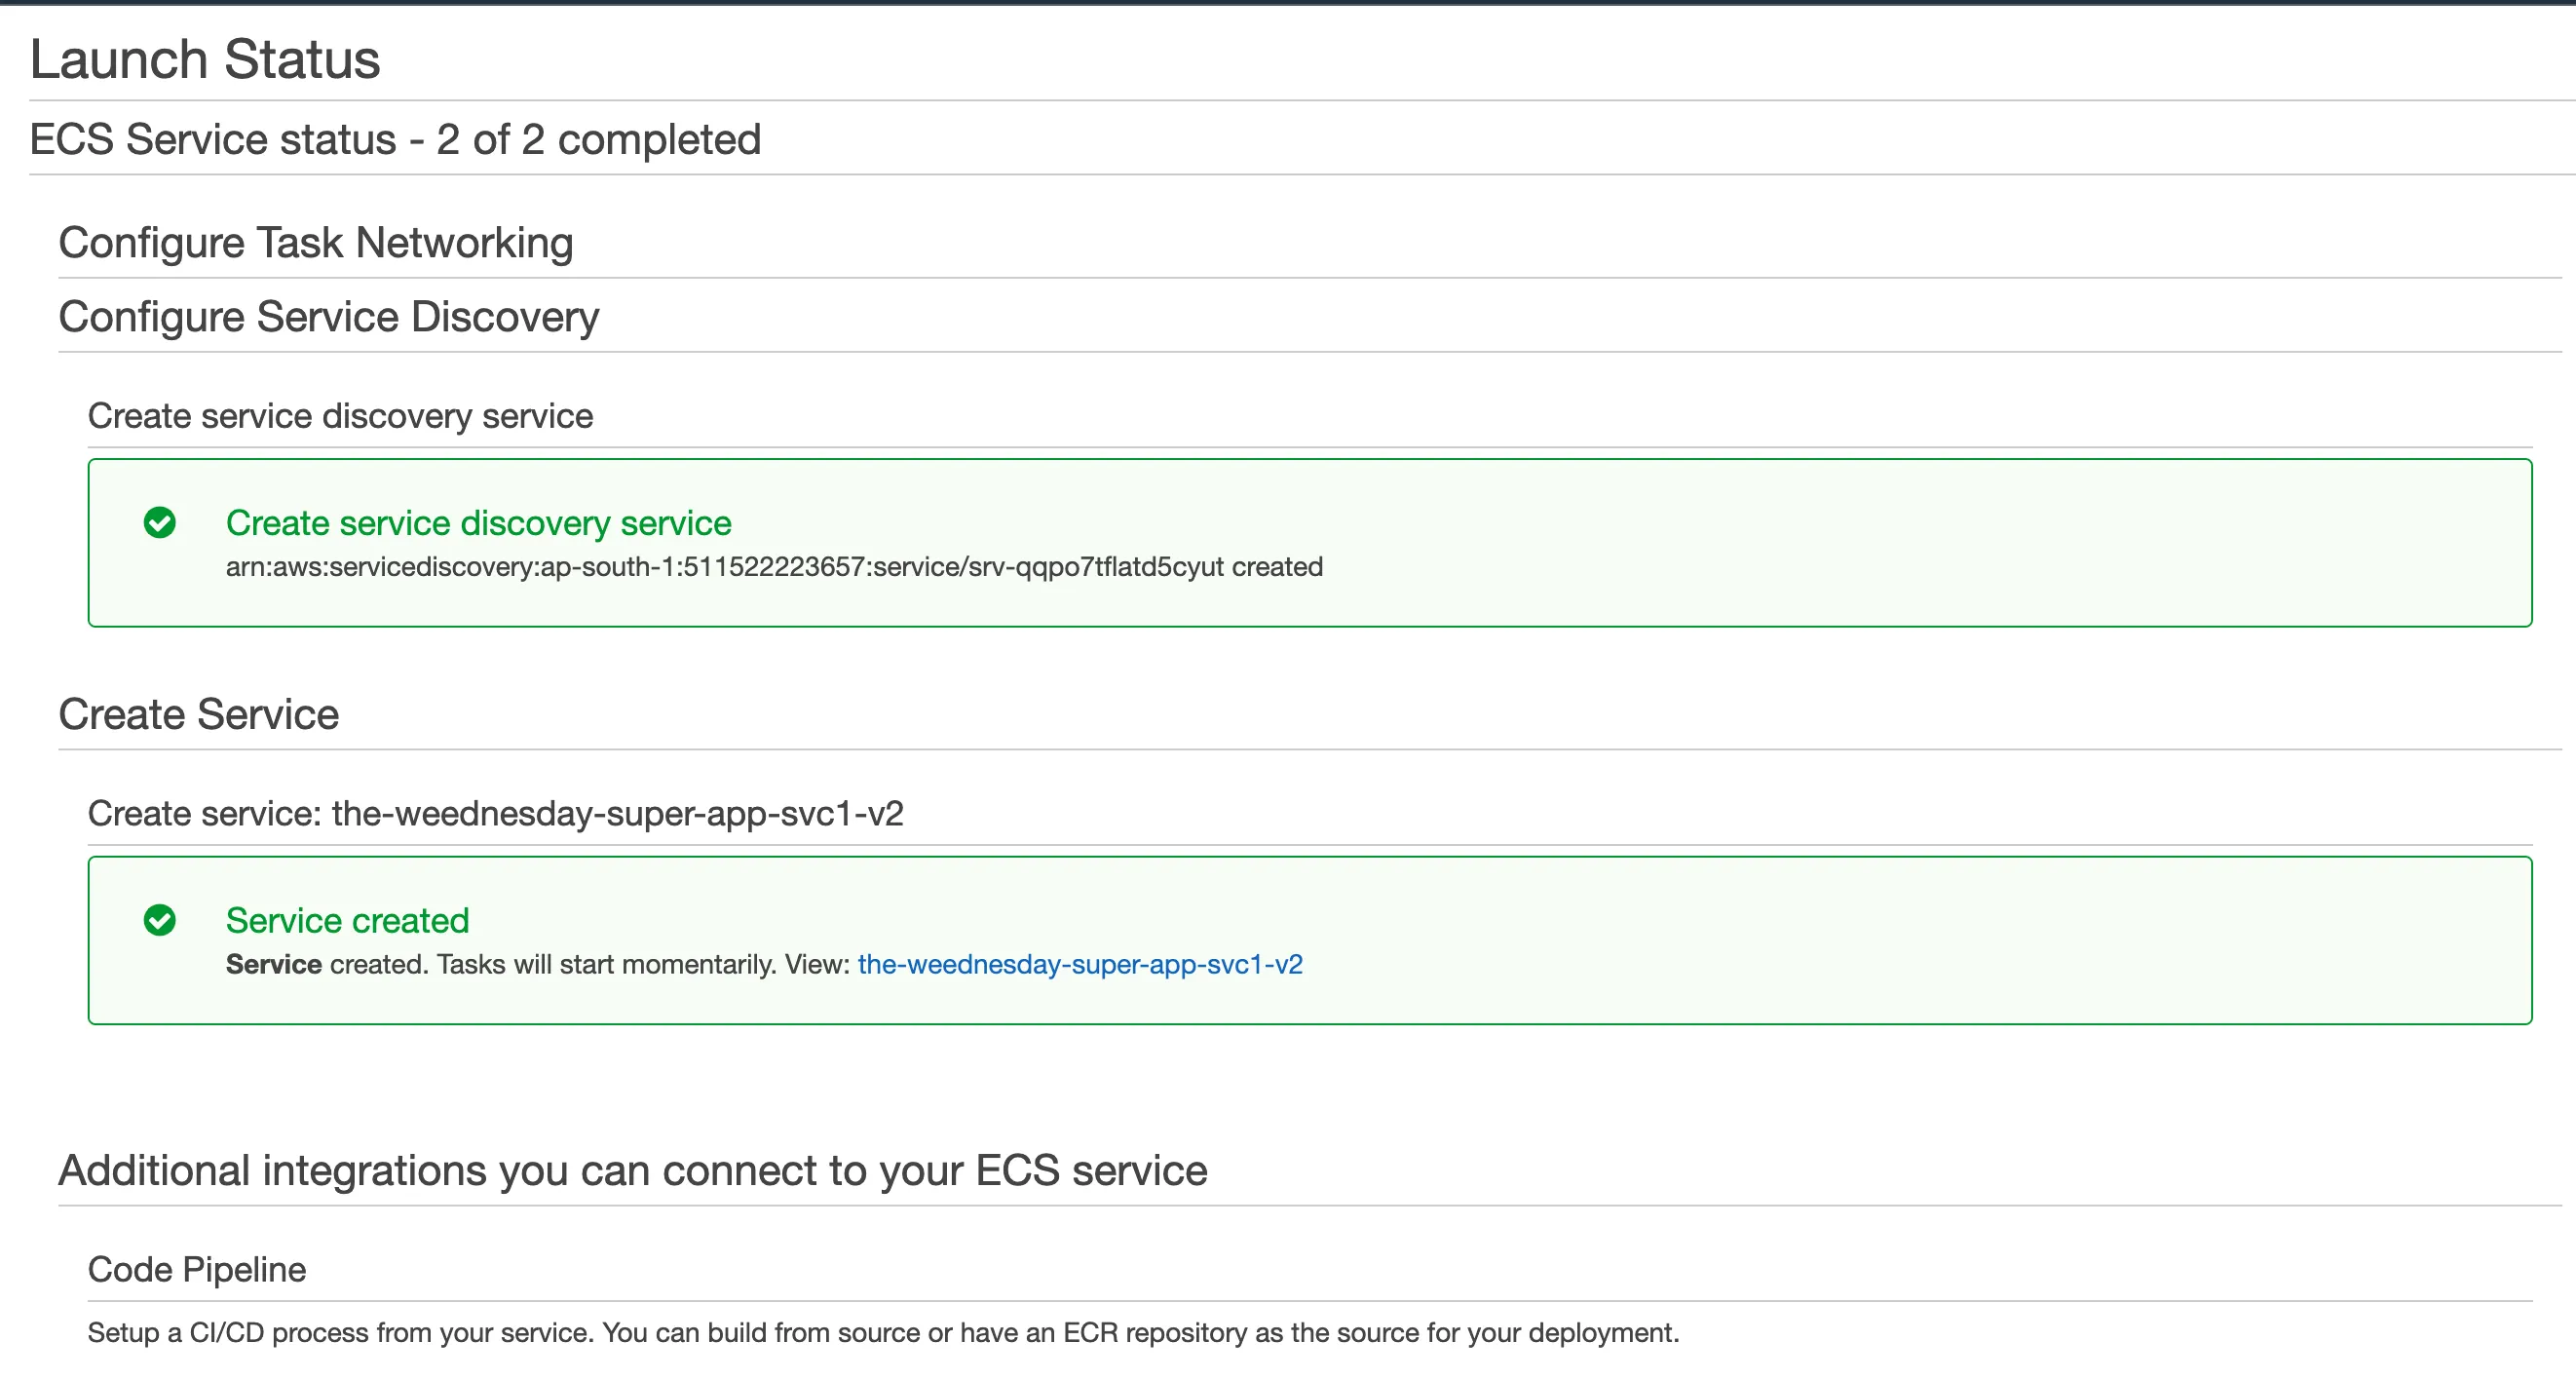
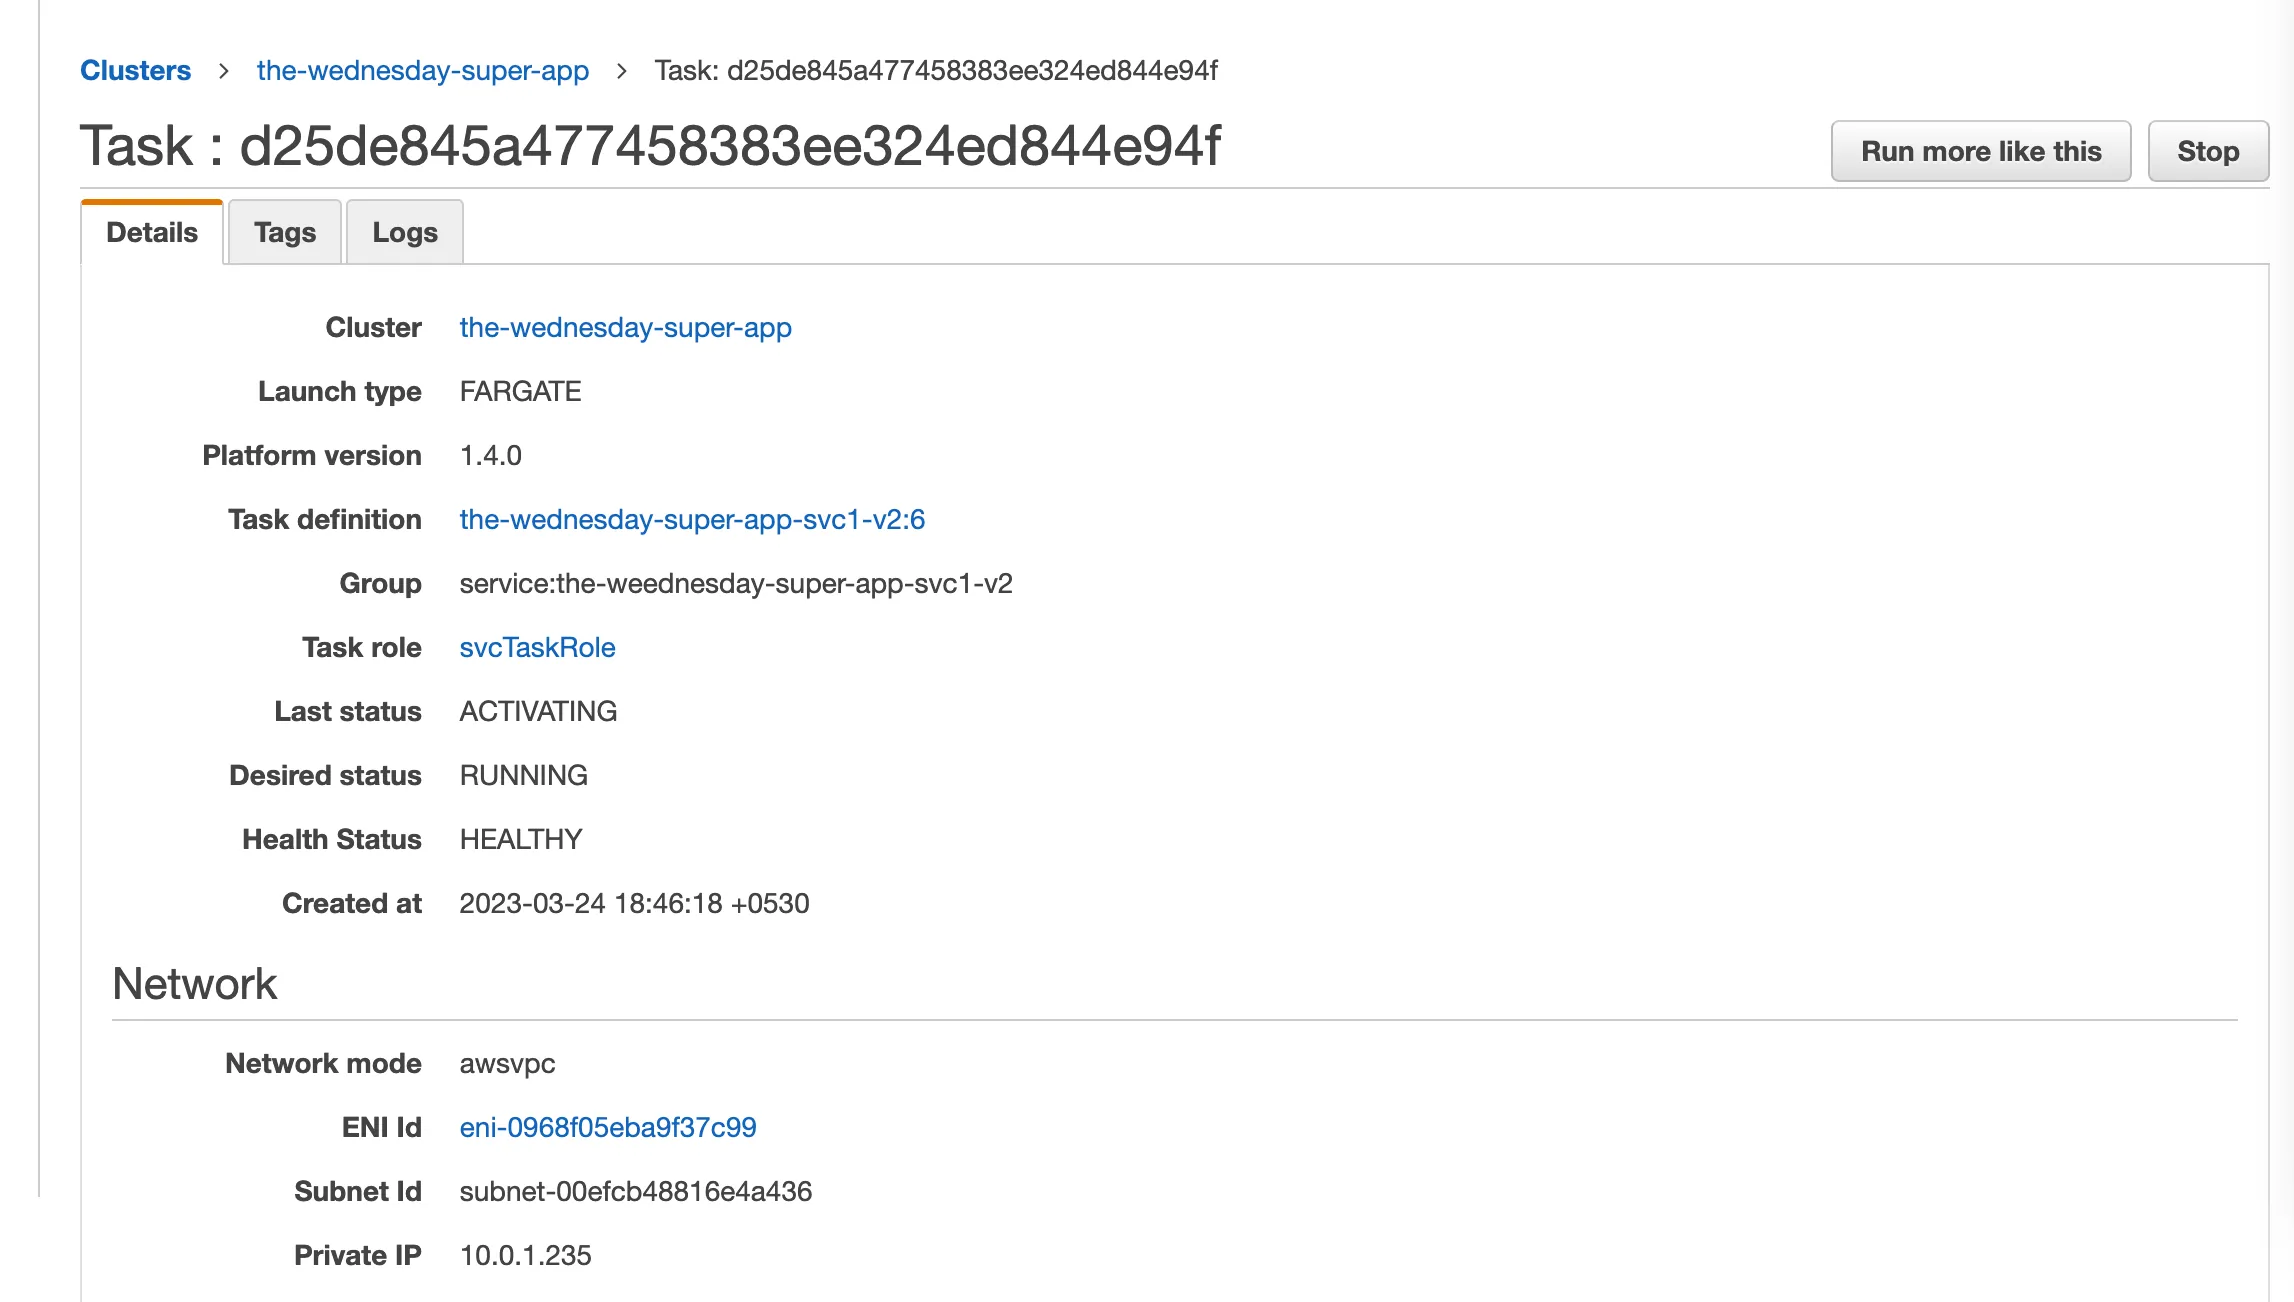
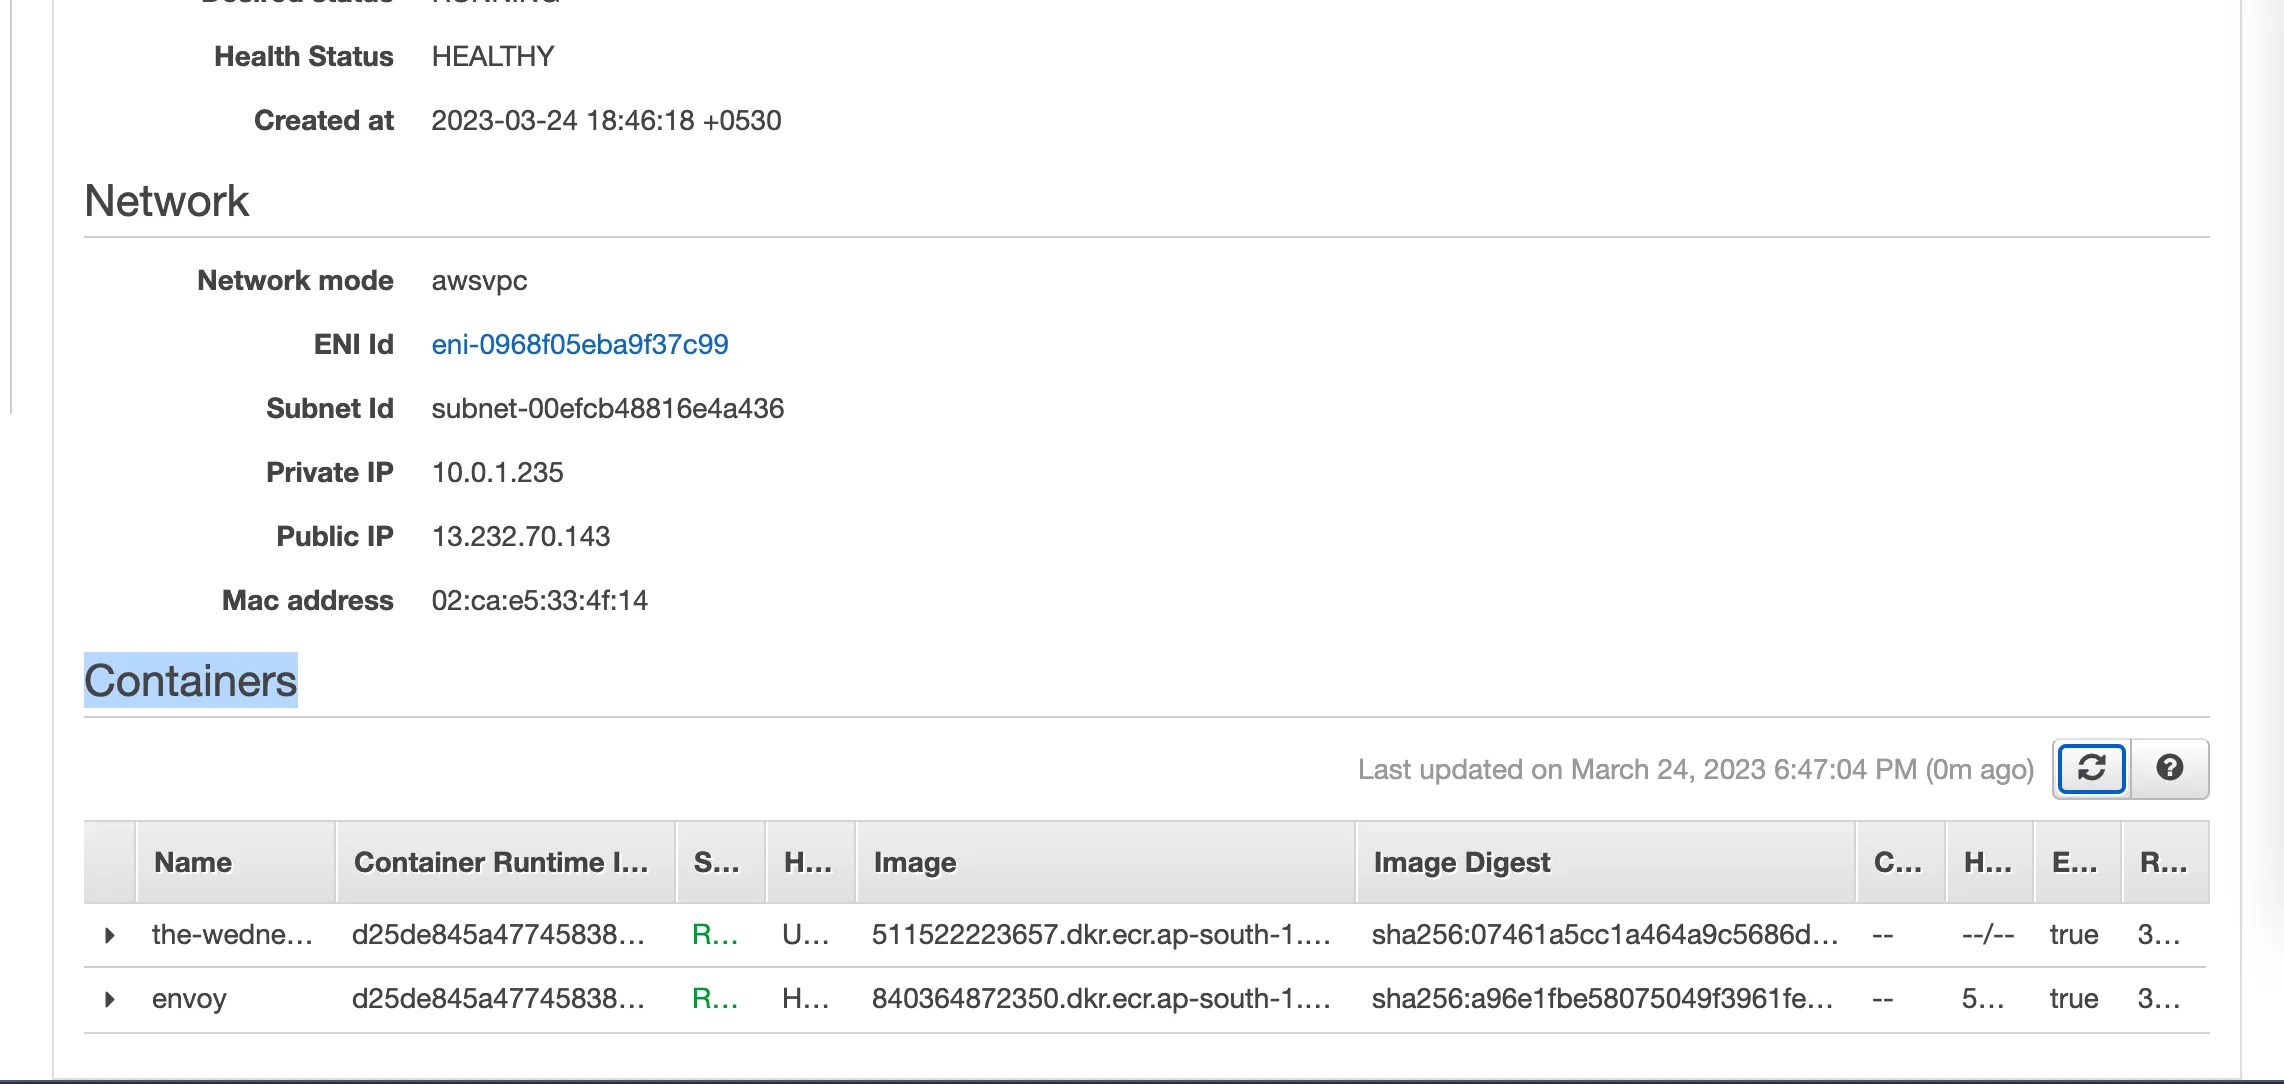
Create the 2nd service and attach the newly created task definition as shown below
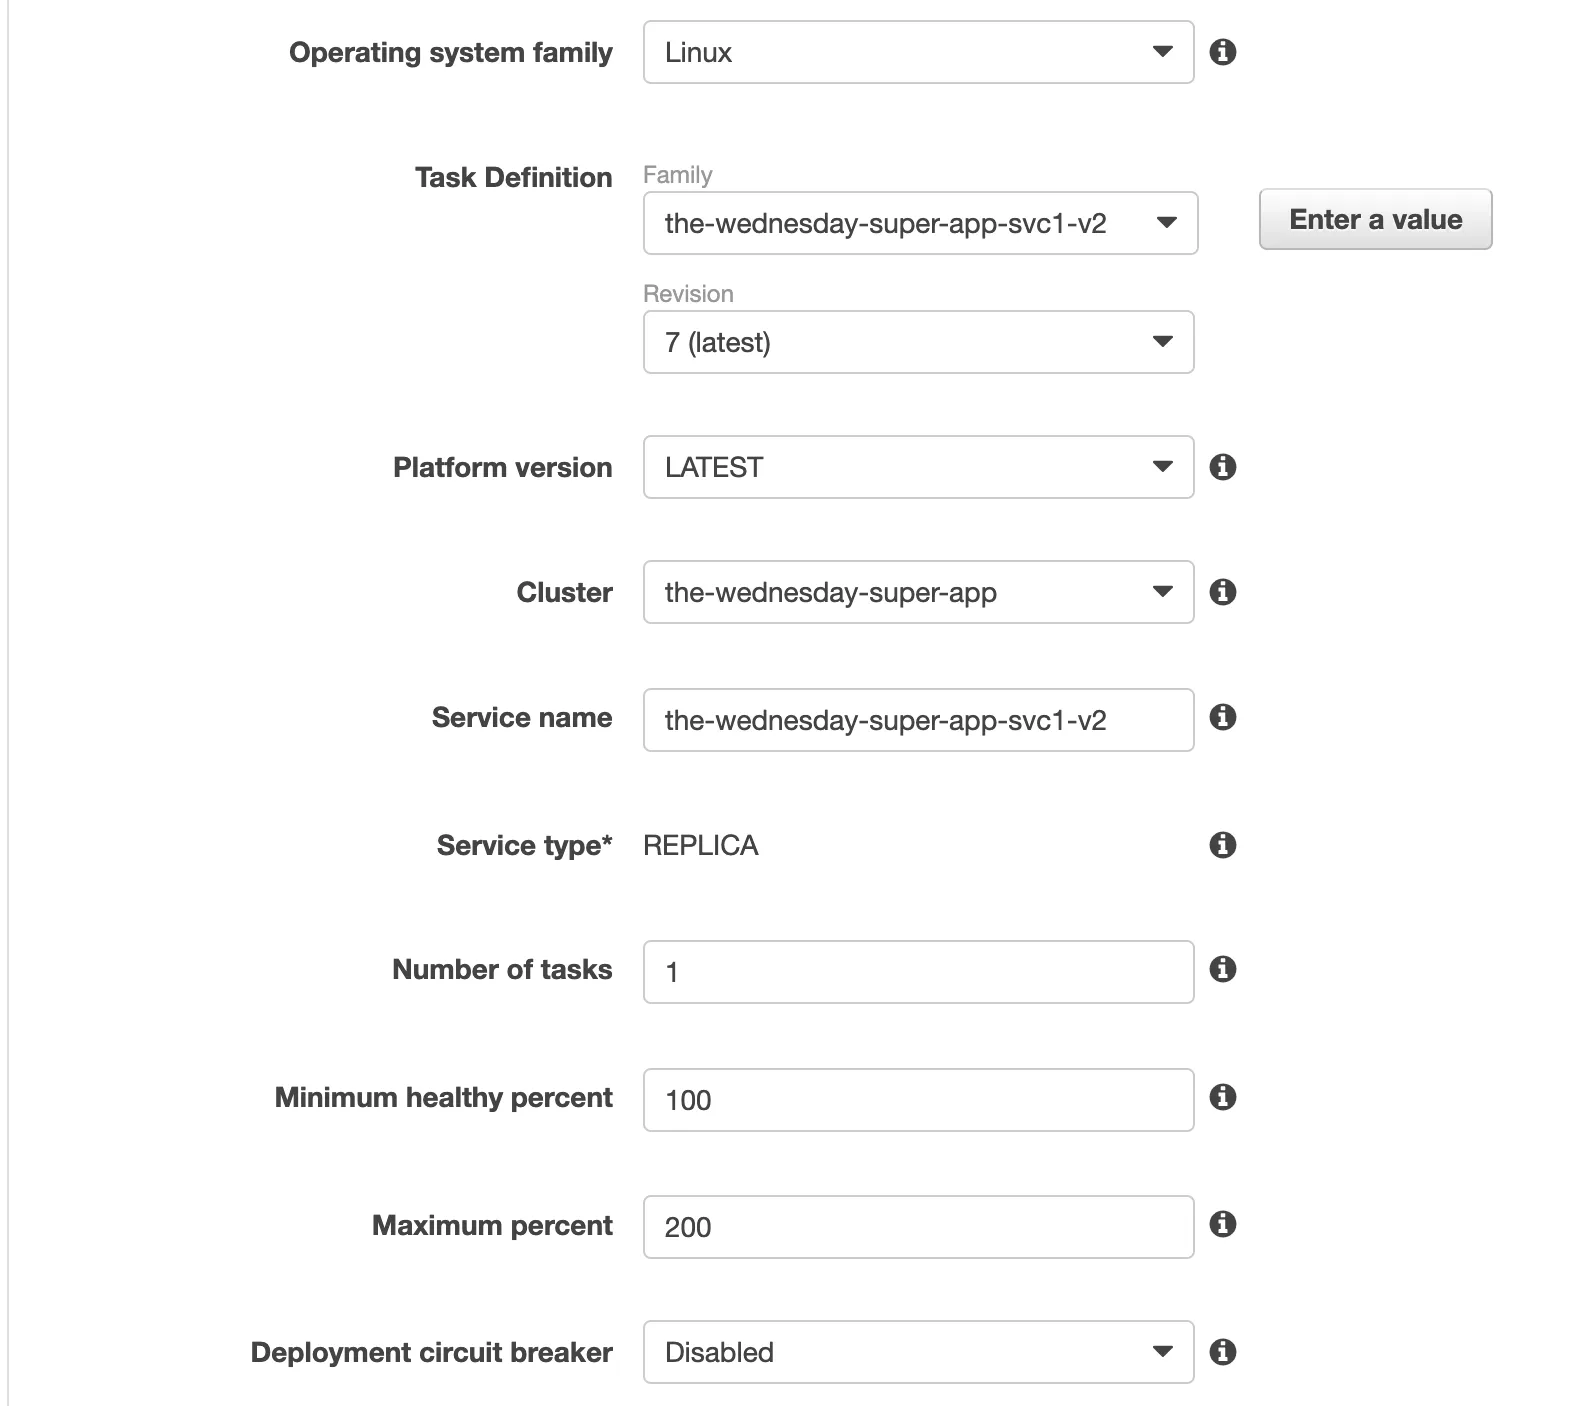
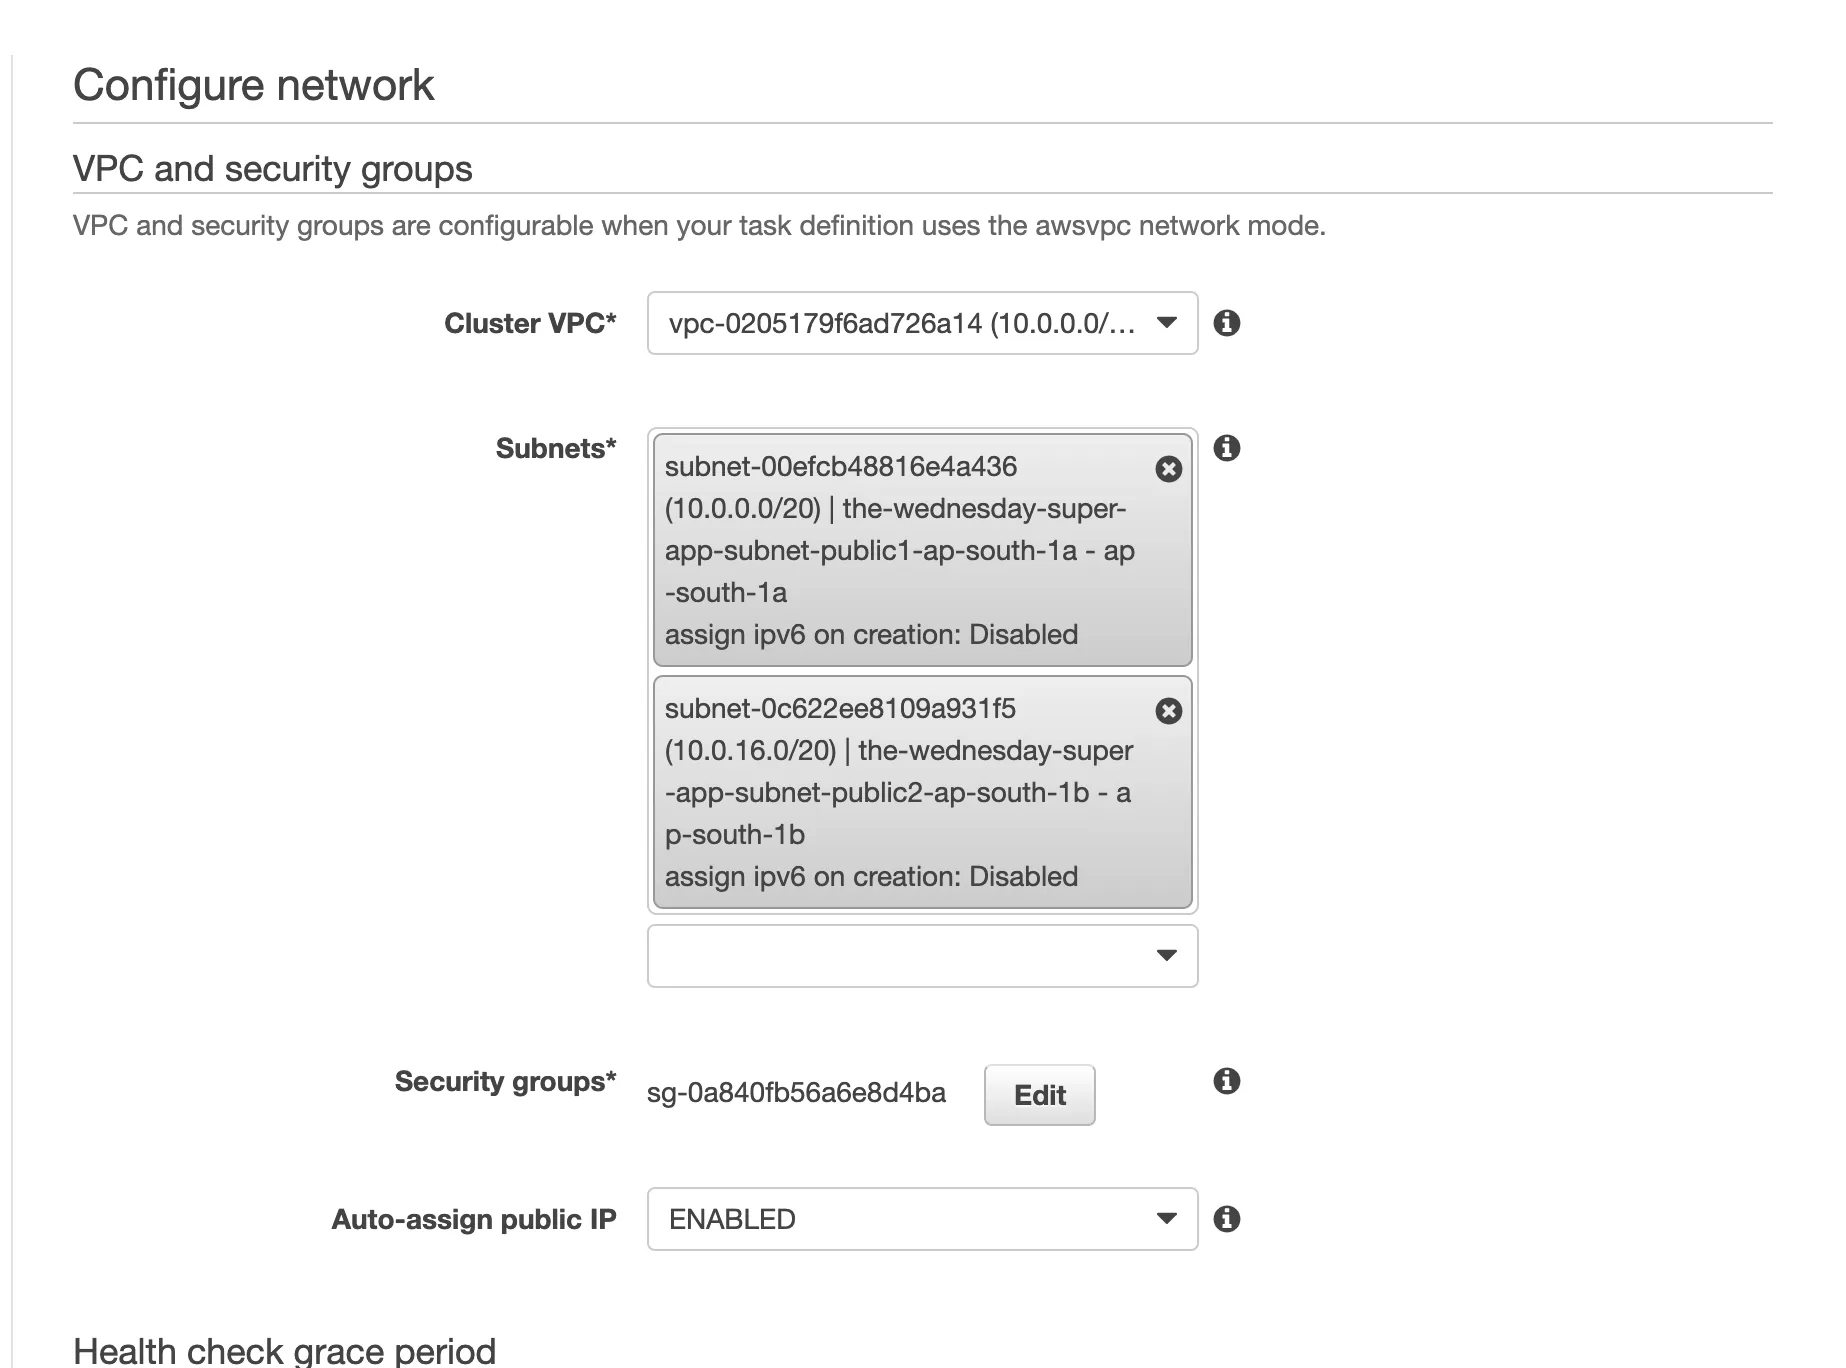
Step 10: Create the ECS Service Gateway
That was the tough part, comrade. You’ve got your ECS cluster, services & task definition envoy sidecar ready. You also have your AppMesh, VirtualService, VirtualRoute, and VirtualGateway ready. All you need now is a service gateway. Don’t worry I’ve got you.
We’re going to provision another ECS service, this one will only be running an envoy proxy.
Copy the contents from assets/task-definitions/svc-gateway.json and let’s get cracking!
Use the New UI for creating this service, it’ll allow you to create the Load Balancer and TG easily.
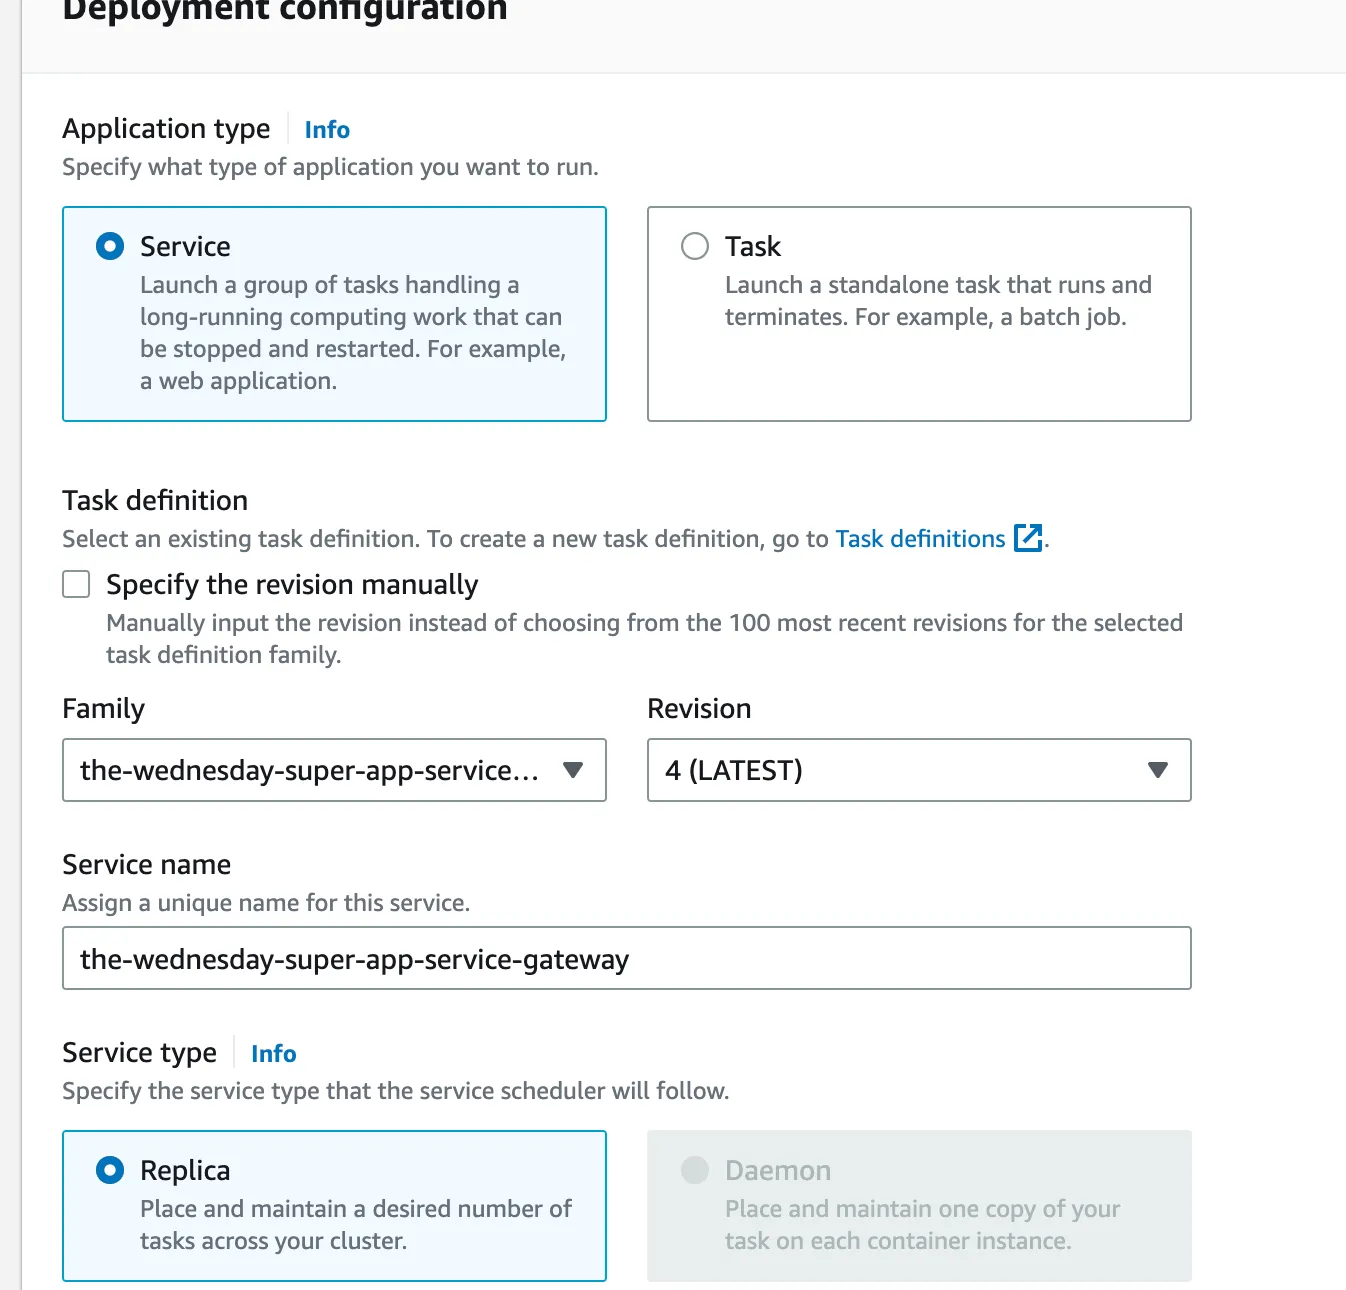
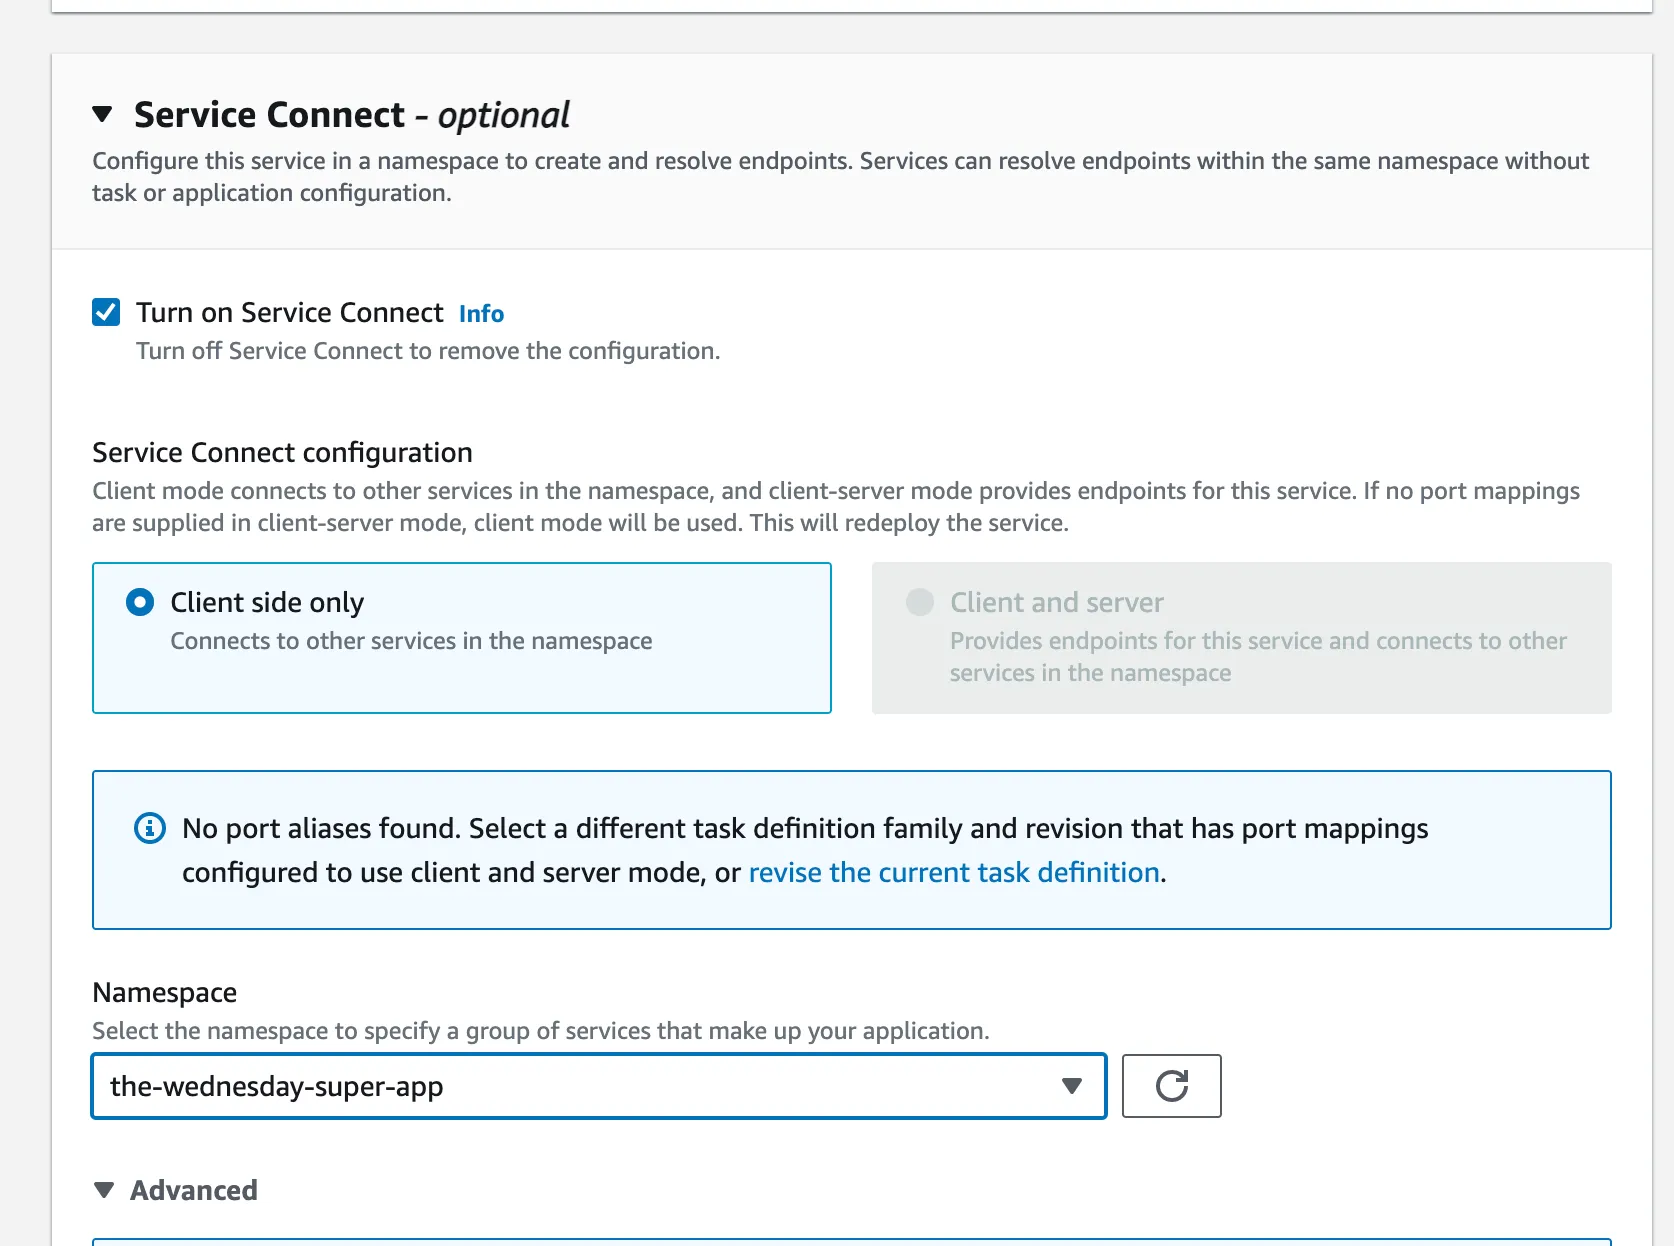
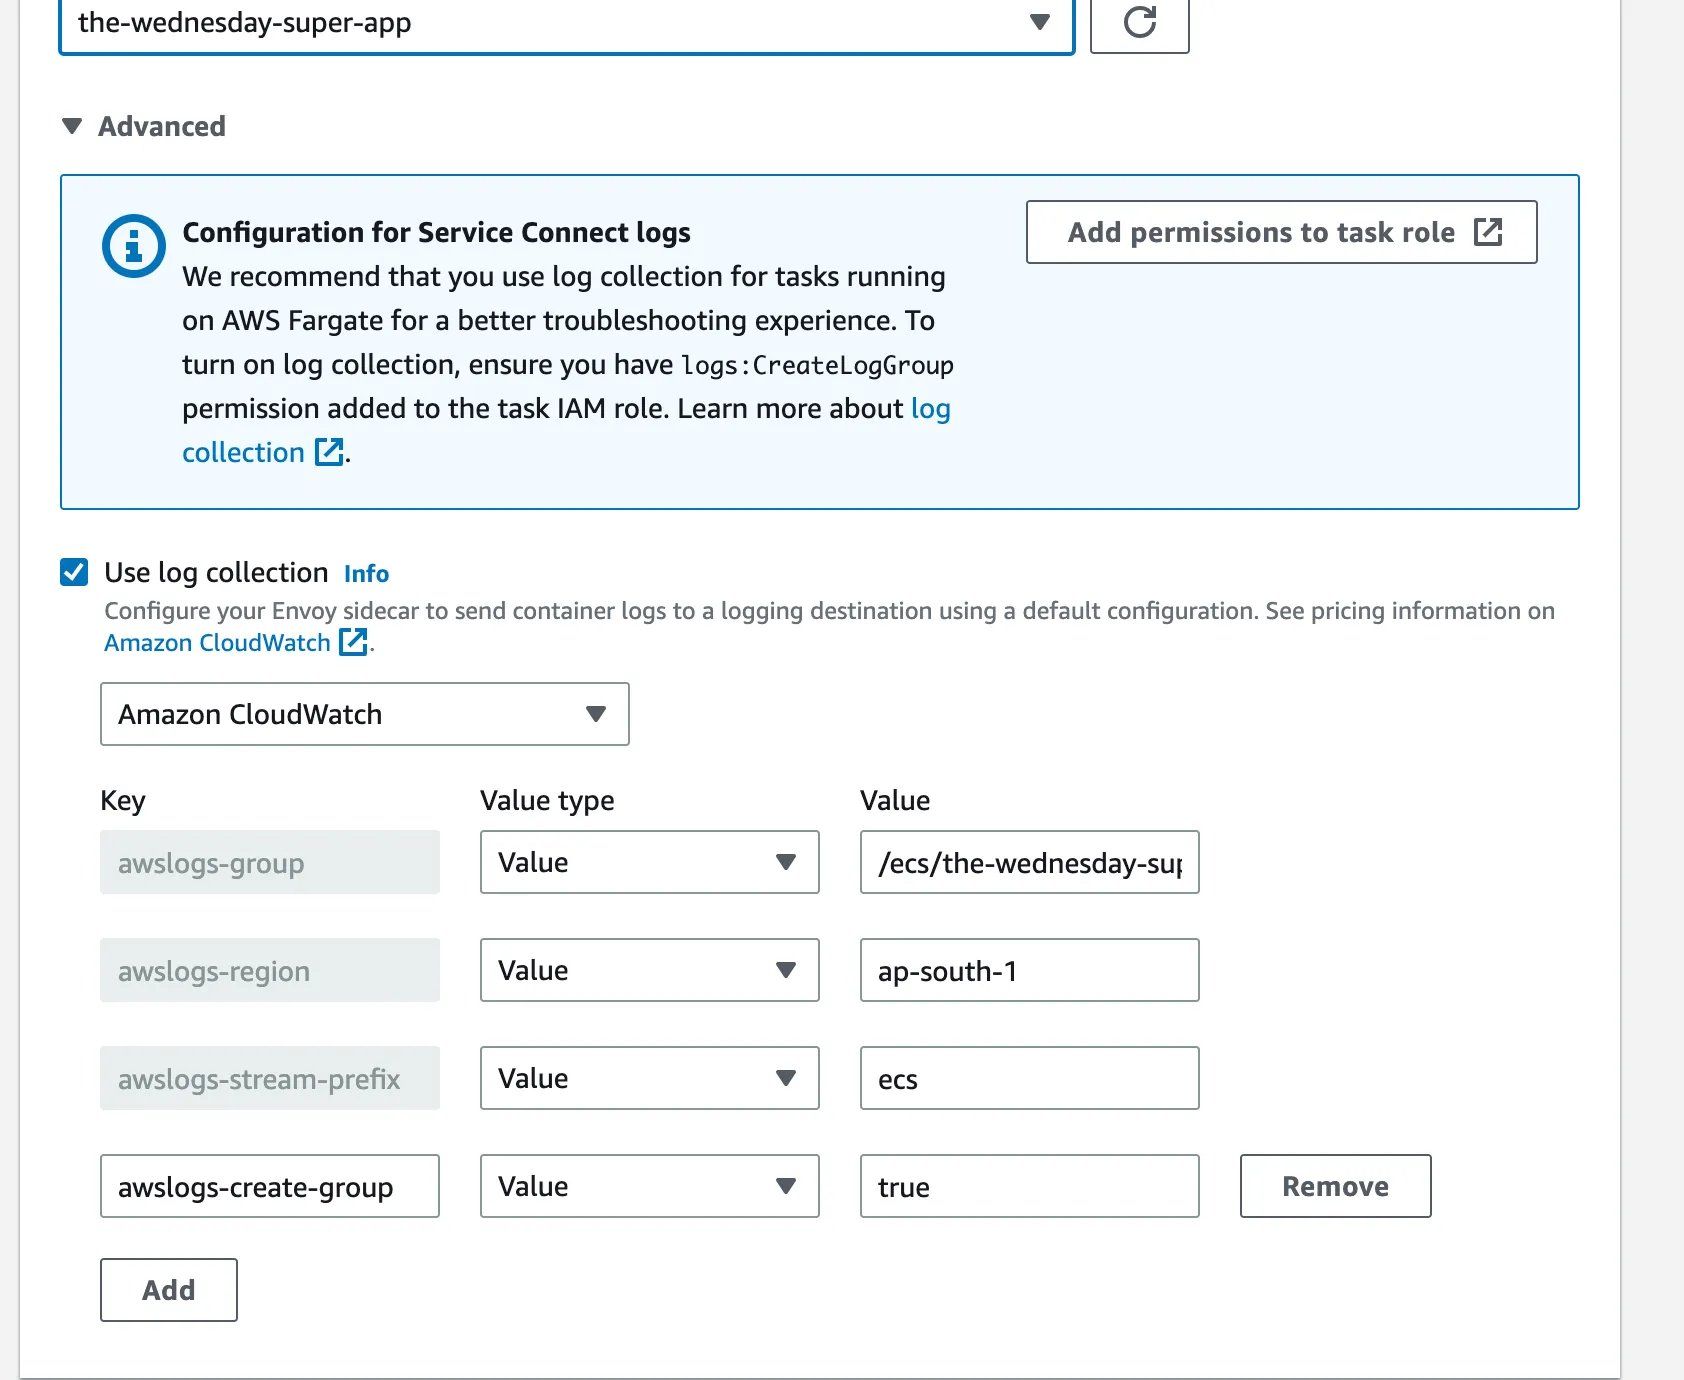
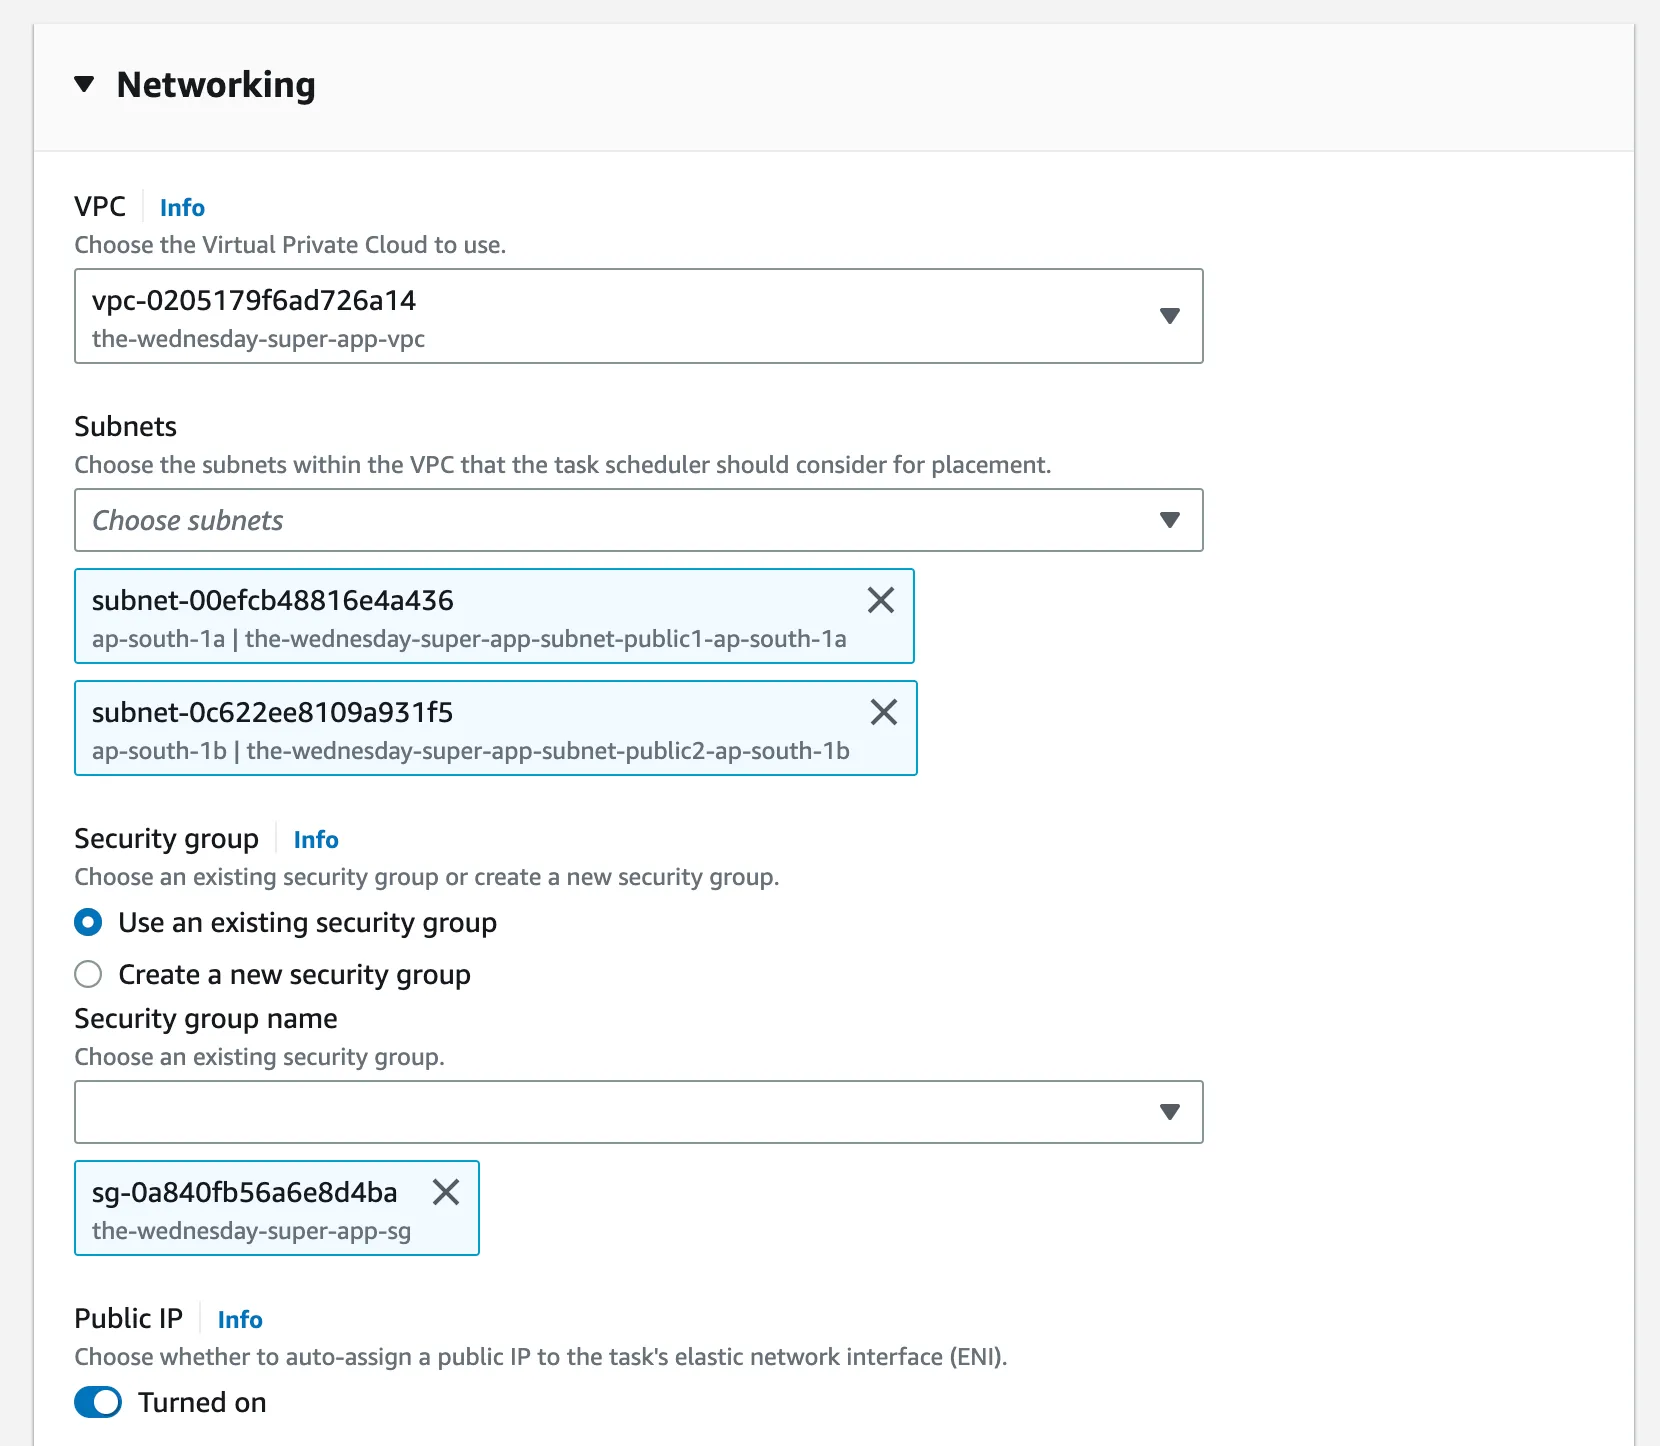
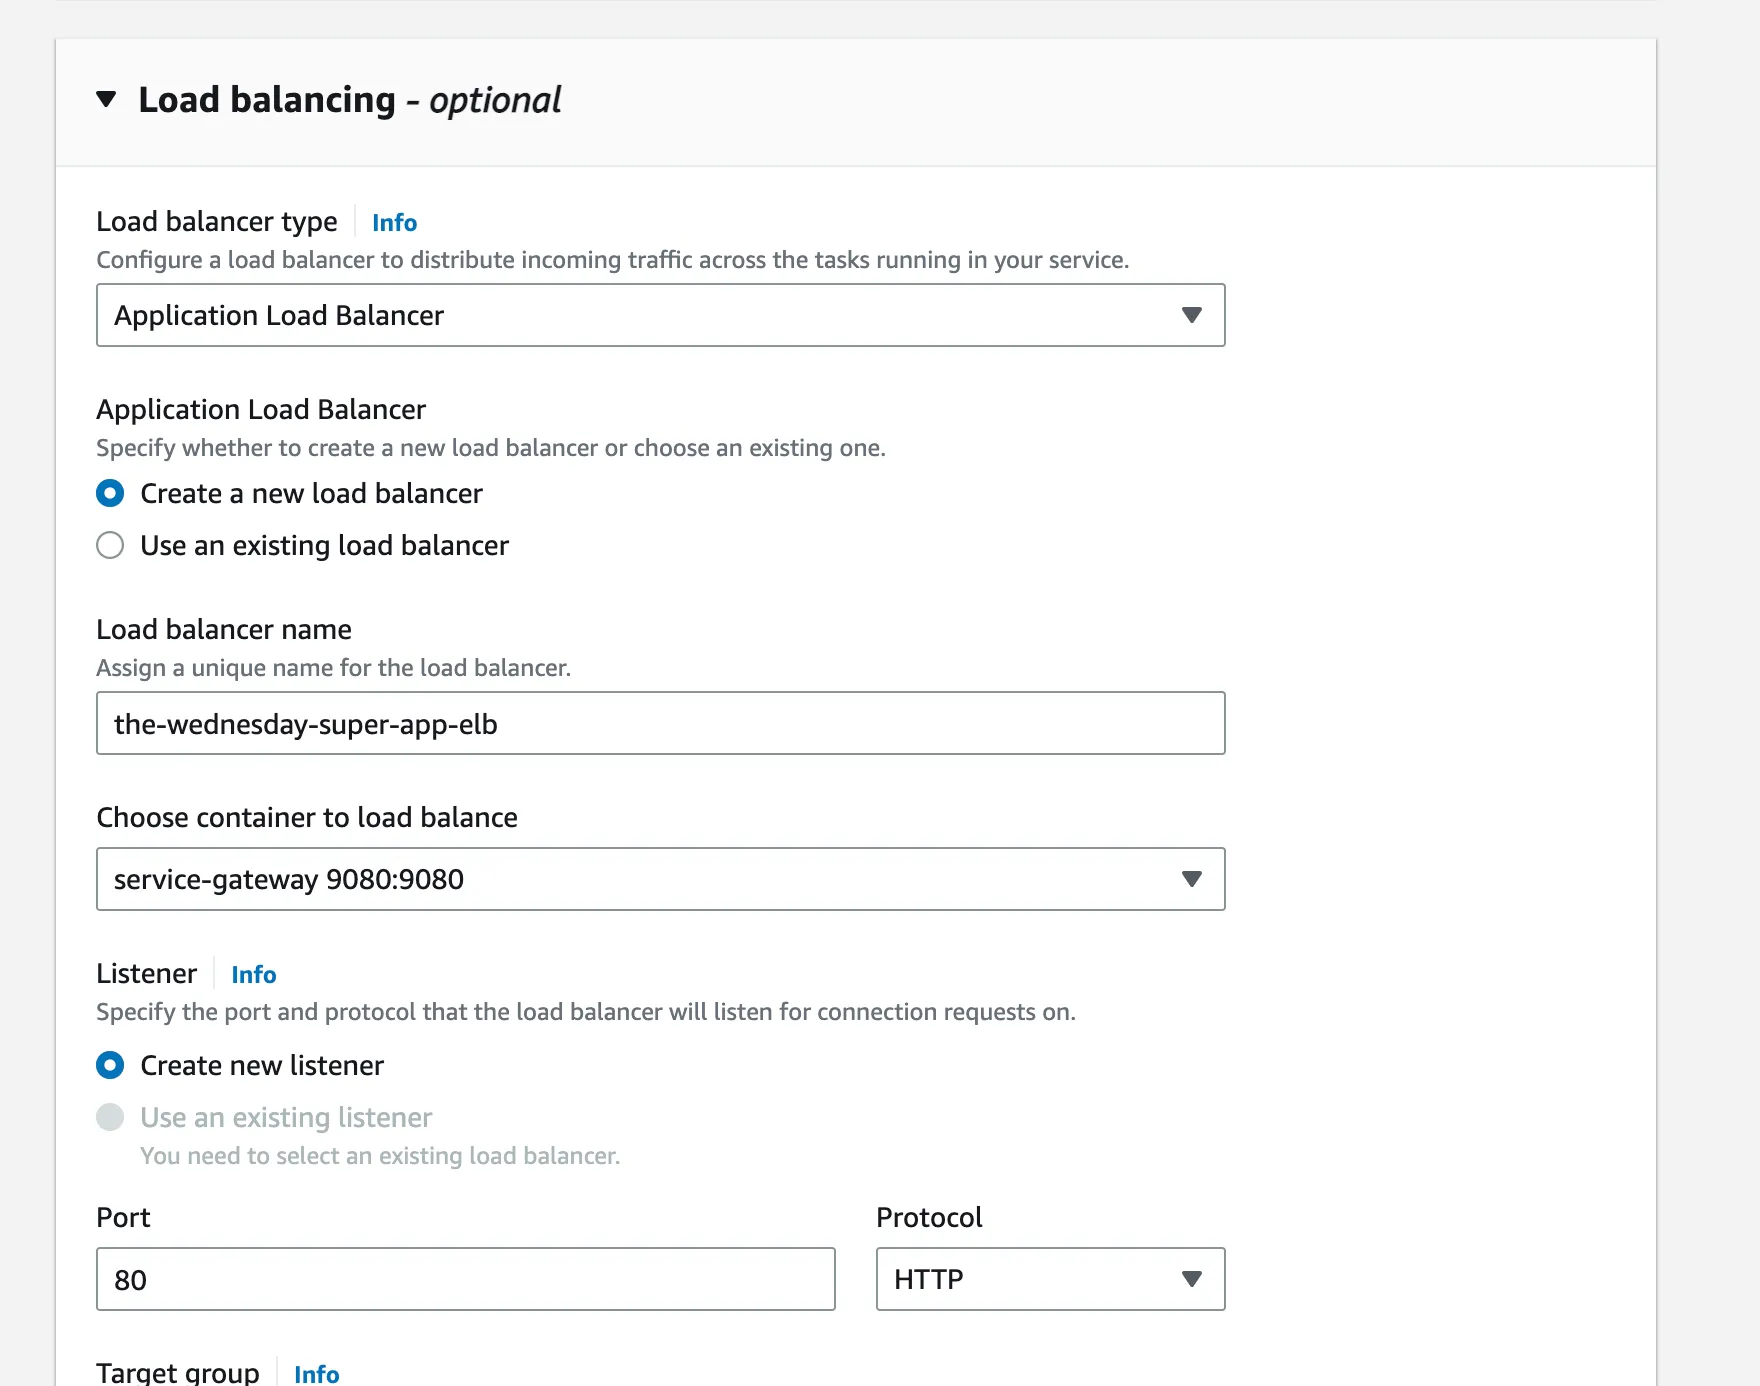
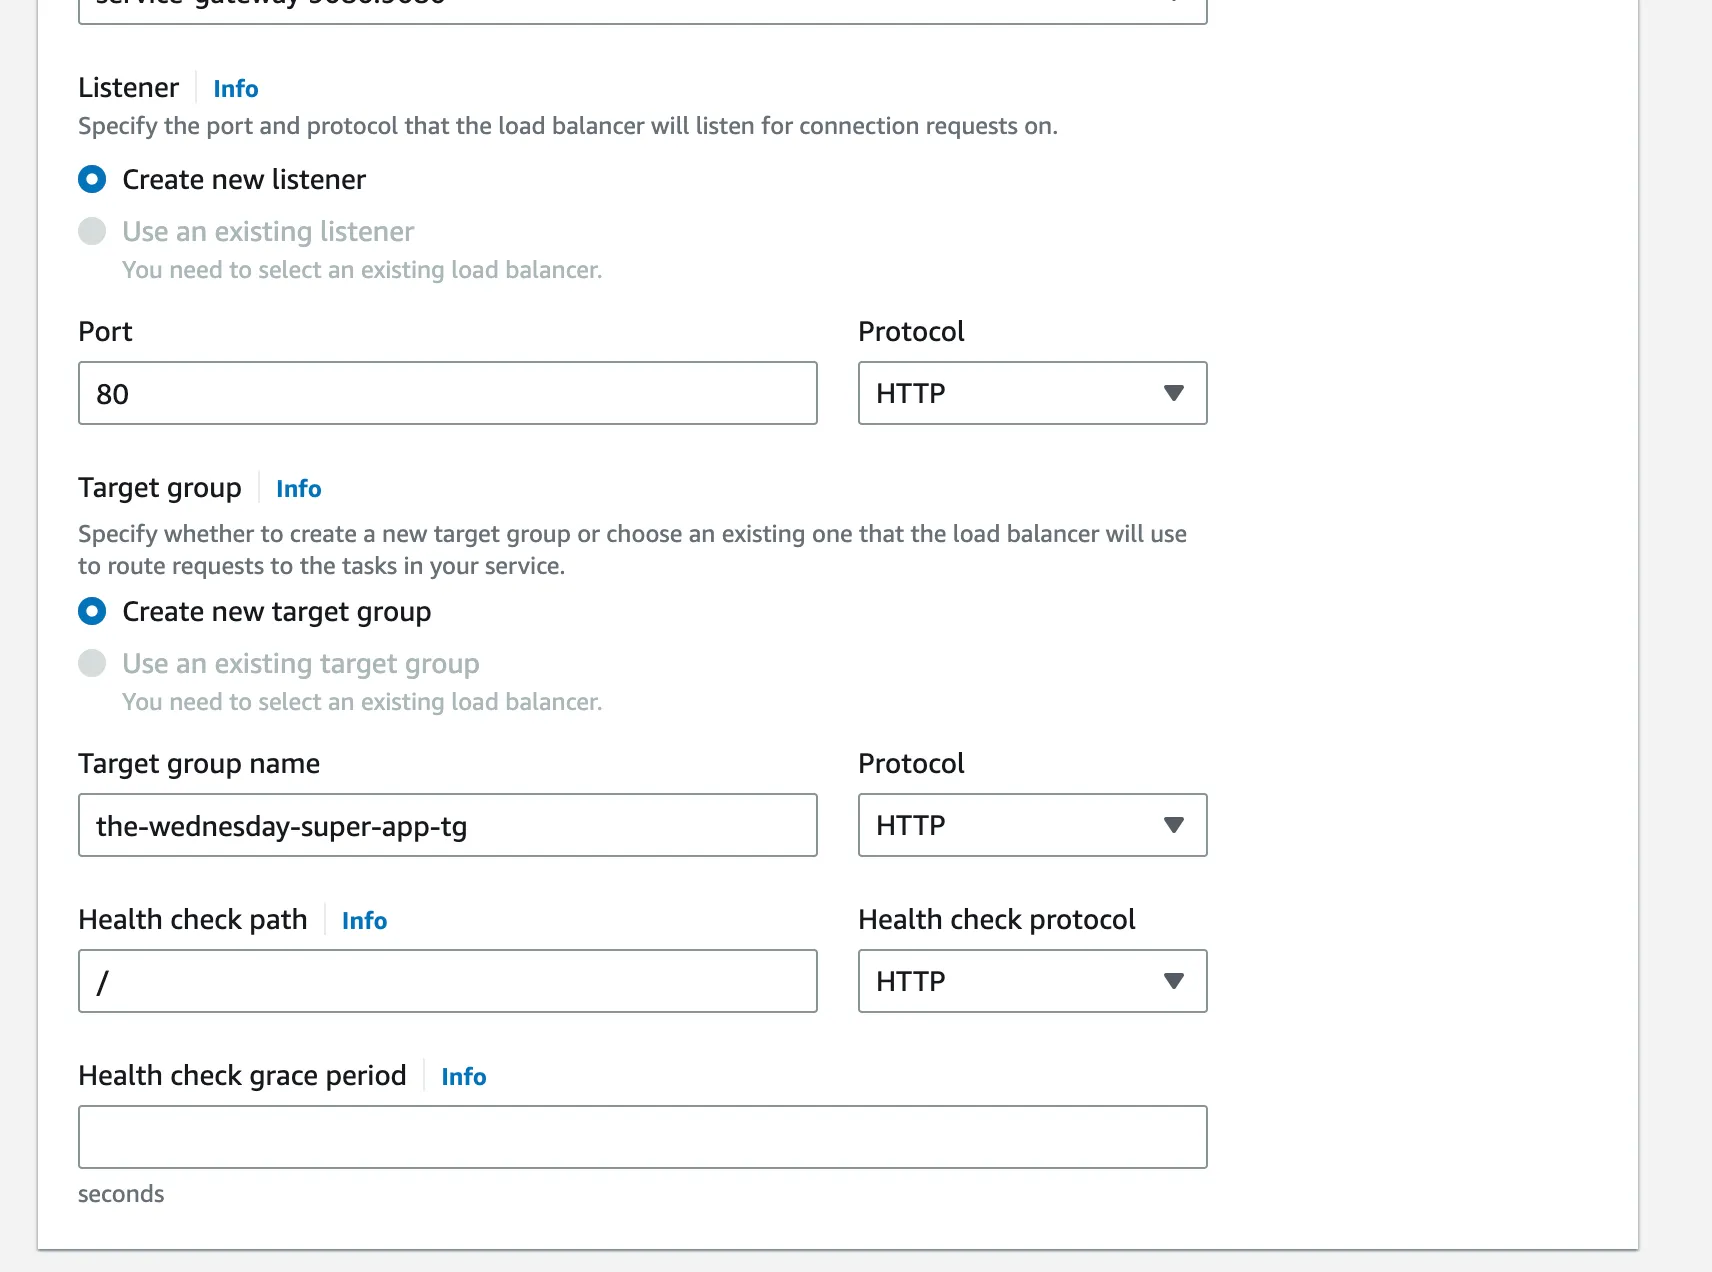
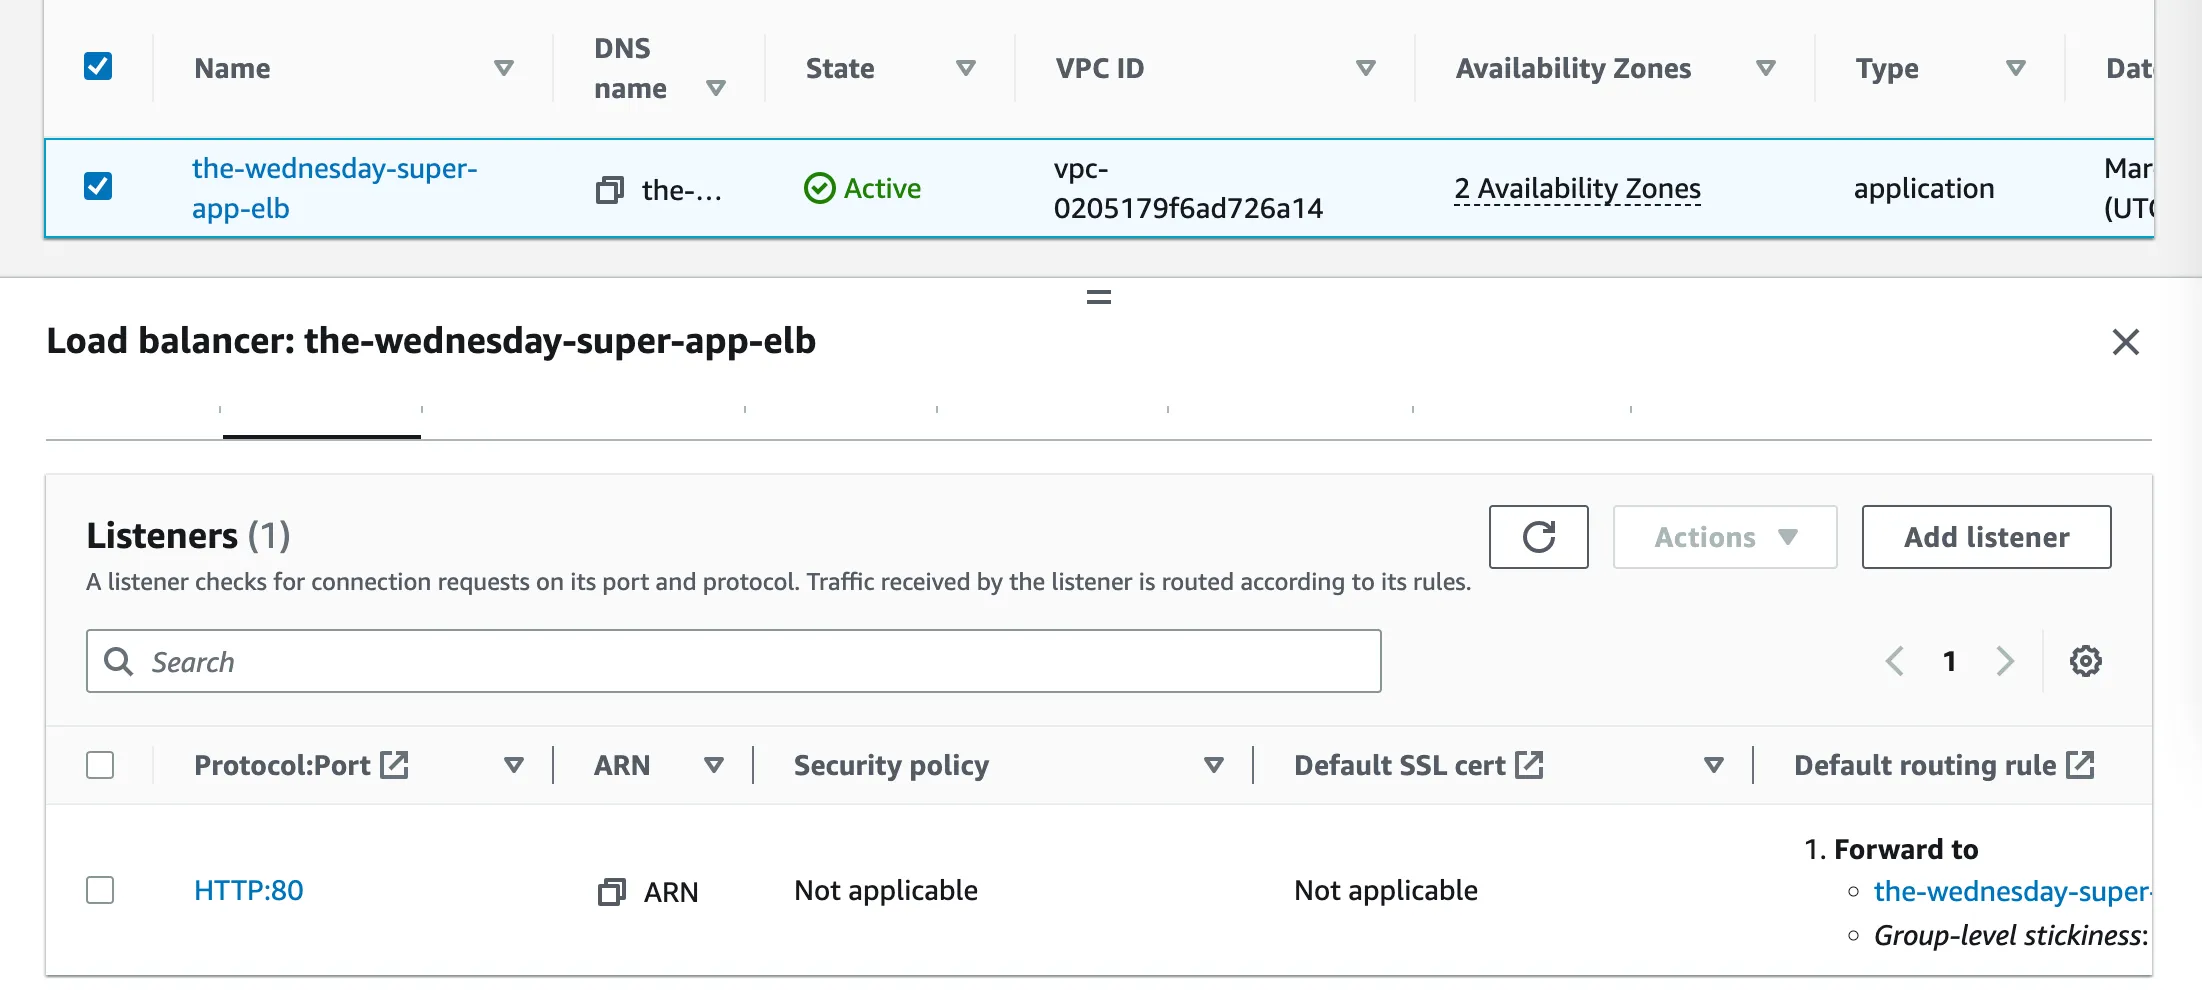
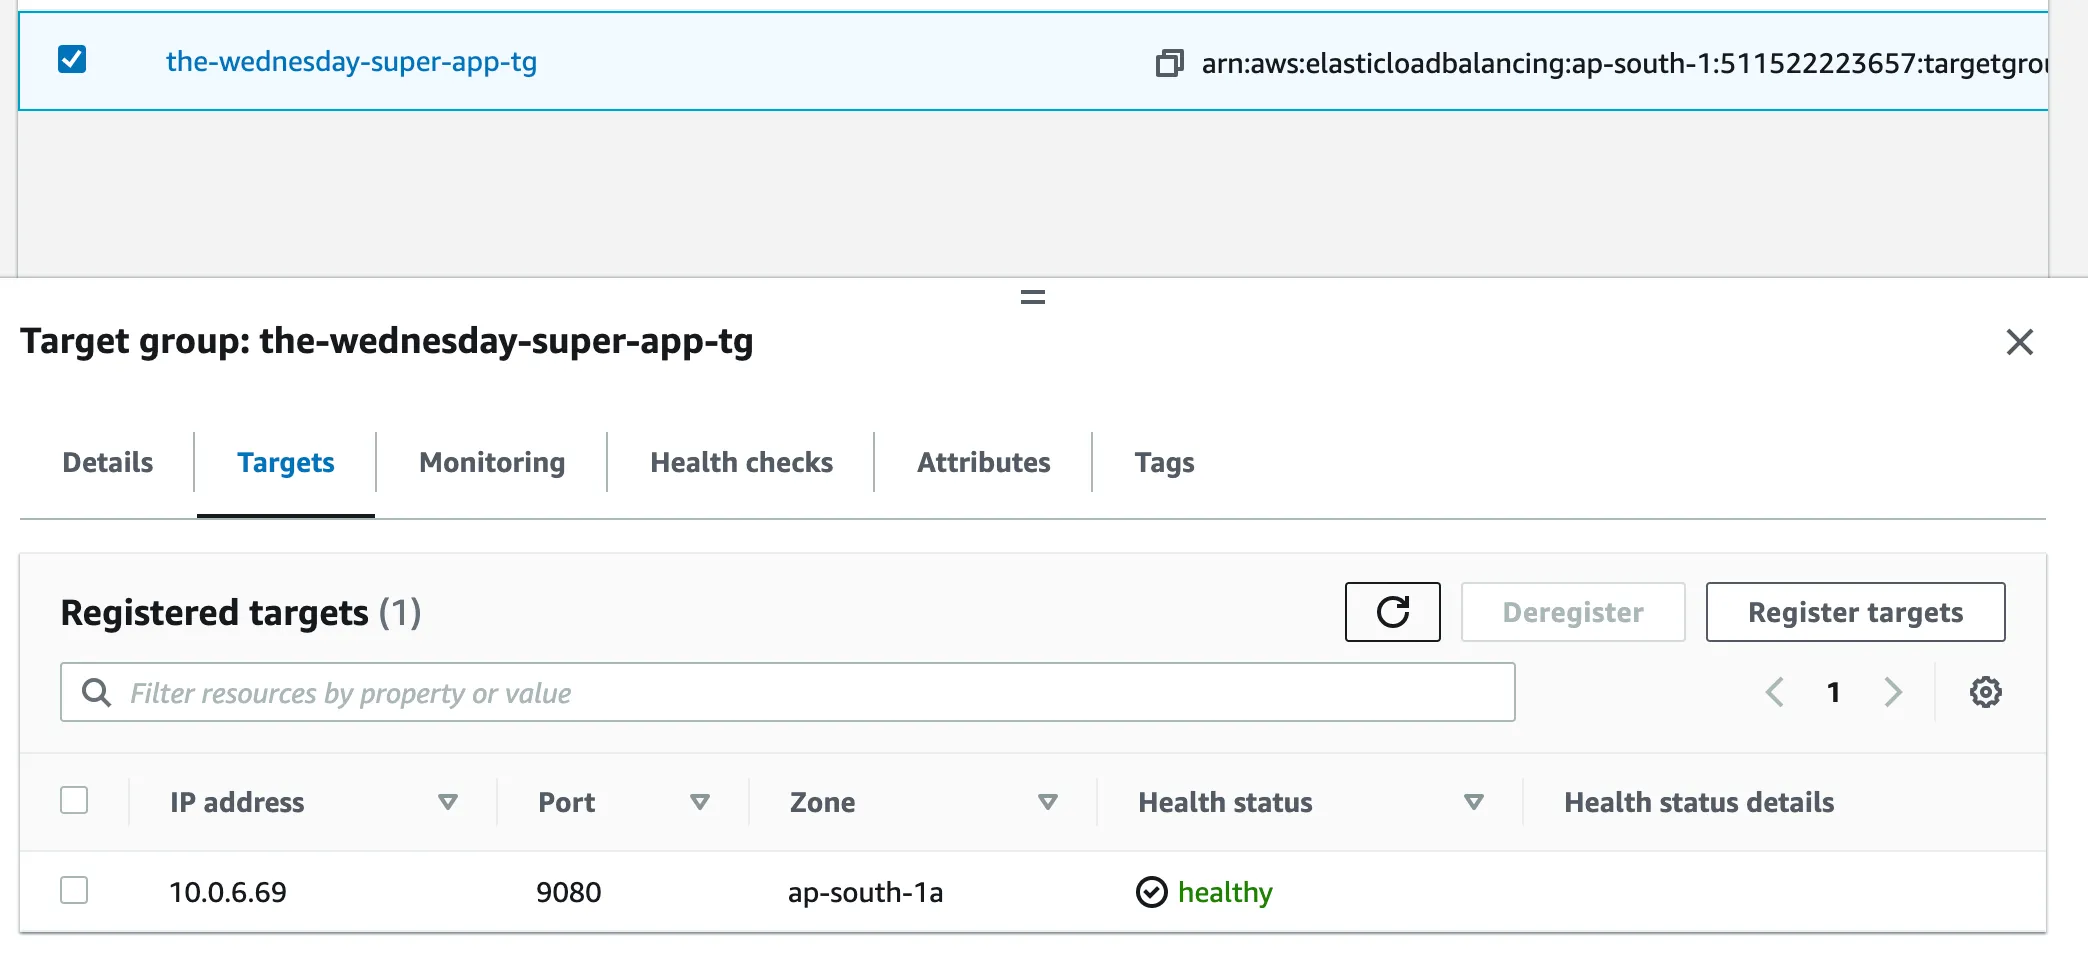

That's it, you’ve done it. You single-handedly set up canary deployments for your workload. “MANUALLY” 😒
Where to go from here?
Okay fine, I’ll stay true to my promise. Here is a one-hit deployment of everything above, plus we’re giving away a comprehensive CD pipeline for free!
The repos got a solid readme. If you’re looking for help setting up custom infrastructure for canary deployments write to us at work@wednesday.is
Enjoyed this article? Don't miss out on more exclusive insights and real-life digital product stories at LeadReads. Read by Top C Execs.
Join here.

Want to see how wednesday can help you grow?


